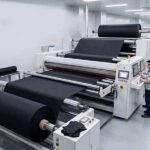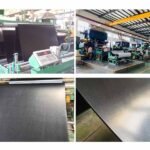
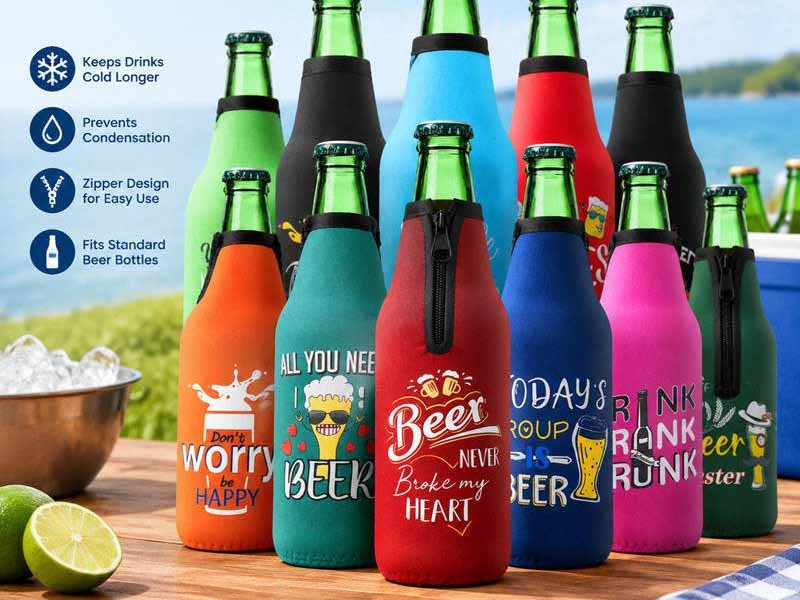
A custom neoprene wine bottle bag looks simple until the project moves from a digital mockup to a real bottle. A few millimeters of incorrect width can make the bag difficult to load. A weak handle opening can stretch after repeated carrying. Artwork that looks perfectly centered on a flat screen can shift toward a seam after printing, cutting, and sewing. These small details determine whether the product feels professional or improvised.
To make a custom neoprene wine bottle bag, first confirm the bottle dimensions, use case, quantity, and branding requirements. Select an appropriate neoprene thickness and laminated surface, develop a pattern with controlled stretch and seam allowance, prepare print-ready artwork, print before cutting for all-over graphics, reinforce the handle and base, test fit and carrying strength, approve a production sample, and control bulk quality through documented inspections.
The most expensive problems are rarely dramatic failures. They are repeated inconsistencies across hundreds or thousands of pieces: slightly different colors, tight bottle openings, twisted handles, puckered bottoms, exposed foam edges, or incorrect labels. One successful wine bag therefore begins before material is cut. It begins with measurable requirements, realistic engineering decisions, and a sample that the factory can reproduce under normal production conditions.
What Should You Define Before Production?
Before production, define the exact bottle dimensions, number of bottles, intended use, sales channel, branding method, packaging format, target quantity, quality requirements, destination, and delivery date. These decisions directly affect the bag pattern, neoprene thickness, handle construction, printing process, reinforcement, sample schedule, production cost, carton efficiency, and final inspection criteria.
Bottle Type and Fit Range
Bottle capacity alone is not enough to determine the correct bag size. Two bottles labeled 750 milliliters may differ significantly in total height, body diameter, shoulder angle, neck length, base shape, glass thickness, and filled weight. Bordeaux, Burgundy, Champagne, Riesling, and spirits bottles often require different patterns even when their nominal capacities appear identical.
The buyer should provide the total bottle height, maximum body diameter, circumference, base diameter, shoulder position, neck diameter, and loaded weight. A physical bottle is preferable because it allows the developer to check insertion force, neck exposure, balance, surface contact, and how the laminated neoprene stretches around the widest section. A dimensioned technical drawing is the next-best option when physical samples cannot be shipped.
A universal bag can fit several related bottles, but the acceptable size range must be defined. Designing only around the largest bottle may leave narrower bottles loose and unstable. Designing around the smallest bottle may make wider bottles difficult to insert and can overstretch the print, upper opening, and seams. The final fit should therefore be established through measured tolerances rather than assumptions about material elasticity.
| Bottle Style | Common Height Range | Common Body Diameter | Main Development Concern |
|---|---|---|---|
| Bordeaux 750 ml | 295–315 mm | 72–78 mm | Straight body and narrow shoulders |
| Burgundy 750 ml | 285–305 mm | 80–88 mm | Wider body and sloping shoulders |
| Champagne 750 ml | 300–325 mm | 85–95 mm | Heavy glass and larger diameter |
| Riesling 750 ml | 320–350 mm | 70–76 mm | Tall, narrow proportions |
| Spirits bottle | Highly variable | Highly variable | Irregular shoulders and bases |
These measurements are common market ranges rather than fixed standards. Production dimensions should always be developed from the actual bottle or a verified drawing because decorative shapes, premium glass, and regional packaging formats can fall outside the ranges shown above.
Single or Multiple Bottles
A single-bottle wine bag usually uses a fitted body, a stable lower section, and either an integrated handle opening or a separately attached handle. Although the structure is relatively simple, the relationship between opening width, body fit, bottom shape, and loaded balance still requires careful development. The bottle should slide in without excessive force and remain controlled when the user walks or lifts the bag.
A two-bottle bag needs more than a wider body. Without an internal divider, two glass bottles can strike each other during transport. The divider should reach high enough to separate the widest bottle sections while remaining low or flexible enough to allow easy loading. The base must also resist sagging between the bottles, which can concentrate weight on the central seam or cause the carrier to tilt.
A filled 750-milliliter wine bottle commonly weighs approximately 1.2 to 1.6 kilograms, depending on the bottle design and glass thickness. A double-bottle carrier can therefore exceed 3 kilograms before additional packaging is included. This increased load affects handle width, attachment length, reinforcement, stitch pattern, bottom construction, and the test plan used before production approval.
For carriers holding three or more bottles, simple sleeve construction is rarely enough. A wider reinforced base, controlled compartments, stronger handle anchors, and better load distribution become more important than material thickness alone. The product should be engineered as a carrying system rather than treated as a larger version of a single-bottle sleeve.
Use and Sales Channel
A wine bag designed for winery retail has different priorities from one developed for a large corporate promotion. Vineyard and specialty retail products may require accurate brand colors, clean edge finishing, a premium hand feel, and packaging that supports counter or shelf presentation. Promotional programs may focus more heavily on full print coverage, efficient folding, short handling duration, and a cost structure suitable for larger campaign quantities.
Corporate gift programs often add individual polybags, belly bands, hangtags, gift cards, barcode labels, presentation boxes, or multiple shipping destinations. These requirements should be defined before sampling because packaging can influence the bag dimensions, folding method, print placement, and carton size. A bag that looks correct when displayed open may develop creases or shape distortion when packed too tightly.
The expected use after purchase also matters. A bag used only to carry wine from a store to a car has different performance needs from a picnic carrier, hotel gift item, wedding favor, or reusable retail accessory. Moisture, repeated use, outdoor handling, and longer carrying distances can change the most suitable material, handle, closure, and reinforcement choices.
Neoprene offers soft cushioning and can slow short-term temperature exchange, but it should not automatically be described as a long-duration cooler. Strong insulation claims require suitable material thickness, closure design, construction details, and testing. Clear product positioning protects both the buyer and end user from unrealistic expectations.
Branding and Project Requirements
Branding should be treated as part of the product design rather than an element added at the end. Logo size, artwork coverage, seam position, handle opening, base construction, and bag curvature can all affect how a graphic appears after assembly. A centered design on a flat panel may look off-center once the bag is sewn and stretched around the bottle.
Before development, confirm whether the project needs a small printed logo, full-surface pattern, photographic artwork, Pantone color matching, woven label, rubber patch, embroidery, silicone badge, or multiple branding methods. Each process has different artwork requirements, setup costs, minimum quantities, lead times, and durability considerations. The chosen branding method should match the product’s market position and intended use.
The project brief should also state the target quantity by design and color, number of SKUs, delivery country, packaging format, barcode requirements, testing needs, target delivery date, preferred shipping method, and acceptable material alternatives. These details allow the manufacturer to assess the complete project rather than quote only the visible bag.
Clear information at the beginning reduces unnecessary sample revisions and prevents late changes that affect cost or scheduling. A factory can often improve manufacturability, but it cannot make reliable decisions when the target bottle, artwork, quantity, packaging, and quality expectations remain undefined.
Which Neoprene Material Should You Choose?
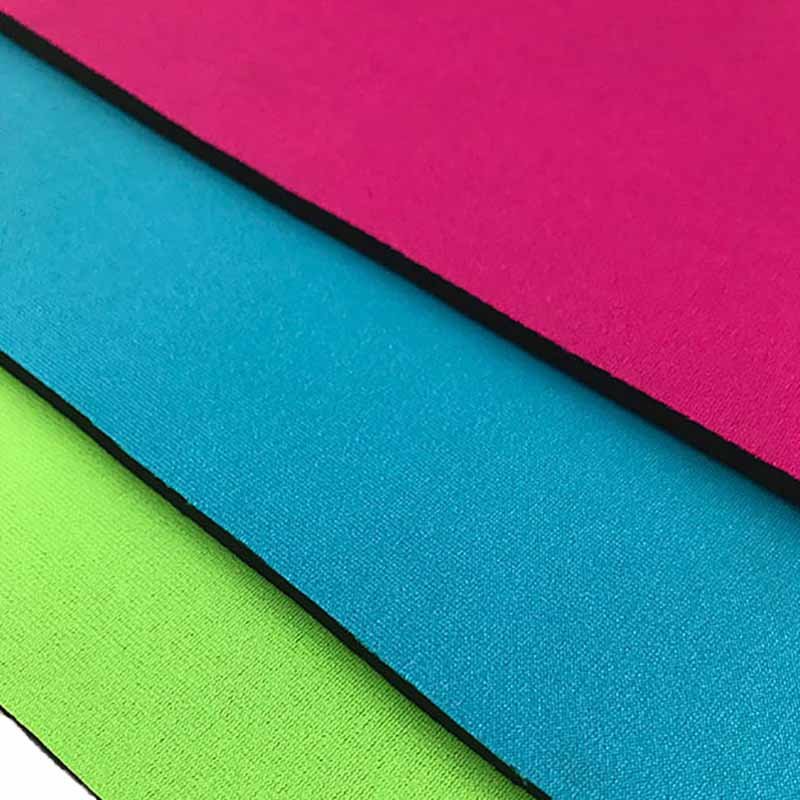
Choose neoprene according to the required fit, cushioning, shape, printing quality, stretch, sewing performance, target cost, and packaging volume. Materials from 2 millimeters to 5 millimeters are commonly available, but thicker is not automatically better. For many wine bottle bags, 3-millimeter neoprene provides a practical balance of flexibility, protection, printability, weight, and production efficiency.
Thickness and Product Positioning
Two-millimeter neoprene creates a light and flexible product that folds compactly and uses less material. It can work well for promotional campaigns, event giveaways, and high-volume branded packaging where the bag is mainly intended for short carrying periods. The trade-off is reduced cushioning, weaker shape retention, and less material around integrated handle openings.
Three-millimeter neoprene is a common starting point for wine bottle sleeves and carriers because it feels substantial without becoming unnecessarily bulky. It normally offers enough cushioning for ordinary handling, remains suitable for full-color printing, and can be cut and sewn efficiently. It also tends to recover well after moderate stretching when the foam density and surface lamination are properly selected.
Four-millimeter material offers more body and impact absorption. It may be appropriate for premium bottle carriers, heavier bottles, travel-oriented products, or structures that need stronger shape retention. However, the additional thickness increases material cost, sewing difficulty, product weight, and carton volume. It can also make tight curves and narrow handle openings harder to finish cleanly.
Five-millimeter neoprene is generally better suited to specialized protection requirements than to ordinary promotional wine bags. It may be useful when cushioning is the main priority, but it can create unnecessary bulk, higher shipping cost, and more difficult assembly. The correct thickness should always be approved on a finished laminated sample, not judged only from the foam specification.
| Thickness | Typical Character | Practical Application | Main Trade-Off |
|---|---|---|---|
| 2 mm | Light and flexible | Promotional sleeves | Less structure and cushioning |
| 3 mm | Balanced and versatile | Most wine bottle bags | Moderate protection |
| 4 mm | More body and cushioning | Premium carriers | Higher cost and shipping volume |
| 5 mm | Thick and protective | Specialized designs | Bulky and harder to sew |
The actual performance also depends on foam density, surface fabric, lamination, stretch direction, and compression behavior. Two sheets with the same nominal thickness may feel and perform differently once they are printed, cut, sewn, loaded, and packed.
Surface Fabric and Printing
Neoprene foam is normally laminated with polyester, nylon, or another textile surface before it is suitable for bag production. The outer textile controls much of the finished appearance, print response, texture, abrasion resistance, and color. Buyers should therefore evaluate the complete laminated material rather than treating the foam and surface fabric as unrelated components.
Polyester-faced neoprene is commonly selected for sublimation because polyester fibers accept sublimation dyes. It supports photographs, gradients, fine patterns, and broad print coverage while keeping the surface flexible. White or light-colored polyester is generally used as the print base because normal sublimation does not deposit an opaque white ink layer.
A smooth polyester face usually gives sharper images and cleaner small text. A textured surface may create a richer or more technical feel, but very fine artwork can appear slightly softer. The best choice depends on whether visual detail, hand feel, abrasion resistance, or perceived value is the primary goal.
Ready-colored neoprene can work well for screen printing, heat transfer, embroidery, labels, and molded patches. It may be more efficient when the product uses a solid body color with a smaller logo rather than an all-over design. Printed strike-offs should always be reviewed on the actual intended material because color and sharpness can change between different surface fabrics.
Stretch, Density, and Recovery
Nominal thickness does not fully describe how neoprene will behave. Foam density, internal cell structure, lamination tension, and surface-fabric stretch can make two materials of the same thickness perform very differently. A soft foam may feel comfortable and flexible, but it can lose body around the bottom or handle. A denser foam usually offers better structure and recovery but may feel firmer.
Stretch influences bottle fit, artwork distortion, handle stability, and dimensional consistency. Highly elastic material can accommodate a broader range of bottle sizes, but it may also cause printed logos to widen, upper openings to deform, and finished dimensions to vary more between pieces. Lower-stretch material offers better shape control but requires more precise pattern development.
The stretch direction should be controlled during cutting. If some panels are cut with the greater stretch running horizontally and others vertically, the finished bags may not fit or recover consistently. Material orientation should therefore be defined in the cutting specification rather than left to the operator’s judgment.
A useful development test includes repeated bottle insertion, measurement of the opening before and after cycling, inspection of handle deformation, and evaluation of shape recovery after unloading. A bag that fits correctly only during the first use may not perform well after repeated handling.
Odor, Lamination, and Color Control
Neoprene, lamination adhesives, printing inks, and sealed packaging can all contribute to odor. Freshly produced material may smell stronger immediately after printing or assembly, particularly if it is packed before sufficient ventilation or curing. The risk becomes more noticeable when each bag is sealed inside a small polybag for retail delivery.
Incoming material should be checked before cutting. Strong, unusual, or inconsistent odor can indicate adhesive, storage, curing, or raw-material problems. Finished goods should remain clean, dry, and properly ventilated where needed. Packing should begin only after printing and lamination processes have stabilized.
Lamination quality is equally important. Weak bonding between the fabric and foam may lead to bubbles, edge lifting, wrinkles, or separation after cutting and sewing. Areas around integrated handles, bottom curves, exposed edges, and tight seams require special attention because they experience greater stress during use.
For brand color control, buyers should provide Pantone references when possible and approve a printed strike-off under consistent lighting. Bulk production should use controlled time, pressure, temperature, and material batches. Slight shade differences can occur between production lots, so components that appear together should be planned and produced with color consistency in mind.
How Do You Design the Size and Structure?
Design the bag from verified bottle measurements, then adjust for material stretch, seam consumption, opening clearance, base shape, handle load, artwork placement, and production tolerance. The finished product should allow comfortable loading, hold the bottle securely, carry the intended weight, and remain visually balanced. A reliable pattern is not created by simply dividing the bottle circumference by two.
Bottle Measurements and Pattern Allowance
Begin with total bottle height, maximum body diameter, circumference, shoulder position, neck diameter, base shape, and filled weight. Circumference can be estimated by multiplying the maximum diameter by 3.1416. A bottle with a 76-millimeter diameter has a circumference of approximately 239 millimeters, but that figure is not the final internal bag size.
Neoprene stretch may allow the internal circumference to be slightly smaller than the bottle circumference, while sewing consumes part of the cut panel through seam allowance. The correct reduction depends on the material’s stretch, density, surface fabric, and desired fit. A soft 3-millimeter material may allow more negative ease than a firm 4-millimeter construction.
The pattern should distinguish between finished dimensions and cut-panel dimensions. It should also identify seam allowance, print bleed, safe logo zones, handle position, base construction, material orientation, and acceptable production tolerance. These elements allow the same approved dimensions to be repeated during cutting and sewing.
A physical prototype remains necessary even when the calculations appear correct. Laminated neoprene can behave differently after printing, heat transfer, cutting, and sewing. The final pattern should be approved only after loading the intended bottle and checking insertion force, neck exposure, seam stress, bottle movement, and recovery after removal.
Handle Design and Load Distribution
Integrated die-cut handles are popular because they create a simple, modern look and avoid separate straps. Their strength depends on the amount of material surrounding the opening. A handle placed too close to the upper edge or side seam can stretch, curl, or tear under load, particularly when used with heavy glass bottles.
The opening should provide enough finger and knuckle clearance without removing too much load-bearing material. The upper section may need a wider shape, internal reinforcement patch, double layer, binding, or additional stitching. Rounded handle corners generally distribute stress better than sharp internal corners, which can concentrate force.
Webbing handles spread the load over a larger area and may be more appropriate for double-bottle or heavier carriers. The webbing ends should extend far enough into the body so that the force is not concentrated on a short stitch line. Box stitching, cross stitching, bar tacks, or reinforcement panels can be selected according to the load and appearance requirements.
Handle testing should review loaded comfort, grip width, twisting, attachment length, edge distance, deformation, and repeated lifting performance. A handle that looks attractive in an empty product photo but becomes narrow or uncomfortable when loaded is not a successful design.
Base and Divider Construction
The base determines whether the bag stands, sags, tilts, or concentrates weight on one seam. A curved bottom seam is economical and works well for fitted sleeves, but it may not create a flat standing surface. This design is usually more suitable when compact folding and simple construction are more important than upright display.
A separate circular or oval bottom panel can improve stability and provide a more structured appearance. It also requires accurate pattern matching and consistent curved sewing. If the body opening and base circumference are not properly balanced, puckering, twisting, and uneven seam tension can appear around the bottom.
A folded or gusseted base may provide additional depth for wider bottles or double-bottle carriers. In multi-bottle designs, the internal divider should separate the glass bodies and prevent contact. It should be high enough to protect the widest bottle areas but flexible enough to allow easy loading and removal.
Divider materials may include neoprene, felt, padded polyester, or laminated fabric. The attachment points must be strong because the divider may carry part of the load when the bottles move. A divider that looks correct while empty can still tear or collapse if its ends are not properly reinforced.
Closures, Seams, and Edge Finishing
Open-top construction is simple, convenient, and cost-efficient. It works well when the bottle neck remains exposed and the main purpose is carrying or presentation. A zipper provides more security but requires precise dimensions, stronger upper construction, and enough clearance to avoid contact with the bottle neck or closure.
Hook-and-loop closures are practical for promotional products but can catch lint or roughen nearby fabric. Snaps create a clean visual detail but require reinforcement around the hardware. Drawcords can give the bag a gift-oriented appearance, although the gathered opening may distort full-color artwork and change how the upper structure carries the load.
Seam placement should avoid the most visible logo areas and should not create unnecessary ridges against the bottle. High-stress points include handle openings, webbing attachments, bottom corners, divider ends, zipper stops, closure hardware, and intersections where several layers meet.
Edges may be finished with binding, overlock stitching, folded seams, or clean-cut exposed neoprene. Binding improves durability and visual consistency but introduces an additional component whose width, stretch, color, and seam alignment must be controlled. Exposed edges can look modern when the cutting, foam quality, and lamination are consistent.
How Are Custom Neoprene Wine Bags Made?
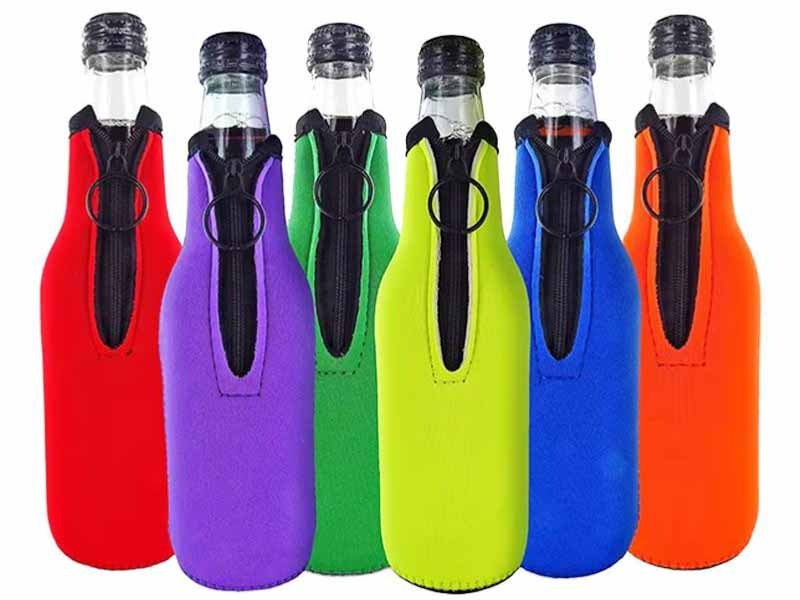
Professional production normally follows a controlled sequence: confirm specifications, prepare artwork, test printing, develop the pattern, print the laminated material, cut registered panels, sew and reinforce the structure, trim and clean the product, inspect it, and pack it. The exact sequence changes according to the handle, divider, closure, branding method, label, and packaging design.
Artwork and Print Preparation
Artwork should be prepared on the factory’s actual production template after the bag pattern has been confirmed. Designing only on a simple rectangle can lead to poor positioning because the finished product contains seams, curves, handle openings, bottom panels, and areas that may become hidden after assembly.
Vector files are preferred for logos, typography, and line graphics because they can be resized without losing sharpness. Raster artwork should generally be supplied at approximately 300 dots per inch at the final print size. Low-resolution images may appear acceptable on a screen but can become blurred, pixelated, or visibly compressed when printed at full product scale.
The print file should clearly identify front and back panels, orientation, final dimensions, bleed area, safe logo zones, seam locations, handle openings, color references, and version number. A bleed of approximately 3 to 5 millimeters is often used outside the cutting line, although the final requirement depends on the registration and cutting method.
Artwork that crosses a seam requires careful planning. Neoprene stretches and shifts slightly during sewing, so perfect alignment of thin lines or small text across separate panels can be difficult. Larger patterns, gradients, and organic graphics usually tolerate normal production variation better than exact geometric elements.
Printing Methods
Sublimation is commonly used for full-color artwork on polyester-faced neoprene. Heat converts the dye into a gas that bonds with the polyester fibers, producing a flexible print without a heavy surface film. This process is suitable for photographs, gradients, illustrations, repeating patterns, and broad edge-to-edge coverage.
Screen printing works well for simple logos and solid colors, particularly on ready-colored neoprene. Each color generally requires separate setup, which makes the method more efficient when the design is stable and the quantity justifies the preparation. Ink flexibility, curing, and adhesion should be checked because the substrate will stretch during use.
Heat transfer can produce detailed smaller graphics and may suit names, numbers, or shorter production runs. The transfer material should be tested for flexibility, edge lifting, cracking, and adhesion after repeated stretching. A film that performs well on a rigid fabric may not perform the same way on soft neoprene.
Woven labels, rubber patches, silicone badges, embroidery, and metal plates offer alternative brand expressions. They can provide a more premium or dimensional appearance but may require tooling, higher minimum quantities, reinforcement, and additional assembly operations.
| Branding Method | Best Application | Main Production Consideration |
|---|---|---|
| Sublimation | Full-color or all-over artwork | Polyester surface and color control |
| Screen printing | Simple solid-color logos | Setup for each color |
| Heat transfer | Small detailed graphics | Film flexibility and adhesion |
| Woven label | Discreet brand identification | Stitch position and edge quality |
| Rubber or silicone patch | Dimensional branding | Mold cost and attachment |
| Embroidery | Textile appearance | Foam compression and distortion |
The method should match the visual objective, quantity, material, cost target, and expected use. Choosing only by the lowest unit price can create a result that does not fit the product’s brand position or durability requirements.
Printing, Cutting, and Registration
For all-over sublimation, the laminated neoprene is usually printed before final cutting. Artwork is transferred to the material in sheet or oversized panel form, and the printed sections are then cut using registration marks. This sequence allows edge-to-edge coverage and avoids the difficulty of applying even heat and pressure to a finished three-dimensional bag.
Heat and pressure can influence the dimensions, compression, and surface behavior of laminated neoprene. The cutting pattern should therefore be verified on printed material rather than assuming that an unprinted sheet will behave identically. A small difference created during transfer can affect seam alignment or bottle fit when repeated across several panels.
Cutting methods may include manual knife cutting, clicking press cutting, steel-rule die cutting, or computer-controlled cutting. The best method depends on quantity, pattern complexity, tooling cost, registration accuracy, and the number of SKUs. Full-print designs require especially careful alignment between artwork and cutting lines.
Critical controls include panel dimensions, print position, material stretch direction, front and back orientation, handle-opening position, edge cleanliness, SKU identification, and shade matching. Panels should be bundled and labeled by style, color, size, and orientation to prevent similar designs from being mixed during sewing.
Sewing and Finishing
A basic single-bottle bag may require side joining, bottom sewing, handle finishing, trimming, and cleaning. A more complex version can include a separate base, internal divider, webbing handles, zipper, binding, labels, reinforcement patches, or molded branding. Each added component changes the sewing sequence and the points that require inspection.
Neoprene compresses under the presser foot, so machine pressure and thread tension must be controlled. Excessive tension can create deep grooves along the seam, while uneven material feeding can shift printed panels, twist the body, or create mismatched edges. Curved bases require consistent guiding and controlled distribution of the two joined pieces.
The sewing team should follow the approved sample, pattern, bill of materials, stitch specification, and reinforcement requirements. Relying only on an operator’s personal method can produce noticeable differences between production lines or shifts, especially in handle placement, binding width, and seam shape.
After assembly, each bag should be checked for loose threads, skipped stitches, exposed adhesive, surface dents, distorted openings, twisted handles, puckered bottoms, and print mismatch. The product may require shaping before packaging because tight folding can leave compression marks, particularly on thicker neoprene.
How Do You Sample, Test, and Scale?
Sampling should confirm bottle fit, material, structure, printing, handle strength, appearance, packaging, cost, and manufacturing feasibility. The approved sample must then be converted into controlled production documents. Reliable scaling depends on consistent materials, sealed samples, pattern control, in-process inspections, final inspections, and packaging verification rather than relying only on individual operator experience.
Prototype and Pre-Production Sample
The first prototype is normally used to confirm size and structure. It may use available material when the main questions involve bottle fit, opening width, handle position, base construction, divider height, or closure function. Using temporary material at this stage can save time when the structure is likely to change.
Once the dimensions and construction are accepted, a more complete pre-production sample should use the intended neoprene thickness, surface fabric, artwork, printing method, binding, webbing, labels, closures, and packaging. This sample should represent the expected bulk product closely enough to become the controlling approval reference.
Simple structural samples may take approximately 3 to 7 days after specifications are confirmed. Standard custom samples often require around 7 to 12 days, while more complex printed or multi-component products may require approximately 12 to 20 days or longer. Custom-dyed materials, molded patches, special accessories, or unusual gift packaging can extend the schedule.
Sample comments should be converted into measurable changes. A request to make the handle stronger should specify whether the solution involves wider webbing, longer attachment, a reinforcement layer, extra bar tacks, or a revised load requirement. Clear revision records prevent old and new instructions from being mixed.
Fit and Handling Tests
Fit testing should use the actual intended bottle or an accurately matched reference. The bottle should be inserted and removed repeatedly while the developer checks loading force, opening recovery, print distortion, seam stress, neck exposure, balance, and movement inside the bag.
One successful insertion is not enough. A bag may fit correctly at first and become loose after repeated stretching. A practical development check can include approximately 20 to 50 insertion and removal cycles, followed by measurement of the opening and body. The exact cycle count should match the project’s intended quality level and expected use.
When one bag is expected to fit several bottles, both the smallest and largest approved sizes should be tested. The largest bottle reveals insertion difficulty and seam stress, while the smallest shows whether the bag becomes unstable or allows excessive movement.
Handling evaluation should include one-handed loading, bottle removal, grip comfort, knuckle clearance, bag balance, base contact, and shape after unloading. A chilled bottle may create condensation, so damp handling should be considered when moisture is likely during normal use.
Load and Durability Tests
Load testing should reflect the intended bottle weight and include a reasonable development margin. A single filled wine bottle commonly weighs approximately 1.2 to 1.6 kilograms, while a double-bottle carrier may hold more than 3 kilograms. The test method should match the actual structure rather than use one universal load for every design.
A short static overload can reveal immediate weaknesses in the handle, seams, divider, and base. Repeated lifting is more useful for identifying progressive deformation, stitch loosening, or foam stretching. The product should be inspected during and after testing rather than judged only by whether it remains intact.
| Test | Example Development Method | Main Inspection Point |
|---|---|---|
| Static load | Hold 2–3 times the intended load briefly | Handle stretching and seam opening |
| Repeated lifting | 50–200 controlled cycles | Progressive deformation |
| Fit cycling | 20–50 bottle insertions | Stretch recovery |
| Controlled drop screening | Low-height drops with test bottle | Base and seam response |
| Print rub check | Repeated dry surface rubbing | Color transfer and abrasion |
| Packaging compression | Packed-carton simulation | Creasing and recovery |
These methods are practical internal development examples rather than universal regulatory standards. Final protocols should be agreed according to buyer requirements, product risk, destination market, and intended claims.
After testing, the handle anchors, bottom seam, divider, binding, print surface, and foam should be inspected for permanent stretching, torn stitches, delamination, cracking, or severe distortion. Any weakness should be corrected before the production sample is sealed.
Bulk Control and Final Inspection
Bulk production should begin only after the approved sample, material specification, pattern, artwork, color standard, bill of materials, size chart, packaging file, label file, and inspection checklist are aligned. These documents turn a visually approved sample into measurable production standards.
Incoming quality control should verify neoprene thickness, surface fabric, stretch, color, lamination, odor, webbing, closures, labels, and packaging materials. In-process inspection should review printing, cutting, panel orientation, seam construction, reinforcement, handle placement, binding, dimensions, and semi-finished appearance.
Final inspection should confirm bottle fit, finished dimensions, material, thickness, print position, color, logo clarity, sewing, handle function, shape, cleanliness, packaging, label accuracy, barcode accuracy, carton quantity, and consistency with the approved sample.
A common inspection approach may use AQL logic such as 2.5 for major defects and 4.0 for minor defects, although the exact plan should be confirmed according to order size, buyer requirements, product risk, and destination market. First orders, complex structures, and highly visible branded products may justify tighter inspection attention.
The most common production problems are often small but commercially damaging: tight or loose fit, uneven handle openings, twisted bodies, color variation, strong odor, rough edges, weak reinforcement, surface dents, mixed SKUs, or incorrect packaging. Scaling successfully means converting every approved feature into a measurable, repeatable, and inspectable standard.
Szoneier supports custom neoprene wine bottle bag projects through material evaluation, pattern development, branding-process matching, sampling, bulk sewing, multi-stage inspection, packaging, and export delivery. With more than 18 years of custom bags and soft-goods manufacturing experience, the team can help buyers identify structural and production risks before they become expensive bulk-order problems.
For selected standard custom soft-goods projects, minimum quantities may begin from approximately 200 pieces, although the exact MOQ depends on material availability, print coverage, number of colors, SKUs, custom accessories, packaging, tooling, and testing. Production scheduling should be confirmed after the final sample, materials, and artwork have been approved.
To receive a practical quotation, provide the bottle dimensions or physical sample, target quantity, artwork, preferred neoprene thickness, handle concept, number of bottle compartments, packaging requirements, quality expectations, destination country, and required delivery date. These details allow Szoneier to evaluate the product as a complete manufacturing project rather than provide an incomplete estimate based only on a reference image.
Contact Szoneier at info@szoneier.com or submit your project through szoneier.com to begin material review, structural development, sampling, and bulk-production planning for your custom neoprene wine bottle bags.