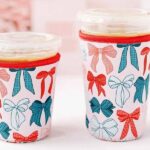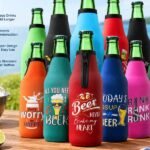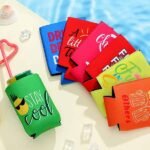
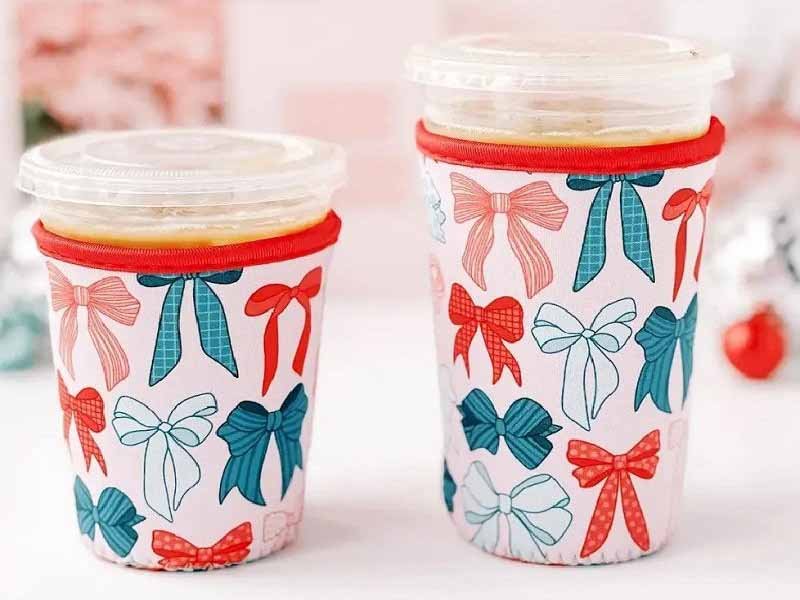
A neoprene bottle sleeve may appear to be one of the simplest products in a beverage campaign, but it can reveal nearly every weakness in product development. A sleeve that is slightly too loose may rotate around the bottle and hide the logo. One that is too tight may crush a lightweight plastic bottle, distort the artwork, or become frustrating to remove. Even an attractive prototype can create problems in bulk production when the bottle dimensions, neoprene thickness, material stretch, seam position, printing process, and quality tolerances were never clearly documented.
Beverage brands should design neoprene bottle sleeves by starting with the actual bottle, defining the use case, selecting an appropriate material and thickness, engineering controlled stretch, placing artwork around seams, and approving a production-intent sample. The final specification should record dimensions, materials, print files, accessories, packaging, inspection points, and acceptable tolerances before bulk manufacturing begins.
The best sleeve is not automatically the thickest, most colorful, or most complex option. It is the one that fits the bottle consistently, feels comfortable in the user’s hand, supports the campaign or retail goal, and can be reproduced without unpredictable changes. One beverage company once approved a beautiful digital rendering, only to discover that the physical sleeve rotated every time the bottle was lifted. The artwork was not the real problem. The project had begun with a graphic file instead of a bottle, and every later decision inherited that mistake.
What Should the Design Brief Define?
A practical design brief should define the bottle, target user, application, required functions, brand appearance, quantity, packaging, budget, testing expectations, and delivery date. These details give the manufacturer a measurable target for material selection, pattern development, printing, sewing, and quality control. Without them, the first sample becomes an expensive experiment based on assumptions rather than a controlled product-development step.
Product Purpose
The first question is not what the sleeve should look like, but what job it needs to perform. A sleeve distributed during a three-hour promotional event has different requirements from a retail accessory expected to survive repeated use for two years. Event programs often prioritize visible branding, compact packing, quick distribution, and predictable cost, while retail programs usually demand stronger finishing, better material recovery, durable printing, and more thoughtful packaging.
Brands should identify one primary purpose and no more than two secondary purposes. The main purpose may be controlling condensation, while the secondary goals are improving grip and increasing brand visibility. Trying to make one sleeve provide maximum insulation, heavy protection, shoulder carrying, storage, bottle opening, premium packaging, and the lowest possible price usually creates a product that is expensive, bulky, and difficult to manufacture consistently.
The use environment should also be described clearly. A sports-event sleeve may need a short handle, quick drying, and strong reinforcement. A sleeve used in a hotel or restaurant may require a cleaner silhouette with fewer accessories. A craft beverage gift set may benefit from substantial material, refined color matching, and coordinated packaging. The manufacturer cannot select the right construction until the real use case is understood.
Bottle and User
The bottle must be treated as a three-dimensional product rather than a liquid capacity. A 500 ml water bottle, a 500 ml sports drink bottle, and a 500 ml glass beverage bottle may have completely different body diameters, shoulder angles, base shapes, filled weights, and surface textures. Developing a pattern from capacity alone is one of the fastest ways to produce a sleeve that technically fits but performs poorly.
A useful brief includes the bottle material, capacity, filled weight, maximum circumference, body height, shoulder position, neck width, base shape, and desired sleeve coverage. Photographs should show the front, side, top, and bottom. For tapered or unusually shaped bottles, measurements should be taken at several heights because one maximum diameter cannot describe how the pattern needs to narrow.
The target user matters just as much as the container. A sleeve for children should avoid small detachable components and unnecessarily long cords. A product for hikers may need one-handed carrying and dependable retention. A premium beverage sleeve may prioritize visual cleanliness over maximum flexibility. These differences affect opening size, grip pressure, strap structure, cleaning instructions, and accessory selection.
Commercial Limits
Commercial requirements should be decided before sampling because they influence the physical product. Order quantity affects printing economics and material purchasing. Delivery time influences whether a custom color or accessory can be developed. Packaging changes labor cost, carton volume, and retail presentation. The number of bottle sizes, artworks, and colorways determines how many separate production setups may be needed.
| Brief Item | Information to Provide | Why It Matters |
|---|---|---|
| Order quantity | Units per size, color, and artwork | Controls purchasing, setup, labor, and unit cost |
| Bottle data | Dimensions, photos, filled weight, or sample | Determines pattern, fit, and reinforcement |
| Use case | Retail, promotion, event, gift set, or outdoor use | Defines durability and feature priorities |
| Branding | Artwork, Pantone references, print area, logo priority | Determines decoration process and material surface |
| Packaging | Bulk pack, individual bag, hangtag, box, or bundle | Affects presentation, labor, and freight volume |
| Delivery | Destination and required arrival date | Influences production and shipping planning |
| Testing | Fit, wash, rub, seam, chemical, or packaging checks | Determines sample and approval requirements |
| Reorder plan | One campaign or continuing product line | Influences documentation and material archiving |
The target cost should be expressed as a realistic range, especially before the structure is finalized. A simple slip-on sleeve with one-color printing cannot be compared directly with a thick full-print sleeve that includes a zipper, reinforced shoulder strap, rubber badge, hangtag, and retail box. When budgets are tight, the development team should protect the essential functions and remove decorative complexity before compromising fit or material consistency.
Approval Criteria
The design brief should also explain how the prototype will be approved. Words such as “premium,” “secure,” “bright,” or “tight-fitting” are open to interpretation. A stronger review process converts these impressions into practical checks covering fit, opening size, sleeve height, print position, seam alignment, edge finishing, odor, carrying comfort, accessory function, and packaging appearance.
Critical dimensions should be measurable, even though flexible sewn products cannot be controlled like molded plastic components. Finished height, top opening width, bottom diameter, strap length, and logo position are usually worth recording. Tolerances should be realistic for neoprene, laminated fabrics, and sewing. Impossibly tight limits create arguments without improving the consumer experience.
The people responsible for marketing, packaging, procurement, and quality should review the same physical sample whenever possible. Marketing may approve the artwork while missing a difficult insertion problem. Procurement may reduce material thickness without understanding how it changes print appearance. Packaging teams may discover that a bulky sleeve no longer fits the planned gift box. Early cross-functional review prevents these issues from becoming late production changes.
How Do You Build the Right Fit?
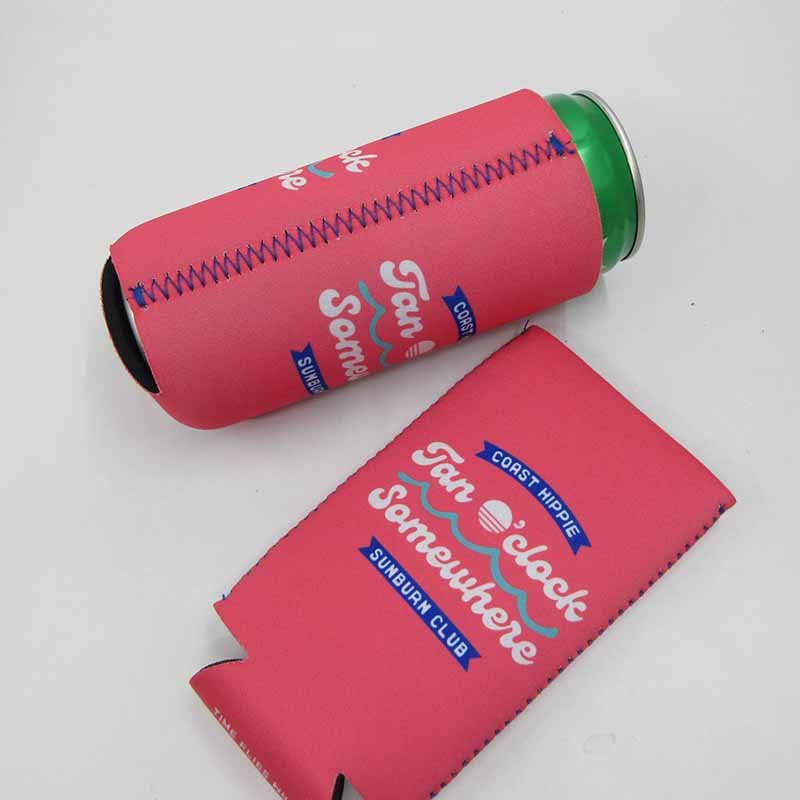
The right fit comes from measuring the real bottle, understanding the stretch and recovery of the selected neoprene, applying controlled negative ease, and testing the finished sleeve in normal use. A successful sleeve grips the bottle without crushing it, remains visually centered, avoids major wrinkles, preserves artwork proportions, and can be inserted or removed without unreasonable force.
Bottle Measurements
Bottle capacity should never be used as the main pattern measurement. Two bottles with the same liquid volume can differ enough in diameter to create a visible fit problem. Measurements should include the lower-body circumference, maximum circumference, circumference below the shoulder, straight-body height, base diameter, neck width, and the exact height at which the sleeve should finish.
The bottle should be measured in the condition in which the consumer will use it. Thin PET bottles may be less stable when empty and become firmer after filling. Labels, embossed grips, raised mold seams, and decorative ridges can also influence how easily the sleeve slides into place. For irregular bottles, a series of circumference measurements taken at fixed vertical intervals gives the pattern maker a much more useful profile.
A physical bottle remains the best development reference. A technical drawing can describe geometry, but it cannot fully show wall flexibility, surface friction, condensation behavior, or how the user naturally holds the container. When sending a physical bottle is not immediately practical, detailed photographs and a dimensional drawing can start development, but final approval should still take place on the real container.
Stretch and Ease
Neoprene stretches, but the amount and direction of stretch vary. Foam formulation, density, thickness, exterior fabric, interior lamination, adhesive, and cutting direction all influence the behavior of the completed sleeve. Two materials both described as 3 mm neoprene may feel and recover differently because their laminated surfaces are not the same.
Pattern makers normally use negative ease, which means the finished sleeve is made slightly smaller than the bottle so that it grips the surface. Too little negative ease creates rotation, slipping, and a loose appearance. Too much can crush thin bottles, distort artwork, create wavy edges, or make insertion difficult after condensation develops.
A practical sampling method is to make a base pattern and two closely controlled fit variations instead of producing several unrelated samples. The purpose is not to identify the tightest sleeve, but the version that provides retention without creating excessive user effort. Repeated insertion tests are important because some materials relax after stretching and may not return completely to their original size.
| Fit Check | Acceptable Result | Warning Sign |
|---|---|---|
| Bottle insertion | Smooth with moderate pressure | Bottle wall folds or insertion requires excessive force |
| Rotation | Front logo remains reasonably centered | Sleeve turns during normal handling |
| Top edge | Even contact around the bottle | Rolling, waving, or localized pressure |
| Surface | Smooth with controlled tension | Deep wrinkles or overstretched graphics |
| Removal | Can be removed by hand | Sleeve locks in place when wet |
| Recovery | Returns close to its original dimensions | Remains visibly enlarged after repeated use |
Pattern Construction
Pattern construction determines size, seam location, artwork orientation, bottom stability, and the distribution of tension around the bottle. A basic cylindrical sleeve may use one body panel and a circular bottom. A highly tapered or unusually shaped bottle may require shaped panels, darts, or a zipper opening to achieve a cleaner fit.
The side seam should be positioned where it causes the least visual disruption. Placing it through a primary logo, QR code, or important text is rarely acceptable. However, the seam cannot always be moved freely because it also affects how the material stretches across the front. Pattern engineering and artwork placement should therefore happen together rather than in separate departments.
The bottom structure deserves equal attention. A fully sewn base provides more coverage and stability but may trap moisture. An open bottom is simpler, dries quickly, and packs flatter, yet it offers less protection and may allow the sleeve to move upward if the fit is weak. Heavier glass bottles may justify a reinforced base, especially when the sleeve includes a handle or carrying strap.
The final production pattern should identify panel dimensions, material direction, seam allowances, notches, logo orientation, accessory locations, and measurement points. These details are what allow a successful prototype to be reproduced consistently by multiple operators during bulk production.
Real-Use Testing
Fit approval should happen under realistic conditions. A cold bottle develops condensation that changes friction between the container and the sleeve. A filled glass bottle is considerably heavier than an empty development sample. Outdoor heat, repeated gripping, and extended carrying can also reveal behavior that is not visible during a quick meeting-room inspection.
Testing should include repeated insertion and removal, normal hand gripping, carrying by any handle or strap, placing the bottle on a table, and holding it at different angles. The branding should remain correctly oriented during these activities. A sleeve that technically fits but rotates every time the user lifts the bottle does not provide dependable brand exposure.
Moisture behavior should also be reviewed. Neoprene can reduce the amount of condensation reaching the user’s hand, but water may collect around the top edge, base, or seam. A closed-bottom design may require drainage or a faster-drying interior surface. Compatibility tests should be completed on every bottle model listed in the brief, particularly when the product is marketed as fitting several containers.
Which Neoprene and Structure Work Best?
The best neoprene and structure depend on bottle size, insulation expectations, carrying method, print design, expected lifespan, packing limits, and cost. Thicknesses from approximately 2 mm to 5 mm are commonly considered for bottle sleeves, with 3 mm often used as a balanced starting point. Physical sampling remains essential because foam density, fabric lamination, stretch, and hand feel vary between materials.
Material Thickness
Thicker neoprene generally offers more cushioning and a more substantial feel, but it also adds material cost, weight, seam bulk, and carton volume. It may make a small bottle sleeve look oversized or reduce flexibility around a tapered container. Thinner neoprene folds and packs more efficiently, but it provides less structure and may show wrinkles more easily.
| Neoprene Thickness | Typical Application | Practical Advantages | Main Trade-Offs |
|---|---|---|---|
| 2 mm | Lightweight promotions and compact sleeves | Flexible, easy to fold, lower shipping volume | Less cushioning and lighter hand feel |
| 3 mm | General beverage merchandise and reusable sleeves | Balanced structure, printing, grip, and handling | Performance still depends on density and lamination |
| 4 mm | Premium or more protective products | More cushioning and stronger visual substance | Increased seam bulk and packed volume |
| 5 mm | Specialized protective or heavy-duty concepts | Greater softness and impact buffering | Higher weight, cost, and sewing difficulty |
Thickness should not be treated as a guarantee of cooling duration. A sleeve slows heat transfer but does not perform like a closed insulated cooler. Results depend on starting beverage temperature, ambient conditions, bottle material, foam quality, sleeve coverage, and exposure time. Brands planning to make a specific thermal claim should conduct a repeatable comparison under controlled conditions rather than relying on the thickness number alone.
Finished material should be approved as a physical swatch because lamination and bonding can affect the final thickness and firmness. A nominal 3 mm material may feel soft and compressible in one construction but dense and rigid in another. The hand feel of the completed sleeve often matters more to consumers than the specification printed on the technical sheet.
Surface Lamination
The fabric laminated to the neoprene influences print quality, stretch, abrasion resistance, color appearance, drying behavior, and touch. Most beverage sleeves use textile-facing neoprene because exposed foam is not suitable for common branding and handling requirements. The exterior and interior surfaces should both be specified rather than treating the foam as the entire material.
Polyester-faced neoprene is commonly considered for full-color sublimation because it provides a compatible print surface. Other knit constructions may offer more stretch, softness, or texture, but can produce different print sharpness and recovery. A smooth, tightly constructed surface tends to support cleaner graphic edges, while a more textured fabric can create a sportier or more casual appearance.
The interior affects user experience. A smooth lining can make insertion easier, while a higher-friction surface may improve retention. Excessive friction becomes inconvenient when condensation forms. Dark interior materials should also be tested against light bottle labels because prolonged wet contact can reveal color-transfer risks that are not visible on a dry sample.
A complete material specification should include nominal foam thickness, exterior fabric, interior fabric, surface colors, stretch direction, and intended decoration method. Odor should be evaluated after the sample has been aired under normal indoor conditions, rather than immediately after opening a sealed courier package.
Structural Options
The simplest construction is usually a slip-on body with a side seam and a sewn base. It is easy to understand, efficient to produce, and suitable for many cylindrical bottles. More complex features should be added only when they improve fit, carrying, protection, or consumer convenience.
A zipper may help a shaped bottle enter a close-fitting sleeve, but it reduces stretch along one side and adds weight, cost, and another possible failure point. The zipper tape, slider, teeth, and end stops need to work with the selected neoprene thickness. A zipper that appears smooth on a flat panel may become difficult to operate once the sleeve is tensioned around the bottle.
Handles and shoulder straps change the load path through the product. A filled 750 ml glass bottle may weigh around one kilogram depending on the container, so a strap should not be attached casually to a single thin layer of neoprene. Reinforcement patches, wider stitching areas, webbing anchors, or additional layers may be required to distribute the load.
Drawcords, D-rings, carabiners, bottle openers, pockets, and rubber badges can add value, but each component affects weight, balance, packing, and inspection. The strongest design is often the one that solves the main user problem with one or two carefully engineered features rather than a long list of accessories.
Cleaning and Durability
Reusable sleeves should be designed for realistic cleaning behavior. Consumers may wipe them, hand wash them, or place them in a washing machine even when the care label recommends something gentler. Materials, printed graphics, labels, hardware, and adhesives should therefore be reviewed for common exposure to water, detergent, friction, and repeated stretching.
Cool hand washing with mild detergent is often the safest general care approach for neoprene products. High heat can affect foam, lamination adhesive, transferred graphics, and accessory components. Tumble drying may accelerate deformation and is rarely necessary. The care label should reflect the actual construction rather than use generic instructions copied from another textile product.
Development testing can include repeated insertion, hand washing, surface rubbing, strap loading, zipper cycling, and seam inspection. A one-time promotional giveaway may need a simpler program than a premium sleeve positioned as a reusable retail accessory. The test plan should match the commercial promise and the risk of customer dissatisfaction.
Durability does not come only from greater thickness. Correctly cured printing, clean seam placement, material recovery, appropriate reinforcement, and realistic care instructions often have a greater effect on long-term performance than adding another millimeter of foam.
How Should Branding and Printing Be Designed?
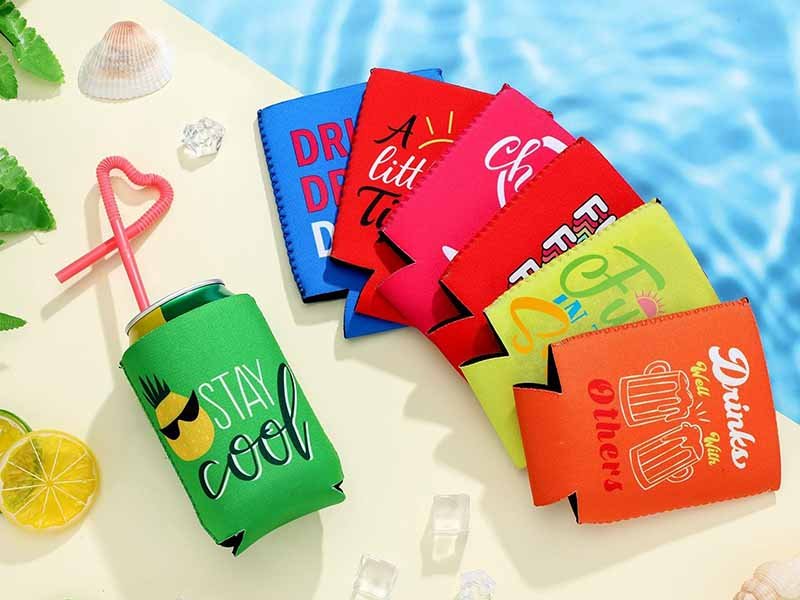
Branding should be designed for a curved, stretchable, sewn product rather than copied directly from flat bottle artwork. The decoration method should match the artwork, material surface, quantity, color requirements, durability, and budget. Important logos, legal text, and QR codes should stay within tested print-safe areas, away from seams and high-stretch zones, and be approved on the finished sleeve.
Print Method
Screen printing is well suited to bold logos, simple graphics, and limited color counts. It can create strong visual coverage and may be economical at larger quantities, although every additional color increases setup and alignment requirements. Fine gradients, photographic images, and large multicolor illustrations are usually less practical than clean shapes and clear typography.
Sublimation is often used for all-over graphics, gradients, detailed illustrations, and campaign artwork with many colors. It normally requires a compatible light polyester-facing fabric. Because the color becomes part of the textile surface rather than a thick raised layer, the sleeve can remain flexible. The final result still depends on fabric whiteness, heat settings, artwork preparation, and production control.
Heat transfer can reproduce multicolor logos and detailed shapes on selected materials. It is useful when the design does not require full-surface printing, but the transferred layer should be tested for adhesion, edge lifting, stretch, rubbing, and hand feel. A logo may look perfect while flat and begin to crack or lift after repeated expansion around the bottle.
Woven labels, rubber patches, silicone badges, and embroidery create a more dimensional identity. They can support premium positioning but affect flexibility, balance, and unit cost. Thick badges may pull a lightweight sleeve to one side, while embroidery compresses the foam and can stiffen the surrounding area. Each method should be judged on the actual sleeve rather than from a supplier’s generic sample book.
| Branding Method | Best Use | Main Advantages | Key Checks |
|---|---|---|---|
| Screen printing | Simple logos and solid colors | Strong coverage and efficient volume production | Registration, curing, cracking, and rub resistance |
| Sublimation | Full-color and all-over graphics | Detailed artwork with flexible surface feel | Fabric base, color accuracy, seam alignment |
| Heat transfer | Multicolor logos and defined shapes | Clean edges and flexible artwork options | Adhesion, stretch, edge lifting, and surface feel |
| Woven label | Small brand identification | Durable and visually controlled | Position, edge finish, and sewing consistency |
| Rubber or silicone patch | Tactile premium branding | Strong identity and dimensional appearance | Weight, attachment, flexibility, and balance |
| Embroidery | Selected logos on suitable structures | Textured, durable visual effect | Foam compression, stiffness, and thread tension |
Artwork Placement
Artwork must be reviewed as part of a three-dimensional object. Only part of the sleeve circumference is visible from one viewing angle, so a very wide logo may disappear around the bottle sides. A smaller, correctly positioned front mark may create stronger recognition than a large graphic that cannot be seen at once.
The artwork template should clearly mark the side seam, bottom seam, zipper, handle attachment, label position, and any reinforced area. Primary logos, small text, legal information, and QR codes should remain inside a safe zone. Placing important content too close to an edge increases the risk that normal cutting and sewing variation will change the final appearance.
Full-wrap designs need a realistic seam strategy. Textile panels cannot always align with the precision of a shrink label or printed carton. Repeating textures, gradients, scattered icons, and intentionally separated panels are more forgiving than one continuous illustration that must match perfectly across a sewn seam.
Small typography should be tested because fabric texture, curvature, stretch, and ink spread can reduce readability. Mandatory information may be better placed on a hangtag, packaging insert, or woven label when the sleeve cannot reproduce it reliably. QR codes require sufficient size, contrast, quiet space, and flatness, and should be scanned on the actual fitted product.
Stretch Compensation
The sleeve stretches when it is installed, which can widen artwork or distort shapes. Circles may become ovals, faces may appear broader, and straight lines may curve around the bottle. The effect is strongest in areas with high negative ease or abrupt changes in bottle diameter.
Compensation should be based on a physical test rather than a random percentage. One effective method is to print a measured grid or reference graphic on the intended material, sew it into the proposed pattern, and fit it to the bottle. The visible deformation shows how the design behaves under actual tension.
Possible corrections include narrowing selected graphics, changing spacing around text, moving details away from high-stretch zones, or adjusting the pattern itself. Sometimes the better solution is to reduce sleeve tension rather than deliberately distort the brand artwork. The purpose is to produce the correct visual result on the bottle, not to preserve the exact appearance of the flat panel.
Accessories also influence orientation. A heavy badge may cause the sleeve to rotate, and a shoulder strap may pull the logo away from the center while the bottle is carried. Artwork should therefore be evaluated while the bottle is standing, held in the hand, and suspended from any carrying feature.
Color Control
Pantone references provide a useful communication standard, but a printed textile surface will not look identical to coated paper, plastic packaging, aluminum, or a digital screen. Fabric texture, base whiteness, print chemistry, curing temperature, lighting, and stretch all influence how the color is perceived.
Brands should identify which colors are critical. The primary logo color may require close control, while a small decorative background shade may not justify the same level of testing. Focusing on the colors that truly define the brand keeps the process commercially practical without lowering the overall visual standard.
A reliable approval sequence includes a digital artwork proof, a physical print strike-off, and a completed sewn sample. The strike-off shows color and image quality on the real material. The sewn sample reveals how stretch, curvature, seam placement, and accessories change the final appearance.
Color should be reviewed under agreed lighting because a shade can appear acceptable under warm office lights and noticeably different under daylight or retail LEDs. The approved physical sample or signed material swatch should be retained for bulk inspection and future reorders. Digital files alone cannot capture the full appearance of color on textured laminated neoprene.
How Do You Approve Samples and Scale Production?
Samples should be approved through measurable checks covering fit, dimensions, material, printing, sewing, function, durability, packaging, and real-world use. The final approved sample must be supported by a specification, pattern version, artwork file, material reference, tolerance list, and QC checklist. Bulk consistency depends on controlling every production stage rather than relying on one visually attractive prototype.
Sample Review
The first prototype should answer the largest technical questions. Does the sleeve fit the bottle? Is the material thickness suitable? Does it remain correctly positioned? Can the artwork be reproduced clearly? Are the seams, base, and carrying features practical? It is normal for an early prototype to require adjustment, particularly when the bottle has unusual geometry.
A later pre-production sample should represent the intended bulk product as closely as possible. It should use the approved neoprene, laminated surface, artwork, thread, binding, zipper, strap, labels, hardware, and packaging. Approving substitute materials at this stage reduces the value of the sample because the final goods may stretch, print, or feel differently.
The sample should be reviewed on the correct filled bottle. The team should check insertion, removal, grip, rotation, condensation, cap access, carrying, table stability, and packaging compatibility. Photographs from the front, back, sides, top, and bottom should become part of the project record.
Feedback should be measurable. “Move the logo upward” should become a defined distance from the edge. “Make the fit tighter” should lead to a revised panel dimension. “Use a stronger handle” should identify the webbing width, reinforcement method, or expected working load. Clear revisions make later production much easier to control.
Practical Testing
Testing should reflect the product’s intended use and any marketing claims. A simple event giveaway may not need a complex laboratory program, but basic functional checks can still prevent large-scale defects. A retail sleeve intended for regular reuse requires a more thorough assessment of material recovery, printing, seams, and cleaning behavior.
Dimensional inspection should cover finished height, opening width, bottom shape, strap length, and print position. Fit testing should include repeated insertion and removal. Seams should be checked for skipped stitches, loose threads, uneven allowances, puckering, and weak reinforcement around handles or straps.
Carrying features should be tested with the intended filled bottle weight. The test method should be selected according to the design rather than using an unsupported universal number. A shoulder strap for a heavy glass bottle deserves more demanding evaluation than a decorative finger loop on a lightweight plastic container.
Printing can be assessed through dry rubbing, damp rubbing, repeated stretching, and washing where relevant. Zippers should be cycled to expose alignment or slider problems. Hardware should be checked for sharp edges, corrosion risk, and contact with the bottle. Claims concerning insulation duration, waterproof performance, or heavy-duty strength should use an agreed test method and recorded conditions.
Production Control
Bulk production requires a controlled reference package that normally includes the approved sample, final specification, pattern number, artwork version, print-placement diagram, material swatch, bill of materials, packaging standard, and inspection checklist. These records prevent informal decisions made during sampling from being lost when the order moves to a larger production team.
Incoming neoprene should be checked for thickness, lamination, color, visible defects, odor, and obvious stretch differences. Printed panels should be approved before large quantities are cut. Cutting orientation must remain consistent because the laminated material may stretch differently across the width and length of the roll.
In-process inspection is more effective than discovering every defect after sewing is finished. Early checks can identify reversed artwork, incorrect panel size, misplaced labels, weak strap attachments, or inconsistent seams while corrections are still manageable. Finished-product inspection should then verify dimensions, fit, printing, stitching, cleanliness, hardware, accessories, and packaging.
Inspection samples should come from different cartons, operators, and production periods rather than from one carefully selected group. Flexible sewn products naturally show small variation, so tolerances need to be agreed before production. Practical standards protect the customer experience without expecting neoprene and textile sewing to behave like precision-molded components.
RFQ and Reorders
A useful request for quotation gives every manufacturer the same product definition. Without it, one supplier may calculate a simple 2 mm sleeve with bulk packaging while another includes 4 mm neoprene, full-color printing, a reinforced strap, and individual retail boxes. Comparing those prices would not reveal which supplier is more competitive because the quoted products are not equivalent.
The RFQ should include the bottle drawing or physical sample, bottle material, filled weight, target sleeve height, preferred fit, neoprene thickness, lamination, artwork, colors, printing method, accessories, quantity by SKU, packaging, testing, destination, and required arrival date. A forecast for future orders is also helpful when material continuity and repeatability matter.
Reorders become much easier when the original development is properly archived. Approved patterns, artwork, material references, color standards, packaging files, measurements, inspection criteria, photographs, and previous production notes should be retained. Any issue discovered during the first order should be converted into an updated specification rather than left in an email conversation.
Material batches may still vary over time, especially in color, firmness, and surface texture. A reorder may therefore require a material confirmation or brief pre-production sample when appearance is critical. The goal is not to repeat the full development process but to confirm that the current production setup still matches the approved product.
Brands preparing a custom project can send their bottle dimensions, reference bottle, artwork files, target quantity, required features, packaging details, destination country, and delivery schedule to Szoneier for a manufacturability review. With more than 18 years of experience in custom sewn soft goods and neoprene products, the team can support material selection, pattern development, sampling, printing, production, quality inspection, packaging, and export coordination.
For a detailed quotation, contact info@szoneier.com or send project information through WhatsApp: (+86) 13423847456. The clearest inquiries normally include the physical bottle or dimensional drawing, editable logo artwork, expected order volume, packaging format, and required delivery date, allowing the project team to provide a more accurate sample plan and production proposal.