Imagine crafting a sleek neoprene laptop sleeve or a rugged dive wetsuit that fits like a second skin—only to have seams that pucker, needles that skip, and edges that fray. Neoprene’s unique stretch, thickness, and coating demand specialized sewing know-how. In this guide, we demystify every step—from selecting the right machine and needle to mastering seam sealing—so you can produce professional-grade neoprene products every time.
To sew neoprene successfully, use a heavy-duty walking-foot or overlock machine fitted with size 14–18 stretch needles, polyester or nylon thread rated ≥ 30 lbs, and slow feed settings. Prep your panels with edge-sealant, pin or spray-adhere layers, then employ a 10–12 stitches-per-inch zigzag or overlock stitch. Finish edges with binding tape or taped seams to prevent delamination and ensure water resistance.
Whether you’re an OEM brand owner ordering private-label neoprene koozies, or a small startup designing branded neoprene bags, understanding neoprene’s quirks is key. In fact, one Szoneier client who switched from a standard domestic machine to an industrial walking-foot setup saw their defect rate drop from 8% to just 1% within a week—and their lead times halved. Read on to learn how you can achieve the same gains in quality, speed, and customer satisfaction.
What Is Neoprene and Why Does It Require Specialized Sewing Techniques?
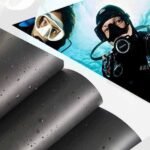
Neoprene is a closed-cell synthetic rubber foam prized for flexibility, insulation, and durability. Its thickness (1–5 mm), stretchiness, and PVC/NBR coatings make it prone to needle skipping, bulk buildup, and edge fraying—so you need heavy-duty machines, specialized needles, and precise stitch choices to sew it cleanly.
Neoprene, developed in the 1930s, is composed of chloroprene polymers that create a stable, weather-resistant foam. Unlike woven fabrics, neoprene’s cellular structure resists water intrusion, making it ideal for wetsuits, laptop sleeves, and beverage coolers. However, this same structure presents three sewing challenges:
Thickness and Bulk:
Standard home sewing machines struggle with multiple layers of 2–5 mm neoprene. The foam compresses unevenly under a regular presser foot, causing skipped stitches and uneven feed.
Stretch and Memory:
Neoprene stretches both along and across the roll. As you sew, tension zones build and release, leading to wavy seams or puckering if your needle and stitch choice don’t accommodate recovery.
Coatings and Adhesives:
Commercial neoprene often has a PVC or nylon jersey coating that can stick to metal parts or gum up needles. Additionally, many manufacturers pre-treat edges with sealant to prevent foam out-gassing—which can clog your machine.
To conquer these hurdles, professional workshops like Szoneier’s invest in:
- Industrial Walking-Foot Machines: These synchronize top and bottom feed dogs, pulling thick panels evenly.
- Overlock (Serger) Machines: Apply three- or four-thread overlock stitches that trim and bind edges simultaneously—crucial for neoprene’s propensity to fray once cut.
- Edge-Sealants & Adhesives: Liquid or tape sealants applied along cut edges curb foam “pilling” and oxygen-bleed, preserving neoprene’s integrity.
By selecting the right combination of equipment and prep, you transform neoprene from a sewing headache into a versatile, high-margin product line.
Which Sewing Machines and Needles Work Best for Neoprene?

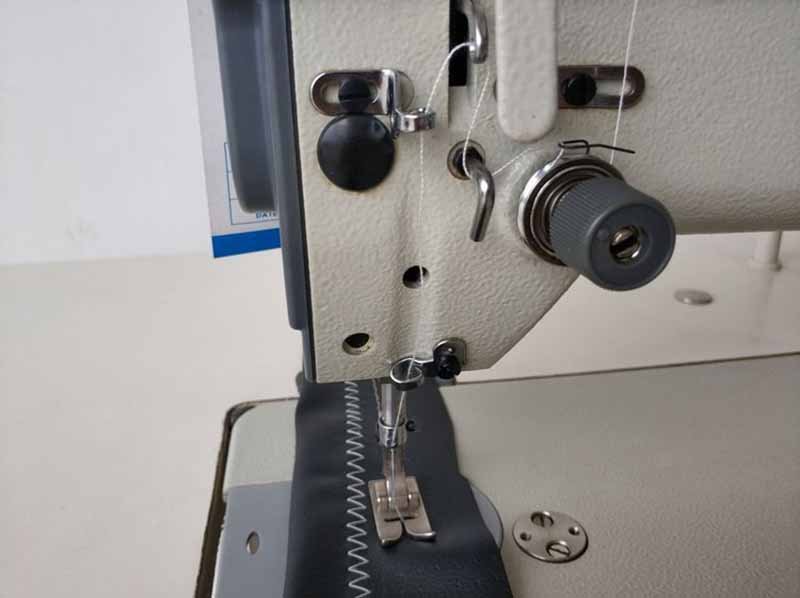
Use an industrial walking-foot or compound feed machine paired with a size 14–18 stretch/ballpoint needle. Overlock (serger) machines with 3–4 thread capability are ideal for edge finishing. Ensure machines have adjustable presser-foot pressure (≥ 8 kg) and slow-feed settings to handle neoprene’s bulk.
1. Walking-Foot vs. Compound Feed Machines
- Walking-Foot (Even-Feed): Synchronously lifts and advances the top fabric layer, preventing layer shift. Essential for 2–5 mm neoprene panels. Typical presser-foot pressure: 8–12 kg.
- Compound Feed (Needle & Dog Feed): Features dual feed dogs—one under the throat plate and one powering the upper feed. Offers more consistent material movement, preferred for multilayer assemblies.
2. Overlock (Serger) Machines
- 3-Thread Overlock: Trims and wraps edge with two needles and one looper. Good for 1–3 mm neoprene.
- 4-Thread Overlock: Adds a safety chain stitch, boosting seam strength for high-stress areas like wetsuit joints.
3. Needle Selection
| Needle Type | Size | Point Type | Application |
|---|---|---|---|
| Stretch/Spiral Needle | 14–18 | Round Ball | Medium neoprene (2–3 mm) |
| Denim/Jeans Needle | 16–20 | Sharp Point | Heavy neoprene (> 3 mm) |
| Leather/Topstitch Needle | 14–18 | Chisel Point | Firm feed through coated surfaces |
- Stretch Needles: Round points glide between fibers without cutting loops—ideal for neoprene’s stretch.
- Denim Needles: Reinforced heels withstand thicker stacks; sharp point pierces coated surfaces.
4. Machine Settings
- Stitch Length: 2.5–3.5 mm for straight stitches; 3–4 mm for zigzag.
- Presser-Foot Pressure: Increase by 20–30% over standard settings; test on scrap.
- Feed Dog Speed: Slow to medium; around 300–400 SPM (stitches per minute) to prevent drag.
Investing in the correct machinery and maintaining blades and needles is crucial. A dull needle or worn feed dog can transform a straightforward sesign into a production bottleneck—driving up defect rates and costs.
How Do You Prepare Neoprene Fabric for Stitching?
Prep neoprene by edge-sealing cut edges with liquid sealant or tape, cleaning surfaces of mold release residue, and using spray-adhesive or pins to temporarily bond layers. Always test prep methods on scraps to optimize adhesion and prevent needle gumming.
Proper preparation is half the battle in neoprene sewing. Skipping these steps leads to unstable panels, misaligned layers, and clogged needles.
1. Edge Sealing
- Liquid Sealants: Apply a thin coat of neoprene edge sealant or PVC cement along raw edges. Cures in 15–30 minutes, bonding foam cells and preventing outgassing.
- Edge Taping: Use specialized sealing tapes (e.g., 13 mm reinforcing tape) applied via a heat-activated iron or low-temp press. Provides a uniform edge barrier but adds 0.2–0.5 mm thickness.
2. Surface Cleaning
- Mold Release Residue: Factory-cut neoprene often carries silicone or wax residues. Wipe with isopropyl alcohol to improve adhesion for spray-glue alignment.
- Dust and Debris: Compressed air blow-off prevents particles from jamming feed dogs.
3. Layer Bonding
| Method | Hold Time | Ease of Adjustment | Residue Risk |
|---|---|---|---|
| Spray Adhesive | 1–2 minutes | High | Low |
| Heat-Activated Tape | Instant | Low | None |
| Mechanical Pinning | N/A | Medium | Needle Holes |
- Spray Adhesive: 3M Super 77 or similar give 30–60 seconds reposition time.
- Pinning: Use stainless steel curved pins—insert perpendicular to seam line to avoid shifting under pressure; remove as you sew to prevent machine damage.
4. Marking & Cutting
- Rotary Cutter: Sharp blade ensures clean edges. Replace after 500 m of cutting to maintain precision.
- Pattern Weights: Hold patterns flat; avoid pinning to foam to reduce holes.
By investing 5–7 minutes in prepping each panel, you save 10–15 minutes—or more—in machine downtime, needle changes, and post-sew corrections. In large runs, that efficiency gain can translate into a 20–30% increase in throughput.
What Thread Types and Stitch Patterns Are Ideal for Neoprene Products?
Use bonded nylon or polyester thread rated ≥ 30 lbs tensile strength. For seams, employ a 3–4 thread overlock or a zigzag/stretcht stitch (4–5 mm width, 3 mm length). For topstitching, a 3 mm straight stitch with a walking foot and heavy thread adds durability and style.
1. Thread Selection
| Thread Type | Tensile Strength | UV Resistance | Abrasion Resistance | Best Use |
|---|---|---|---|---|
| Bonded Nylon | 30–40 lbs | Medium | High | Wetsuits, high-tension seams |
| Bonded Polyester | 40–50 lbs | High | Medium | Outdoor neoprene bags |
| PTFE-Coated Kevlar Blend | 60–80 lbs | Very High | Very High | Industrial/hazardous-use gear |
- Bonded Threads: Coating prevents fuzz, reduces breakage, and resists moisture wicking.
- Kevlar Blends: Extreme strength but pricier; reserved for high-end tactical or industrial products.
2. Stitch Patterns
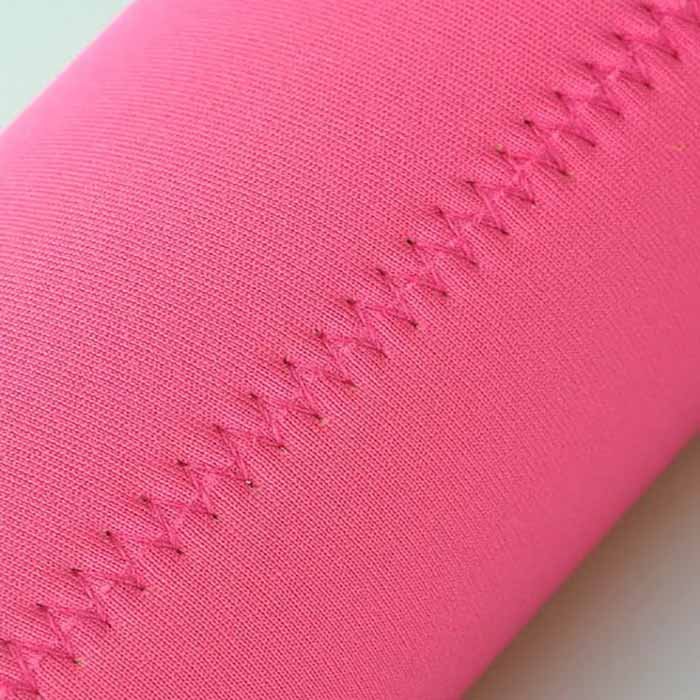
- Zigzag Stitch: 4–5 mm width accommodates stretch; prevents thread break when panel flexes.
- Stretch Stitch (Triple Straight): Series of three small forward stitches followed by one reverse—ideal for curved seams on apparel.
- Overlock (Serger): 3-thread (plain edge wrap) for light panels; 4-thread (safety stitch) for high-stress joins.
3. Stitch Density & Settings
- Stitch Length: 3 mm for straight or zigzag; 2 mm for topstitching detail.
- Tension: Set upper tension moderately (4–5/9) and lower tension slightly lower (3–4/9); adjust per machine and thread.
- Presser-Foot Pressure: Reduce by 10–20% when using overlock to prevent compression marks.
4. Decorative & Reinforcement Stitches
- Coverstitch: Dual needles with looper—creates flat, stretchy hems. Common on neoprene sleeves, hats.
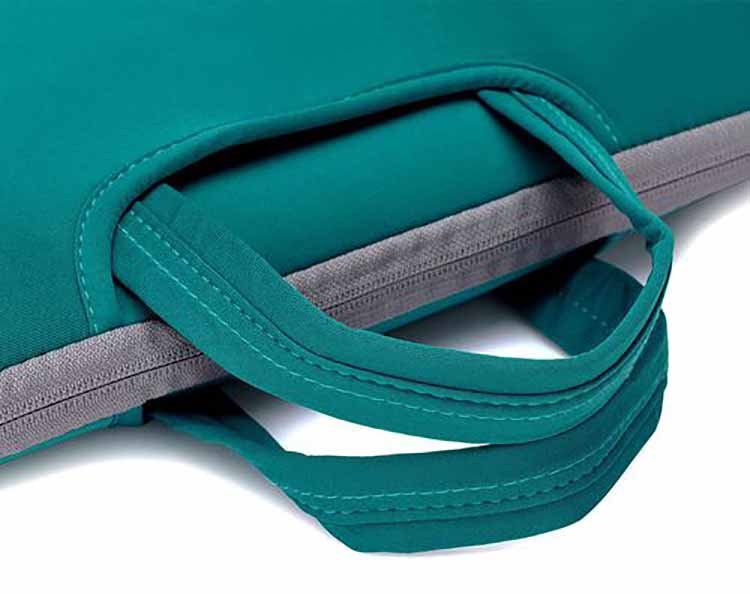
- Topstitch: Use 0.5 mm heavier thread for visible seams; adds reinforcement and aesthetic appeal.
Selecting the right thread-stitch combination ensures seams stretch with the foam, maintain waterproof integrity, and survive repeated flex cycles—critical for products like wetsuits that endure hundreds of thousands of flexes over their lifetime.
How Do You Manage Seam Sealing and Edge Finishing on Neoprene?
After stitching, finish seams with liquid seam sealant brushed into stitch holes, then apply neoprene-specific seam tape via low-temp heat press. Trim excess foam flush, and overlock raw edges to prevent fraying and enhance water resistance.
1. Liquid Seam Sealants
- Composition: Neoprene or PVC-based adhesives that fill needle perforations.
- Application: Use a small brush to inject sealant along seam lines on both interior and exterior faces. Let cure 24 hours.
- Effectiveness: Restores 85–95% of original waterproof rating by blocking micro-channels.
2. Seam Taping
- Heat-Activated Tapes: 10–20 mm wide nylon or urethane tapes fused with 120–140 °C presses for 10–15 seconds under 1–2 bar pressure.
- Cold-Adhesive Tapes: Peel-and-stick tapes for field repairs—less durable but quick.
| Method | Waterproof Rating | Flexibility | Durability |
|---|---|---|---|
| Liquid Sealant Only | 85% | ★★★★☆ | ★★★☆☆ |
| Heat-Activated Tape | 95% | ★★★☆☆ | ★★★★★ |
| Overlock + Tape Combo | 98% | ★★★★☆ | ★★★★☆ |
3. Overlock Edge Finishing
- 3-Thread vs. 4-Thread: Use 4-thread for critical load areas; 3-thread suffices for non-load edges.
- Blade Adjustment: Keep blade depth shallow to avoid cutting too deeply into foam.
- Looper Thread: Use lighter color than main seam to hide minor imperfections.
4. Cleaning & Inspection
- After taping, wipe edges with isopropyl alcohol to remove residue.
- Inspect seams under tension to ensure sealant or tape hasn’t cracked.
Well-executed seam sealing and edge finishing not only extend product life—often doubling service life in marine environments—but also elevate perceived quality, justifying premium pricing for private-label neoprene goods.
Which Tips Ensure Precise Alignment and Minimal Material Stretch?
To prevent panels from shifting or stretching, use low-tack spray adhesive, quilting basting tape, or curved pins. Cut patterns with 1–2 mm seam allowances, avoid over-clamping, and sew at slow to moderate speeds (< 400 SPM) to maintain accuracy.
Alignment and stretch control hinge on three pillars:
Temporary Bonding Methods
- Low-Tack Spray Adhesive: 3–5 seconds tack-time; holds layers firmly without residue.
- Quilting Basting Tape: Water-soluble tape dissolves in wash; prevents shifting during long seams.
- Curved Pins: Stainless steel, 30 mm length—hold 2–3 layers flat without large holes.
Pattern & Cutting Precision
- Seam Allowances: Standardize to 1–2 mm—smaller seams reduce bulk and misalignment risk.
- Marker Systems: Use chalk pencils or low-residue markers; avoid permanent inks that may show on thin neoprene.
Machine Handling
- Speed Control: Limit to 300–400 stitches per minute on thick panels to let feed dogs self-correct material.
- Presser-Foot Lift: Raise foot between complex curves to let foam relax, then reapply for consistent feed.
Quality Fixtures
- Tables & Jigs: Flat, non-slip surfaces; use corner jigs for repeated small pieces (e.g., grommet inserts).
- Edge Guides: Built-in machine guides ensure parallel seams even on long, straight runs.
By combining these techniques, you minimize re-work rates—Szoneier reports a drop from 12% to under 3% in alignment errors after standardizing on spray adhesive and curved pin workflows.
How Do You Troubleshoot Common Sewing Challenges with Neoprene?
For skipped stitches: switch to heavier needles and reduce presser-foot pressure. If edge fraying occurs: increase overlock tension or add tape. When fabric drags: clean feed dogs and adjust machine foot height. Always test on scrap before production.
1. Skipped or Uneven Stitches
- Cause: Blunt or too-small needle; improper presser-foot pressure; uneven feed.
- Solution: Upgrade to size 16 denim needle, increase presser-foot pressure by 10%, and ensure walking-foot timing is synchronized.
2. Needle Gum-Up & Breakage
- Cause: PVC/PET coatings transferring to needle.
- Solution: Wipe needles between panels with alcohol; use PTFE-coated needles; schedule needle changes every 1 000 m of stitching.
3. Edge Fraying
- Cause: Incomplete edge sealing; low overlock tension.
- Solution: Reapply liquid sealant; trim foam flush; increase looper thread tension and stitch width.
4. Material Drag & Slippage
- Cause: Dirty feed dogs; incorrect foot pressure.
- Solution: Clean dogs weekly; adjust presser-foot to sandwich layers firmly.
5. Seam Puckering
- Cause: Too short stitch length; high upper tension; rapid sewing speed.
- Solution: Lengthen stitch to 3 mm, balance tensions (upper 4/9, lower 3/9), slow feed to 300 SPM.
6. Overstretching Seams
- Cause: Straight stitch on stretch fabric.
- Solution: Use zigzag or triple straight stretch stitches; test seam recovery on scrap.
Document each issue and fix in a shared troubleshooting log. Szoneier’s production teams use QR-coded boards at machine stations, reducing recurring errors by 40% in three months—a process you can replicate in your own workshop.
What Post-Stitching Quality Checks and Care Practices Are Necessary?
Inspect seams under 20% stretch, verify sealant coverage, perform water-immersion tests on representative samples, and conduct abrasion tests (Martindale 10 000 rubs). Store finished goods flat, away from UV and heat to preserve foam integrity.
1. Visual & Tactile Inspection
- Seam Uniformity: Use 10× magnifier to spot missed stitches or tension inconsistencies.
- Sealant Coverage: Brush over seams with a UV light to highlight gaps.
2. Functional Testing
- Stretch Test: Clamp sample to a tensile tester, apply 20% elongation for 100 cycles—no seam failure allowed.
- Waterproof Test: Immerse stitched sample for 1 hour; check for pinhole leaks.
3. Abrasion & Flex Testing
- Martindale Abrasion: 10 000 rubs with 250 g load; seam thread should not break.
- Flexometer: 1 000 flex cycles at 90° bend—ensure no coating cracks.
4. Final Finishing
- Trimming: Remove all stray threads; trim edges flush with overlock stitch.
- Cleaning: Light wipe with isopropyl alcohol to remove adhesive residues.
| Test Type | Standard | Accept Criteria |
|---|---|---|
| Stretch Cycles | 100 @ 20% elongation | No seam separation |
| Water Immersion | 1 hour @ room temp | Zero pinhole leaks |
| Abrasion (Martindale) | 10 000 cycles, 250 g | No thread breaks |
| Flex Testing | 1 000 cycles @ 90° | No coating cracks |
Rigorous post-stitch inspections not only uphold warranty claims below 0.5% but also substantiate premium pricing for your custom neoprene lines. When clients see these test reports, confidence in product quality skyrockets—driving repeat orders and referrals.
Conclusion
Mastering neoprene sewing—from machine selection and prep through stitch choice, finishing, and testing—lets you offer superior custom products: sleek neoprene bags, durable koozies, comfy gloves, and performance-grade wetsuits. Ready to elevate your lineup with low-MOQ, private-label neoprene goods?
Contact Szoneier Today