Skip to content
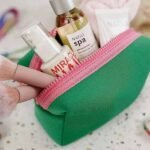
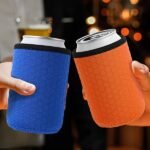
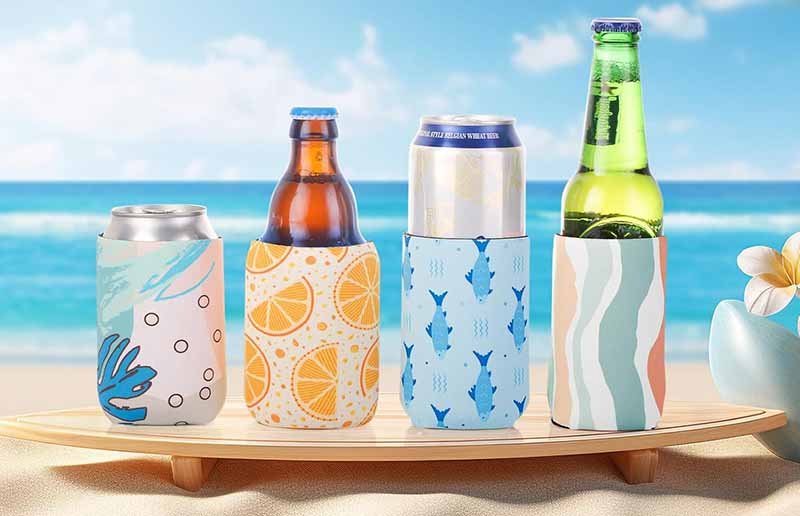
If you’ve ever reached for a cold drink on a warm day, you know the magic of a koozie — that little sleeve that keeps your hands dry and your beverage cold. What most people don’t realize, though, is how simple (and surprisingly fun) it can be to make your own. Whether you’re crafting for personal use, creating handmade gifts, or preparing stock for your Etsy shop, a DIY koozie is the perfect balance between creativity and practicality.
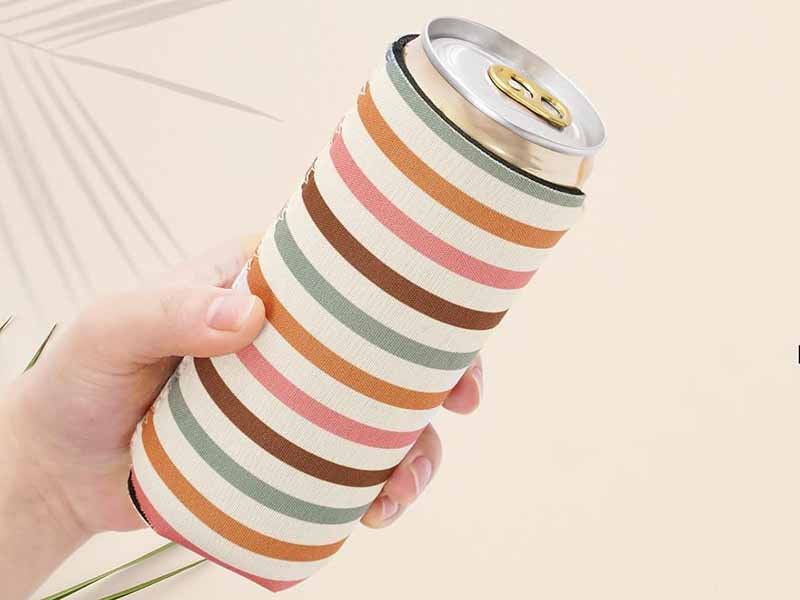
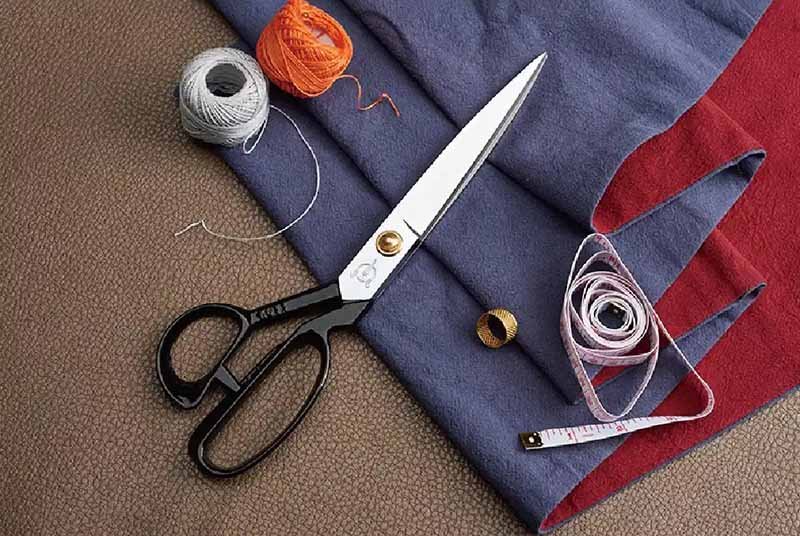
To make your own koozie, you’ll need a material like 3–4 mm neoprene, a standard can template, scissors or a rotary cutter, and strong fabric glue or a sewing machine. Cut the pattern, join the edges with adhesive or stitching, and decorate with heat transfer vinyl or sublimation prints. The result is a durable, reusable sleeve that keeps your drinks cold and hands dry.
As more crafters rediscover the joy of making personalized drink sleeves, neoprene — once reserved for wetsuits and sports gear — has become the go-to fabric for home projects. But while tutorials make it look easy, the difference between a “fun craft” and a “pro-quality koozie” lies in the details: precise cuts, edge finishing, and heat-safe printing. So let’s explore what you really need to know before you start cutting and gluing your first sleeve — and how to give your handmade koozie that Szoneier-grade polish.
What Is a Koozie and Which Sizes Do You Need?
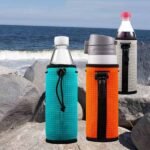
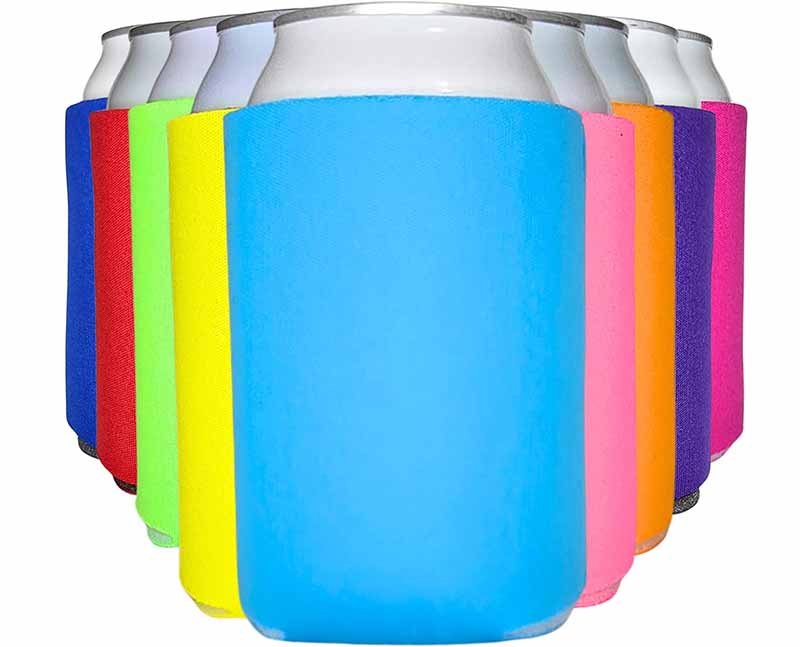
A koozie is an insulating sleeve designed to fit around beverage containers — usually cans or bottles — to maintain cold temperature and prevent condensation. The size of your koozie depends on the drink format you’re targeting, from standard 12 oz cans to tall seltzers and reusable tumblers.
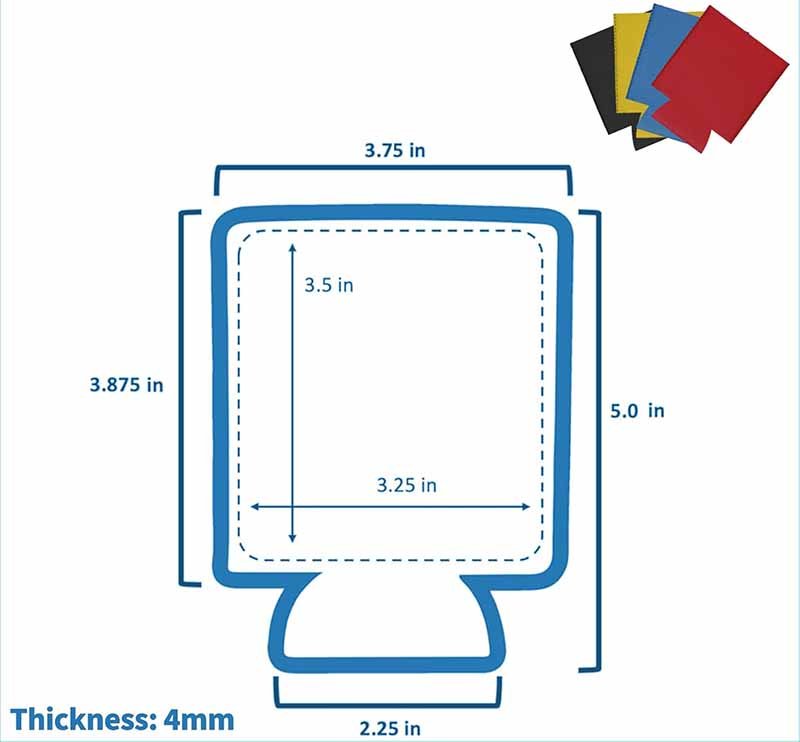
A koozie is a soft insulating sleeve that fits around cans, bottles, or tumblers to keep drinks cold and hands dry. Standard 12 oz cans use 4.1″ × 10.2″ flat templates, while slim cans need taller sleeves around 4.3″ × 10.8″. Always allow for seam margins (about ¼”) to ensure a snug fit after stitching or gluing.
Koozies are deceptively simple — but precision matters. A few millimeters off can mean a loose, floppy sleeve or one that’s too tight to slide over the can. The first rule of a professional DIY koozie is to measure your container, not just rely on a generic pattern.
1. Common Koozie Formats
| Drink Type | Capacity | Flat Template Size (W × H) | Notes |
|---|---|---|---|
| Standard Can | 12 oz | 4.1″ × 10.2″ | Most popular; fits soda & beer cans |
| Slim Can | 12 oz slim | 4.3″ × 10.8″ | For hard seltzers, energy drinks |
| Bottle | 12 oz longneck | 4.5″ × 11″ | Requires neck extension or zipper |
| Tumbler | 16–20 oz | Custom | Best made using flexible foam or stretch neoprene |
When cutting your neoprene sheet, remember that thickness affects fit. For example, a 5 mm neoprene sleeve fits tighter than a 3 mm one due to material compression. If you’re making a gift or selling online, test your pattern with multiple can brands — even a 1–2 mm diameter difference can change how easily the koozie slips on.
2. The Science of a Snug Fit
A good koozie doesn’t just look cute — it insulates effectively because it hugs the can tightly. The closer the neoprene is to the can’s surface, the less warm air can enter the gap.
Professional factories like Szoneier use digital cutting systems to achieve ±0.2 mm precision, ensuring both consistency and insulation efficiency. When crafting at home, aim for similar care: use a rotary cutter instead of scissors, and always measure twice before cutting.
3. Creative Shape Variations
DIY makers often experiment with:
- Flat-bottom koozies – easy to cut and sew; can fold flat for shipping.
- Tapered koozies – fit ergonomic tumblers or pint glasses; need curved templates.
- Zippered bottle koozies – include a zip up the neck for tight-fitting bottles.
Each variation demands small adjustments in height or edge allowance, so it’s best to create one paper prototype before committing to fabric.
Which Materials Work Best—Neoprene vs. Foam vs. Fabric?
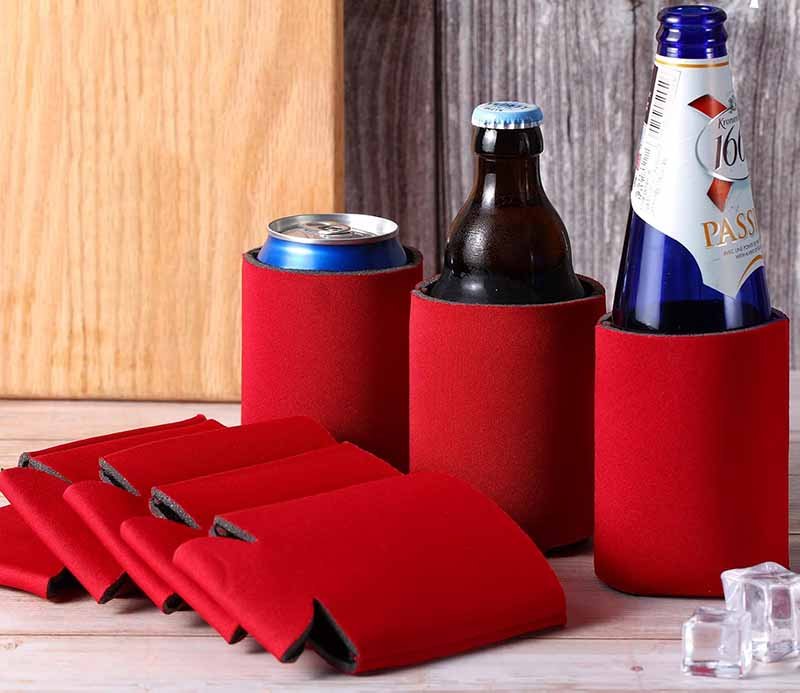
The heart of every koozie is its material. Neoprene — the same synthetic rubber used in wetsuits — dominates the market for its flexibility, water resistance, and heat retention. However, foam and fabric alternatives still have their niche, especially for budget or decorative projects.
Neoprene is the best material for DIY koozies because it’s flexible, durable, and insulates well. Foam is cheaper but less resilient and harder to print on. Fabric-laminated neoprene adds style and softness while keeping drinks cold longer. Choose 3–4 mm closed-cell neoprene for the ideal balance of comfort, insulation, and durability.
When choosing material, you’re balancing function, cost, and feel. Each option brings distinct pros and cons — and your decision depends on whether you’re crafting for fun or building a small handmade business.
1. Neoprene: The Premium Choice
Neoprene is the gold standard for koozies, and for good reason:
- Thermal insulation: Keeps beverages cold 40–60% longer than foam.
- Water resistance: Repels condensation, keeping surfaces dry.
- Elasticity: Returns to shape even after repeated use.
- Print compatibility: Supports sublimation, heat transfer, and screen printing.
Szoneier’s production lines typically use 3 mm double-sided fabric neoprene, meaning both sides are laminated with stretch polyester for easy printing and a soft handfeel. For DIYers, pre-laminated neoprene sheets (sold in A4 or yard rolls) are ideal — they cut cleanly and resist fraying.
| Property | Neoprene | Foam | Fabric |
|---|---|---|---|
| Insulation (1–10) | 9 | 7 | 5 |
| Durability | High | Medium | Low |
| Water Resistance | Excellent | Poor | Depends on weave |
| Printability | Excellent | Fair | Good (if coated) |
| Cost | $$ | $ | $$–$$$ |
2. Foam: Lightweight and Budget-Friendly
Foam koozies — often made from polyurethane — are extremely light and inexpensive. They’re easy to cut, come in vibrant colors, and are perfect for party favors or one-time events.
However, foam compresses and tears more easily, especially around the seams. If you plan to decorate with sublimation, foam’s low heat tolerance (often below 150°C) can cause warping. Use adhesive vinyl or fabric paint instead of high-temperature transfers.
3. Fabric or Canvas: The Eco-Chic Alternative
For eco-minded makers, cotton canvas or linen sleeves lined with thin foam or felt can offer a rustic, reusable charm. They’re machine-washable and biodegradable — though they don’t insulate as effectively as neoprene.
If you sell on Etsy, fabric koozies can appeal to sustainable shoppers who value craftsmanship over performance. For extra stability, add interfacing or a thin neoprene insert inside the fabric shell.
4. The Hybrid Approach
Many modern DIYers now mix materials — for example, a neoprene core laminated with printed canvas, combining performance with personalized aesthetics. This hybrid style mimics what professional factories like Szoneier produce for global brands.
Pro Tip:
For long-lasting seams, avoid very thin (under 2 mm) neoprene. It stretches unevenly and doesn’t insulate well. A 3.5 mm closed-cell neoprene is the sweet spot for home sewing and heat printing.
What Tools, Patterns, and Templates Do You Need to Start?
You don’t need industrial equipment to make your own koozie — just a few basic tools, a clean workspace, and some patience. The right setup helps you cut precisely, avoid glue mess, and get factory-quality edges at home.
To start making a koozie, you’ll need neoprene sheets (3–4 mm thick), a rotary cutter or sharp scissors, ruler, fabric glue or sewing machine, and a template for your chosen drink size. Use a cutting mat and clips to hold seams. Optional tools include a heat press for transfers and overlock scissors for edge finishing.
A well-organized workstation can be the difference between a fun craft and a frustrating mess. Let’s break down what truly matters when you begin your first project.
1. Basic Tools Checklist
| Tool | Purpose | Pro Tip |
|---|---|---|
| Rotary Cutter / Sharp Scissors | Clean, accurate cuts | Use 45 mm blades for curves |
| Cutting Mat | Protects surface | Mark ½-inch seam lines directly on mat |
| Ruler / Measuring Tape | Template alignment | Acrylic rulers resist glue buildup |
| Fabric Clips | Hold seams before gluing | Avoids holes from pins |
| Contact Fabric Glue | Joins neoprene edges | Choose flexible, waterproof formulas |
| Sewing Machine (optional) | Reinforces seams | Use heavy-duty needle #14–16 |
| Heat Press / Iron | Transfers logos or patterns | Maintain 180 °C for 40 s on neoprene |
| Template Sheet | Guides your cutting | Print or trace from a real can |
Quick Tip: Always test your glue on a small neoprene scrap first — some adhesives dissolve the rubber layer. A silicone-based or neoprene-specific contact cement works best for longevity.
2. Templates and Patterns
Start by printing a flat can sleeve template. You can find free downloadable PDFs online or trace a commercial koozie by carefully cutting along one seam to flatten it.
When using templates:
- Include ¼ inch seam allowance around edges.
- Mark the top/bottom orientation for printed designs.
- Label the template by can type (standard, slim, or bottle) so you don’t mix them up later.
For DIYers who enjoy digital crafting, software like Adobe Illustrator, Cricut Design Space, or Inkscape can generate accurate outlines for laser cutting or vinyl plotting.
3. Workspace Setup
Lay out a flat, dry area with bright lighting. Koozie assembly involves small tolerances — so visibility matters. If possible, use a heat-resistant silicone mat to prevent glue from sticking and to safely handle hot transfers.
Have a small bin for offcuts; neoprene scraps are reusable for making keychains, cable ties, or mini sleeves.
4. Optional Tools for Advanced Makers
If you plan to sell your koozies, a few upgrades can raise your quality:
- Laser Cutter: Perfect edges without scissors; clean seals prevent unraveling.
- Industrial Sewing Machine: Straight and zigzag options for thicker seams.
- Edge Binder Attachment: Adds binding tape quickly and evenly.
How Do You Cut, Join, and Finish the Koozie Cleanly?
Cutting and finishing determine how professional your koozie looks and how long it lasts. Even if you use the best neoprene, rough edges or weak seams can make it look amateurish.
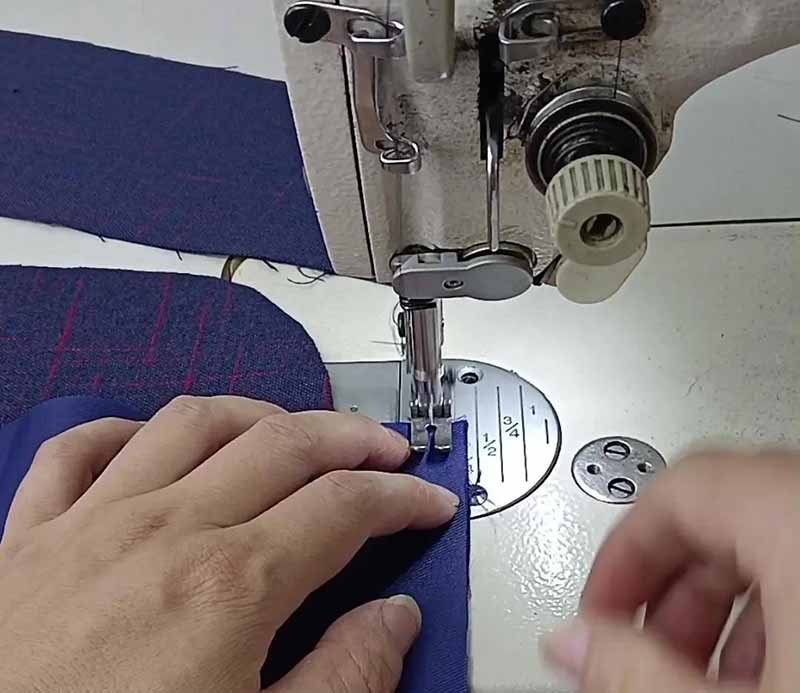
To make a clean, durable koozie, cut neoprene using a rotary cutter, align edges evenly, and join with contact glue or zigzag stitching. Press seams firmly for 1 minute, then let cure for at least 4 hours. Finish the top and bottom edges by heat-sealing, overlocking, or binding with fabric tape to prevent fraying and stretching.
1. Cutting with Precision
Accuracy is everything. Place your printed template on the neoprene sheet and trace lightly using a silver gel pen or tailor’s chalk (never ballpoint). Then cut along the line in smooth, continuous strokes — jagged edges weaken the seam.
- Rotary Cutter Technique: Hold the blade perpendicular; rotate the mat, not the cutter, around curves.
- Laser Cutting (optional): For makers with access to a small CO₂ laser, this method seals edges automatically, giving you a crisp, factory-grade outline.
If you plan to sublimate or print graphics, cut after decorating to maintain clean color borders.
2. Gluing and Seaming Options
There are two reliable methods: adhesive bonding and machine stitching.
A. Contact Cement (No-Sew Option)
- Apply a thin, even layer of neoprene-safe glue to both edges.
- Let it dry for 3–5 minutes until tacky.
- Press edges firmly together, holding for 60 seconds.
- Cure 4–6 hours before use.
This creates a waterproof, flexible joint. Ideal for hobbyists who don’t sew.
B. Stitching (Sewing Option)
Use a zigzag stitch about 3 mm wide to allow flexibility. For neoprene 3–4 mm thick, set your machine tension to medium-high and feed slowly to avoid skipped stitches. Use nylon or polyester thread for water resistance.
| Method | Durability | Waterproof | Skill Level |
|---|---|---|---|
| Contact Glue | High | Excellent | Beginner |
| Zigzag Stitch | Very High | Good | Intermediate |
| Overlock Stitch | Professional | Fair | Advanced |
If you combine glue with stitching, glue first — let it set — then sew just beside the bonded edge for perfect alignment.
3. Edge Finishing Techniques
Raw neoprene edges may look fine at first, but over time, friction and stretching cause them to fray or split. Here are the top finishing styles:
- Heat-Seal Edge: Quickly run a lighter or soldering iron along the edge for a micro-melt. Works on plain neoprene but avoid printed surfaces.
- Binding Tape: Fold ½-inch fabric tape over the edge and stitch with a narrow zigzag. This mimics commercial koozies.
- Overlock Edge: If you have a serger, use it for a decorative finish — great for multi-color threads.
Many DIY makers underestimate this step, yet it’s what visually separates a “handmade gift” from a “boutique product.”
4. Structural Reinforcements
Want your koozie to stand upright on a table? Add a 3 mm EVA disk or stiff neoprene ring to the base before sealing the bottom seam. This small upgrade gives stability and makes your sleeve feel like a store-bought item.
5. Troubleshooting Common Cutting & Seaming Issues
| Problem | Likely Cause | Fix |
|---|---|---|
| Uneven edges | Template shifted | Use masking tape or clips |
| Visible glue marks | Too much adhesive | Apply thin layer, wipe excess |
| Puckered seam | Tension too high | Reduce presser foot pressure |
| Weak joint | Insufficient curing | Allow longer drying time |
Maker’s Note: Always test a finished koozie in real conditions. Fill a can with ice water and check: is it snug, dry, and comfortable? If yes — you’ve achieved true craft-grade precision.
How Do You Add Graphics—Sublimation, Screen Print, or Heat Transfer?
Once your koozie is cut and assembled, the next big step is custom decoration — turning a plain sleeve into a personalized gift, brand promo, or small-batch product. The print method you choose depends on your material, color, and budget.
You can decorate koozies using sublimation, screen printing, or heat transfer vinyl. Sublimation works best on white polyester-coated neoprene, while screen printing suits dark colors. Heat transfer vinyl is perfect for small designs or names. Always test temperature and pressure — around 180 °C for 40 seconds — to avoid scorching or distortion.
1. Sublimation Printing (for Bright, All-Over Designs)
Sublimation uses heat and pressure to turn solid dye into gas, embedding it directly into polyester fibers. For DIYers, this is the most vibrant and durable print method — but only works on white or very light neoprene that has a polyester outer layer.
You’ll need:
- Sublimation printer (Epson EcoTank + sublimation ink)
- Heat press (flat type)
- Heat-resistant tape
- White neoprene blanks
Process:
- Print your mirrored design on sublimation paper.
- Align it face-down on the koozie blank.
- Secure edges with heat-resistant tape.
- Press at 180 °C for 40 seconds (medium pressure).
- Peel paper immediately for a vivid transfer.
Pro Tip: Let the neoprene cool flat under a book for 2–3 minutes to prevent curling.
| Parameter | Recommended Setting |
|---|---|
| Temperature | 180 °C / 356 °F |
| Time | 40 seconds |
| Pressure | Medium |
| Best for | White neoprene with polyester fabric surface |
| Cost per print | ~$0.20–$0.30 (home setup) |
Sublimation is ideal for Etsy shops or wedding favors, where each design can be unique — no screens, no setup fees.
2. Screen Printing (for Bold, Dark Surfaces)
If your koozies are black, navy, or colored, sublimation won’t show up well. Instead, use screen printing, which applies thick ink layers that sit on top of the surface.
You can buy small one-color screen kits for under $50 or use a local print shop for bulk runs.
Steps:
- Cut your stencil or photo emulsion screen.
- Position it on the flat koozie sheet.
- Apply plastisol or water-based ink evenly.
- Lift and let dry; cure at ~160 °C for 2–3 minutes.
Screen printing excels for logos, slogans, or minimalist designs. It also allows metallic or puff inks that give texture — something sublimation can’t achieve.
3. Heat Transfer Vinyl (HTV) — Great for Names & Small Runs
Heat transfer vinyl is perfect if you don’t want to invest in printers or screens. You cut shapes from colored vinyl sheets using a Cricut or Silhouette machine, then press them onto your koozie.
Process Summary:
- Cut mirrored design on HTV sheet.
- Weed out excess vinyl.
- Place design on koozie.
- Heat press at 150–160 °C for 15–20 seconds.
- Peel warm for best adhesion.
HTV is durable, flexible, and washable. Use stretch vinyl for neoprene to prevent cracking. It’s also ideal for personalization — think initials, wedding dates, or team names.
| Print Type | Best Material | Durability | Color Range | Skill Level |
|---|---|---|---|---|
| Sublimation | White neoprene | Excellent | Unlimited | Intermediate |
| Screen Print | Dark neoprene | High | Moderate | Advanced |
| Heat Transfer Vinyl | All colors | Very High | Wide | Beginner |
4. Hand Painting or Fabric Markers (Creative Option)
If you’re making koozies for kids or parties, fabric paints or permanent markers are fun and mess-free. Choose flexible, water-based paints that won’t crack when neoprene stretches. Seal with a light mist of fabric protector spray for longevity.
Creative Hack: Use masking tape to block patterns before painting — it creates neat stripes or geometric effects with zero printing tools.
5. Avoiding Printing Mistakes
Always test on a scrap first. Neoprene melts easily at high heat, and once scorched, it can’t be repaired. Keep your press clean — ink buildup can stain white surfaces.
For screen printers, pre-wash neoprene to remove any factory residue that might repel ink.
Remember: the print should stretch with the fabric. If it cracks when you squeeze the koozie, your temperature or pressure was too high.
What Common Mistakes Should You Avoid?
Even experienced makers hit snags when crafting koozies. Fortunately, most problems come down to a few avoidable errors in cutting, gluing, or heating.
Common DIY koozie mistakes include using the wrong neoprene thickness, cutting without seam allowance, overheating during sublimation, and overusing glue that seeps through edges. Always measure twice, test print temperatures, and let adhesives cure fully to prevent curling or cracking.
1. Material and Fit Issues
| Problem | Why It Happens | How to Fix It |
|---|---|---|
| Koozie too loose | Wrong template or thin neoprene | Reduce width by ¼ inch |
| Koozie too tight | Over-thick material or small seam | Adjust template +0.3 inch |
| Wrinkled sides | Uneven glue or tension | Use clips; don’t stretch fabric |
| Edges curl | Overheated or unbalanced layers | Cool flat under weight |
The rule of thumb: cut smaller, test, then scale up. Once glued or sewn, neoprene doesn’t stretch much further.
2. Glue and Adhesion Mistakes
One of the biggest frustrations among beginners is glue seeping or peeling. Here’s how to fix it:
- Too much glue: Apply a thin, even coat on both sides; wait until tacky before pressing.
- Weak bond: Increase curing time — many adhesives need 12 hours to fully set.
- Stiff seam: Use flexible neoprene cement instead of super glue; it bends without cracking.
- Odor issue: Work in a ventilated space or choose low-VOC adhesives.
If you plan to sell or gift your koozies, never rush drying — factory-standard curing time is 24 hours, even for high-speed production.
3. Heat & Printing Errors
Sublimation and heat transfers are heat-sensitive by nature.
- Overheating (above 190 °C): Causes bubbling, yellowing, or shrinkage.
- Underheating: Leads to faded prints.
- Uneven pressure: Creates ghosting or blurred edges.
Solution:
Keep a heat press logbook — note your time, temperature, and pressure for each batch. Once you find a perfect formula, repeat it every time. That’s how Szoneier maintains consistency across thousands of OEM prints.
4. Finishing and Durability Oversights
Sometimes, makers skip final sealing or edge trimming — the very details that define a “premium” finish.
Avoid these pitfalls:
- Not cleaning edges after trimming → visible glue streaks.
- Forgetting to seal cut neoprene → moisture absorption over time.
- Skipping reinforcement on bottom → early tear with use.
A 5-minute polish can extend product life by 3×.
Rub a drop of clear fabric glue along inside seams — it dries transparent and acts as invisible reinforcement.
5. Aesthetic and Branding Mistakes
Even the most technically sound koozie can look dull without thoughtful design.
Avoid over-cluttering prints; choose 2–3 main colors for visual balance. For personal gifts, match font tones with the drink occasion (e.g., tropical brights for beach, metallic gold for weddings).
If you’re building a small brand, consistency matters more than variety. Use one logo placement and background pattern to establish recognition.
How Do You Test, Care, and Price Your DIY Koozies?
Once your koozies look polished and printed, the final stage is validation — checking whether they perform as expected. A little testing and smart pricing turn hobby projects into reliable, sellable products.
Test your DIY koozie by timing how long it keeps a chilled drink cold (aim for 30–40 minutes) and ensuring seams stay dry. Care by hand-washing in cool water and air-drying flat. To price koozies, add your material and labor costs and include a 30–50 percent margin for profit if selling online or at events.
1. Testing Thermal Performance
A good koozie isn’t just cute — it works.
To check insulation efficiency:
- Fill a can with ice water (4 °C) and measure temperature every 10 minutes without the koozie.
- Repeat with your koozie on.
- Compare results.
| Condition | No Koozie | Neoprene Koozie (3 mm) | Foam Koozie (2 mm) |
|---|---|---|---|
| Start (4 °C) | 0 min | 0 min | 0 min |
| After 30 min | 12 °C | 7 °C | 9 °C |
| After 60 min | 18 °C | 10 °C | 13 °C |
Neoprene retains cold about 40 percent longer than foam and over 60 percent longer than bare metal — proving why it’s the preferred choice for makers and brands alike.
Also check for:
- Condensation resistance — is the outside dry?
- Grip comfort — does the koozie slip when wet?
- Structural integrity — do seams or edges shift after 5 minutes of use?
A factory like Szoneier runs the same tests under controlled conditions before mass production — you can mirror their discipline at home on a smaller scale.
2. Cleaning and Maintenance
Handmade koozies deserve gentle care to extend their life.
- Hand-wash only. Use cool water (under 30 °C) with a drop of mild detergent. Avoid bleach or alcohol-based cleaners.
- No dryer. Air-dry flat to preserve shape and print integrity.
- Avoid folding when wet — it can cause permanent crease lines in foam or printed surfaces.
- Spot clean only for sublimated graphics. Scrubbing can fade color if too aggressive.
For business sellers, attach a small care-instruction card to each koozie. This tiny detail signals professionalism and reduces post-sale returns.
3. Durability and Usability Checks
Before selling or gifting, run a quick five-point inspection on each koozie:
| Checkpoint | Pass Criteria |
|---|---|
| Edge seam | Even, no gaps or stiff spots |
| Print alignment | Centered within ±2 mm |
| Elastic return | Stretches and recovers 3× without deformation |
| Surface cleanliness | No dust, glue residue, or fingerprints |
| Fit test | Slides onto can with slight resistance |
4. Pricing Your DIY Koozies
Pricing is part math, part strategy. Below is a typical cost breakdown for a single DIY neoprene koozie made at home in 2025 (USD estimates):
| Item | Unit Cost | Notes |
|---|---|---|
| 3 mm Neoprene Sheet (12″ × 12″) | $0.80 | Enough for 1–2 koozies |
| Fabric Glue / Thread | $0.10 | Per piece usage |
| Heat Transfer / Print Ink | $0.20 | Small batch estimate |
| Electricity + Consumables | $0.05 | Heat press / machine use |
| Packaging (Bag + Label) | $0.15 | Optional |
| Total Cost per Unit | ≈ $1.30 | — |
To determine a fair retail price:
Selling Price = Material Cost × Markup + Labor Cost
Example: $1.30 × 2.5 + $0.70 ≈ $4.00–$5.00 per koozie.
That range is competitive on Etsy and craft fairs while still yielding a reasonable margin. As volume grows, buy neoprene rolls in bulk from manufacturers like Szoneier to cut your cost per unit below $0.80 — instantly boosting profits.
| Batch Size | Cost per Unit (approx.) | Suggested Retail Price |
|---|---|---|
| 1–20 pcs (DIY) | $1.30 | $4–5 |
| 50–200 pcs (small shop) | $0.95 | $3.5–4 |
| 500+ pcs (wholesale via Szoneier) | $0.55–0.70 | Custom quote |
Maker Insight: Include custom packaging (like kraft tags or ribbon wraps) to justify a higher price point. A $0.10 visual upgrade can add $1 to your selling price when presented professionally online.
5. Turning Hobby into Micro-Business
If friends start asking for your koozies, you’re already testing a market. Take these small steps to scale safely:
- Create a brand name and logo. Use consistent colors across tags and Instagram.
- Track costs and inventory using a simple spreadsheet.
- Bundle sales (sets of 4 or 6) to raise average order value.
- Partner with a factory for custom-printed bulk orders once you hit 100 units a month.
That’s where Szoneier becomes your bridge from craft table to global supply chain. We can replicate your designs at OEM scale while maintaining the handcrafted look your customers already love.
Conclusion — From Handmade to High-Quality: Craft Your Future with Szoneier
You’ve now mastered every step of making a professional-grade koozie — from measuring templates to cutting, printing, and finishing. What begins as a simple DIY craft can easily grow into a profitable side business or even a boutique brand. The key is precision, patience, and the right materials.
Neoprene remains the heart of the koozie world — versatile, waterproof, and incredibly resilient. When sourced from a trusted manufacturer like Szoneier, you gain access to industrial-grade rolls, custom printing, and seam techniques used by leading outdoor and beverage brands worldwide.
At Szoneier, we’ve spent over 18 years perfecting neoprene innovation — from eco-friendly rubber formulas to high-definition sublimation and precise laser cutting. Whether you want 10 DIY sheets for crafting or 10 000 units for your own label, our team can help you source materials, design patterns, and scale without compromising quality.
Ready to take your DIY passion to the next level?
Contact Szoneier today for free samples, custom quotes, and expert advice on professional-grade neoprene production.