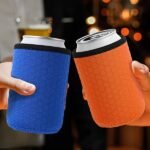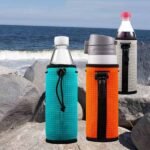
Neoprene — the versatile synthetic rubber used in wetsuits, laptop sleeves, camera cases, and custom industrial gear — is known for its durability, flexibility, and resistance to water and temperature changes. But gluing neoprene isn’t as simple as grabbing a bottle of general-purpose adhesive. The wrong glue or poor surface preparation can result in weak bonds, stiff seams, or quick failures when the item is under stress or exposed to moisture.
To glue neoprene effectively, you need the right adhesive type, thorough surface preparation, and correct application technique to create a flexible, waterproof, and long-lasting bond. Contact cement or neoprene-specific adhesives are generally the best choice, paired with proper curing time and pressure.
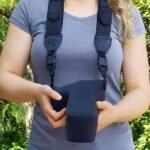
This isn’t just about “sticking two pieces together” — it’s about understanding neoprene’s closed-cell structure, its chemical resistance, and how adhesives interact with it under real-world conditions. Imagine repairing a wetsuit seam before a deep dive, or assembling custom neoprene tool covers for an industrial client — your glue job could be the difference between flawless performance and total failure.
So let’s break down the what, which, how, and do’s & don’ts of gluing neoprene — with step-by-step methods, pro tips, and common mistakes to avoid — so you can achieve professional-grade results every time.
What Is Neoprene and Why Does It Require Special Adhesives?

Neoprene is a synthetic rubber (polychloroprene) with a closed-cell foam structure, making it water-resistant, flexible, and durable. Standard glues often fail because they can’t penetrate its surface or remain flexible after curing. Special neoprene adhesives or contact cements are formulated to bond securely while maintaining elasticity and water resistance.
Neoprene, first developed by DuPont in the 1930s, is prized for its resistance to oils, solvents, and environmental conditions. Its structure contains millions of tiny sealed air cells, giving it buoyancy, insulation, and compressive flexibility.
These same benefits create bonding challenges:
- Low surface energy — Adhesives have a harder time wetting the material.
- Chemical resistance — Neoprene resists penetration by many solvents and adhesives.
- Elasticity — Bonds must stretch without cracking or delaminating.
Unlike porous materials like fabric or leather, neoprene’s closed-cell nature means that adhesives rely on surface bonding and chemical compatibility rather than absorption. Using a generic glue like PVA (wood glue) or basic superglue leads to brittle seams that fail under flexing.
Professional neoprene bonding typically uses:
- Contact cement — Bonds instantly under pressure, flexible after curing.
- Solvent-based neoprene adhesives — Engineered to soften the surface slightly for better bonding.
- Two-part polyurethane adhesives — For high-stress, industrial applications.
The right adhesive ensures that the glued joint matches neoprene’s physical properties — not just in strength, but in flexibility and waterproofing.
Which Types of Glue Work Best for Neoprene Projects?
The best glues for neoprene are solvent-based contact cements, neoprene-specific adhesives, and two-part polyurethane glues. These options cure to form flexible, waterproof bonds that resist temperature changes and repeated flexing, making them ideal for wetsuit repairs, sports gear, and industrial neoprene products.
Choosing the wrong glue is the number one reason neoprene bonds fail. Here’s a performance comparison of common adhesive types:
| Adhesive Type | Flexibility After Cure | Waterproof | Bond Strength | Best For | Example Products |
|---|---|---|---|---|---|
| Contact Cement | High | Yes | Very Strong | Wetsuits, covers | Barge All-Purpose, DAP Weldwood |
| Neoprene-Specific Adhesive | Very High | Yes | Strong | Seams, patches | Aquaseal+NEO, Black Witch |
| Two-Part Polyurethane | High | Yes | Very Strong | Industrial, load-bearing | 3M Scotch-Weld DP8010 |
| Super Glue (CA) | Low | No | Weak | Small rigid spots only | Loctite Ultra Gel |
| Epoxy | Low-Med | Partial | Strong but brittle | Rigid reinforcement | West System G/flex |
Key Takeaways:
- For general repairs, go with neoprene cement or contact cement.
- For structural applications, two-part polyurethane adhesives work best.
- Avoid brittle adhesives unless bonding to rigid inserts.
If you’re a manufacturer like Szoneier, adhesive choice also depends on production scale — solvent-based contact cements offer speed, while two-part systems suit heavy-duty items.
How Do You Prepare Neoprene Surfaces for Gluing?
Preparation is crucial for strong neoprene bonds: clean surfaces with mild solvent, lightly roughen with fine sandpaper, and ensure they’re completely dry. This increases surface area, removes contaminants, and improves adhesive penetration.
Even the strongest glue can’t bond through dirt, oils, or silicone residue. Neoprene often comes with manufacturing lubricants, talc, or waxy mold-release agents that must be removed.
Surface Prep Steps:
- Clean — Use isopropyl alcohol (90%+) or acetone sparingly. Avoid soaking, which can damage foam.
- Dry — Let evaporate completely; moisture can weaken adhesive.
- Roughen — Lightly sand with 120–220 grit paper to create micro-anchoring points.
- Dust Removal — Use a lint-free cloth or compressed air.
Why Roughening Helps:
A smooth neoprene surface limits mechanical grip. Micro-abrasion increases surface energy and gives adhesives more to “bite” into, especially important for solvent-based glues.
Pro Tip:
When working with pre-printed or coated neoprene, test a hidden area — coatings can alter bonding properties, and you may need to remove or abrade them for best results.
What Is the Correct Process for Gluing Neoprene for a Durable Bond?
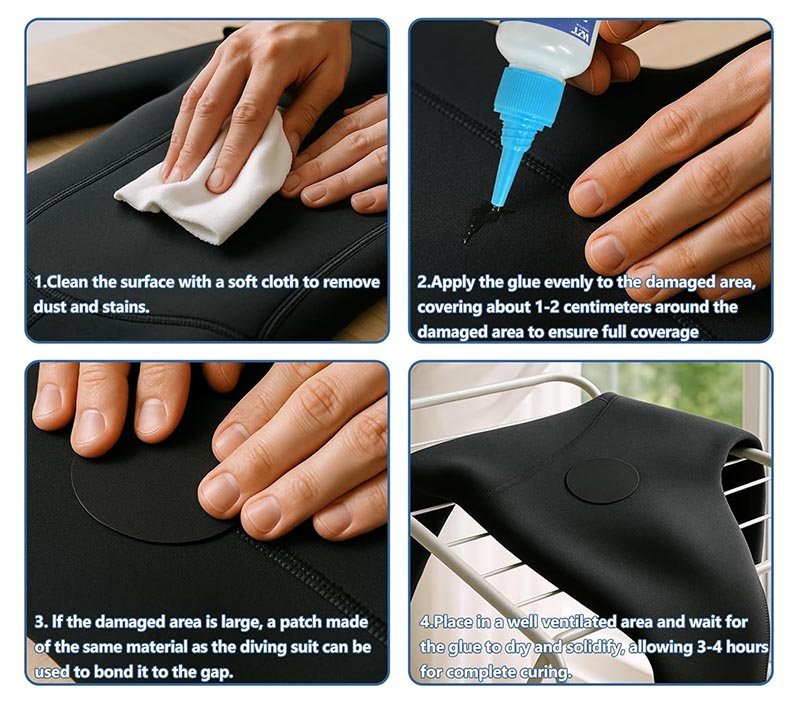
To glue neoprene for a durable bond, prepare both surfaces by cleaning and lightly roughening them, then apply a thin, even coat of adhesive to each side. Allow the glue to become tacky (typically 5–15 minutes), press the pieces together firmly, and apply even pressure for several minutes. Let the bond cure fully—usually 24 hours—before use to ensure maximum flexibility and strength.
The bonding process for neoprene requires precision, patience, and the right environment to ensure a seam that is both strong and flexible. While neoprene is durable, its closed-cell rubber structure doesn’t absorb adhesives like fabrics do, so the process relies heavily on surface activation and pressure.
Step-by-Step Professional Method
- Surface Preparation
- Clean the neoprene with 90%+ isopropyl alcohol or acetone applied sparingly.
- Lightly roughen the bonding area using 120–220 grit sandpaper to improve mechanical grip.
- Remove dust with a lint-free cloth.
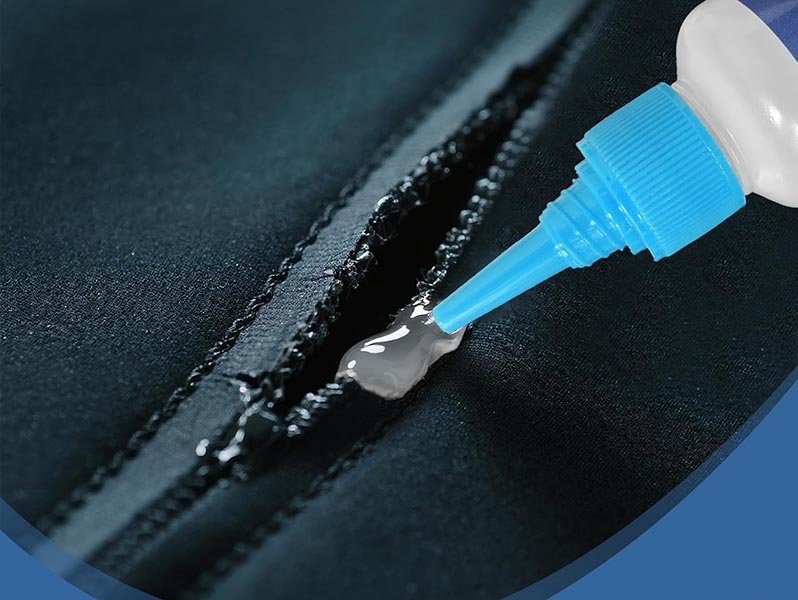
- Adhesive Application
- Apply a thin, even layer of neoprene cement or contact cement to both surfaces.
- Avoid heavy coats—thick glue layers trap solvents and lead to weak spots.
- If working in a high-humidity environment, dehumidify the workspace first.
- Tack Time
- Allow adhesive to set for 5–15 minutes until it feels dry but tacky.
- This step lets solvents evaporate, improving bond quality.
- In industrial settings, heat-activation (40–60°C) before joining increases initial bond strength by up to 20%.
- Joining the Pieces
- Carefully align surfaces—contact cements bond instantly upon touch, so there’s no room for repositioning.
- Press together firmly, starting from one edge to avoid trapping air pockets.
- Pressure Application
- Use a seam roller for even pressure on flat joints.
- For curved surfaces, use padded clamps or elastic bands to maintain uniform compression.
- Maintain pressure for 2–5 minutes.
- Curing
- Light handling is possible after 1–2 hours.
- Full bond strength is achieved after 24 hours.
- Keep away from stress, moisture, and temperature extremes during curing.
Pro Manufacturing Insight from Szoneier
In high-volume neoprene production, we standardize adhesive open times with batch timers and use pneumatic rollers for consistency. This ensures every seam, whether for a wetsuit, laptop sleeve, or industrial gasket, meets the same durability standards—critical for OEM/ODM clients demanding repeatable quality.
Do You Need to Use Heat or Clamps When Gluing Neoprene?
While not always essential, applying heat or clamps can improve neoprene bonds. Heat activation reactivates solvent adhesives for stronger initial grip, while clamps or rollers ensure even pressure and eliminate air gaps.
Heat and pressure are force multipliers in adhesive bonding.
Heat:
- When Used: With heat-activated contact cements or when re-bonding old adhesive layers.
- Benefits: Improves adhesive flow, increases penetration into neoprene cells, speeds curing.
Clamping/Rolling:
- Purpose: Ensures uniform adhesive contact across the seam.
- Method: Soft-faced clamps prevent indenting foam; rollers are ideal for flat seams.
For large industrial neoprene panels, Szoneier uses pneumatic rollers for consistent pressure — faster and more uniform than manual clamping.
What Common Mistakes Should You Avoid When Gluing Neoprene?
Avoid using the wrong adhesive, skipping surface prep, over-applying glue, bonding in humid conditions, or moving the joint before curing. These errors cause weak, brittle, or uneven bonds.
Top 5 Mistakes:
- Wrong Adhesive Choice — Leads to brittleness or peeling.
- Poor Prep — Oils, dust, or mold-release agents can block adhesion.
- Too Much Glue — Creates lumps and weak spots.
- Humidity & Temperature Neglect — Moisture can react with solvents, creating bubbles.
- Premature Stress — Using the item before full cure reduces bond life by up to 50%.
Pro Tip:
Track curing times in production with a batch timer — consistency is key for large orders.
How Do You Maintain and Repair Glued Neoprene Items Over Time?
Keep neoprene clean, dry after use, and avoid prolonged UV exposure. For repairs, re-clean and abrade the old bond area before reapplying adhesive for the strongest fix.
Dive Deeper
Neoprene bonds can last for years with proper care:
- Rinse after exposure to saltwater, chlorine, or chemicals.
- Dry flat away from direct sunlight to prevent UV degradation.
- Inspect seams periodically; early intervention is easier than major repairs.
For repairs, removing old adhesive residues and lightly sanding ensures the new glue layer bonds directly to neoprene, not degraded glue.
Conclusion
Whether you’re fixing a wetsuit seam, crafting custom neoprene bags, or assembling industrial neoprene covers, mastering the art of gluing neoprene ensures your products last longer, perform better, and keep customers satisfied.
At Szoneier, we’ve spent over 18 years perfecting neoprene product manufacturing — from selecting the best adhesives to ensuring flawless seams at scale. Our expertise means your custom, private-label, or OEM neoprene products are built to the highest standards, with rapid prototyping, low MOQs, and 100% quality assurance.