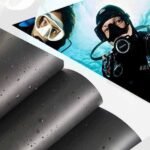
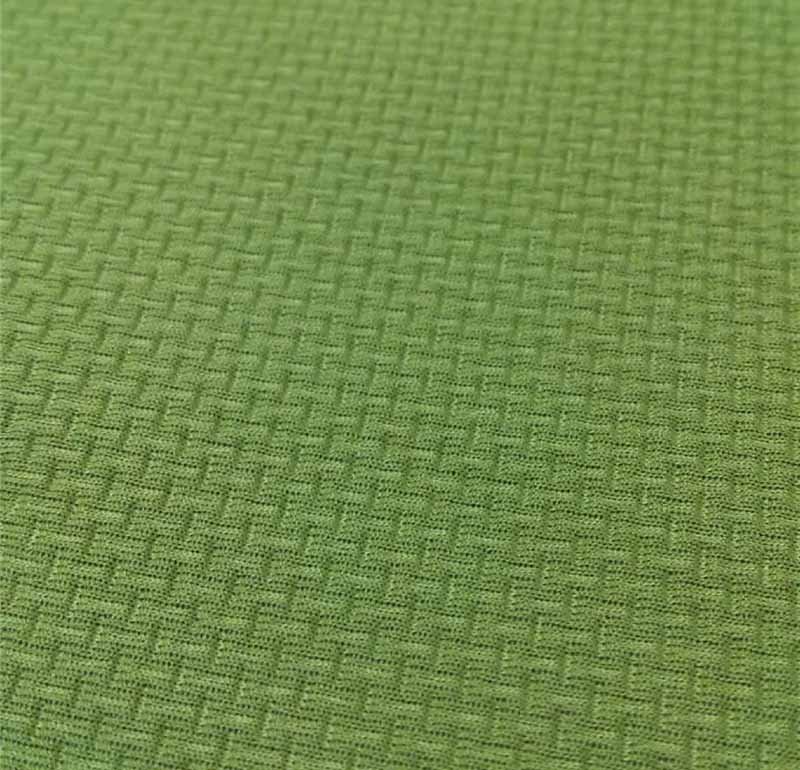
Embossing neoprene transforms a plain, functional material into a tactile branding canvas that stands out—whether you’re crafting sleek neoprene bags or high-performance wetsuits. This simple surface finish can elevate your product by adding depth, texture, and visual interest, all while maintaining neoprene’s inherent flexibility and water resistance. Emboss patterns range from subtle geometric repeats to bold custom logos, making embossing a go-to customization for sportswear brands, promotional items, and luxury accessories alike.
To emboss neoprene, first clean and pre-heat the material. Position an engraved metal plate (made of brass or aluminum) onto the neoprene surface, then apply calibrated heat (120–160 °C), pressure (2–5 MPa), and dwell time (10–25 seconds) via a hydraulic or vacuum press. Allow the embossed area to cool under light pressure before releasing. This process yields crisp, durable textures without compromising neoprene’s stretch or waterproof qualities.
Imagine unveiling a neoprene koozie that bears your client’s logo in elegant relief—instantly turning a giveaway into a premium keepsake. Ready to dive into the “how”? Let’s explore the techniques that make embossing on neoprene a game-changer.
What Is Neoprene Embossing and Why Use It?
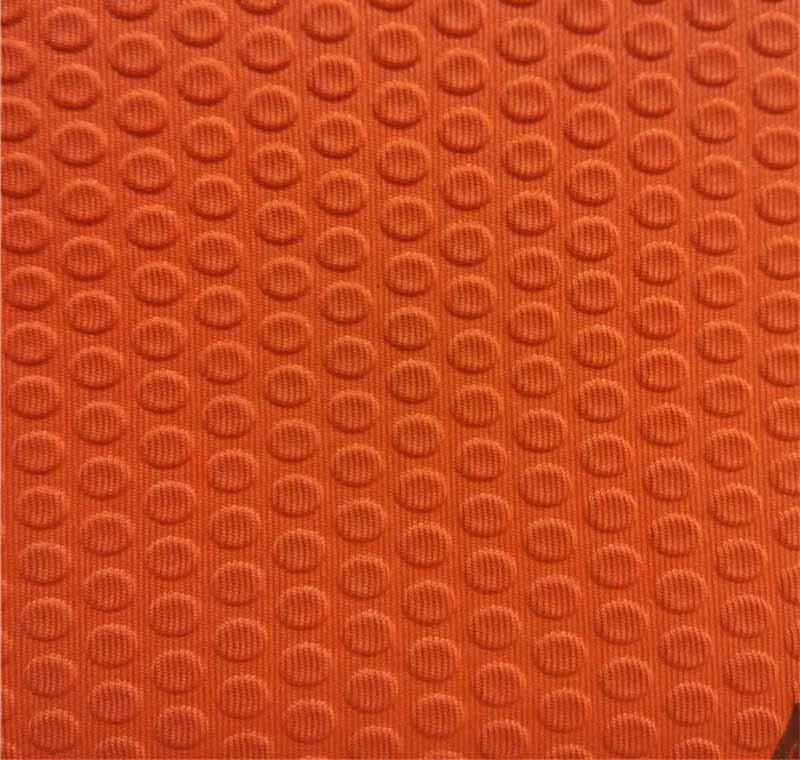
Neoprene embossing presses raised or recessed designs into the surface, adding texture and depth. Brands use embossing to highlight logos, pattern fabrics, and differentiate products. It enhances perceived value, improves grip on gear like gloves and phone covers, and offers a clean, durable finish resistant to wear and washing.
Embossing is the process of creating three-dimensional designs on neoprene by applying controlled heat and pressure. Unlike printing or silicone patches, embossing integrates the design directly into the material, ensuring long-lasting results. Here’s why embossing stands out:
Material Compatibility
Neoprene’s closed-cell structure responds well to embossing because it softens under heat without melting. This unique behavior preserves the material’s elasticity and waterproof barrier. Lower temperatures (120–140 °C) yield subtle impressions, while higher settings (140–160 °C) create deeper, more pronounced textures.
Branding Impact
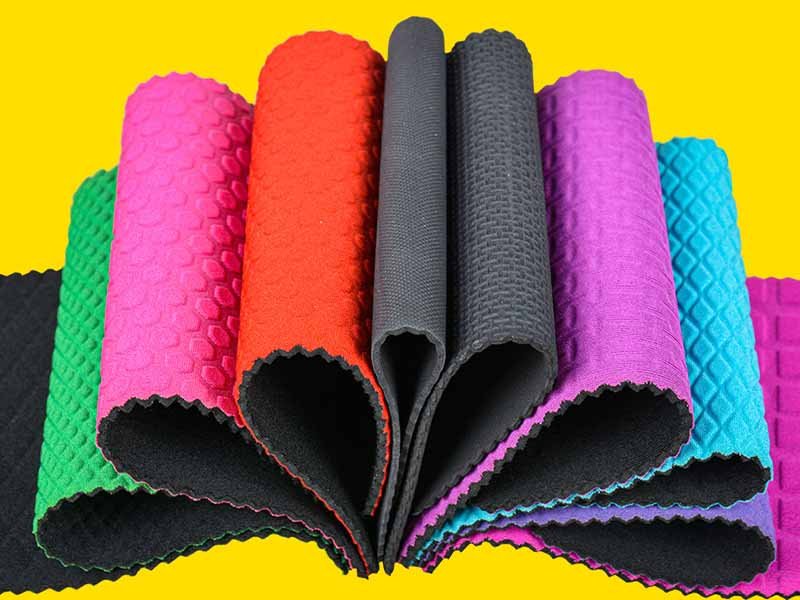
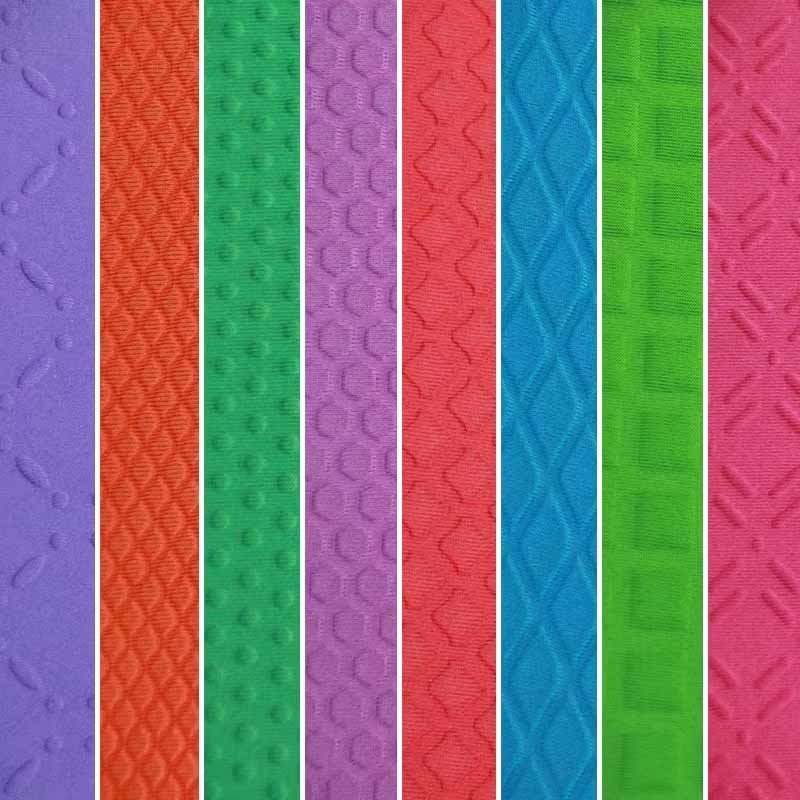
- Visual Depth: Embossed logos catch light differently than flat prints, drawing the eye.
- Tactile Appeal: Raised designs provide a premium feel—customers notice the difference on products like neoprene bags and key fobs.
- Durability: Unlike screen prints or transfers that wear off, embossing remains intact through flexing, washing, and repeated use.
Applications & Examples
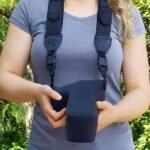
- Neoprene Bags & Cases: Embossing offers a lightweight alternative to heavy metal hardware logos.
- Wetsuit Panels: Texture improves grip for knee pads and chest areas, enhancing performance.
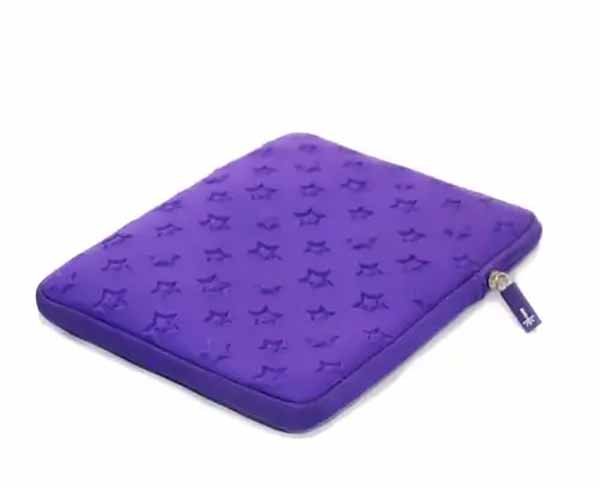
- Protective Covers: On laptop sleeves or phone pouches, embossed patterns provide extra cushioning.
Cost vs. Benefit
- Setup Costs: Die and plate fabrication ranges $100–300 per design.
- Unit Economics: Once plates are made, per-unit emboss costs drop below $0.30 for volumes over 1,000 pieces.
- MOQ Considerations: Szoneier supports low MOQs (200 units) to help brands test emboss styles before larger runs.
By understanding the what and why of neoprene embossing, you can decide whether it fits your product strategy and budget. Next, let’s compare the embossing methods available.
Which Embossing Techniques Work Best on Neoprene?
Heat embossing, rotary embossing, and vacuum-press embossing each suit neoprene: heat embossing uses flat plates and a hydraulic press for precise, shallow patterns; rotary embossing runs neoprene through heated rollers for continuous designs; vacuum presses deliver even pressure for thicker materials. Choice depends on design complexity, production volume, and material thickness.
Heat Plate Embossing
- Process: A flat, engraved metal plate is heated and pressed onto neoprene in a hydraulic or pneumatic press.
- Advantages:
- Precise pressure and temperature control → consistent depth.
- Ideal for batch runs up to 5,000 units.
- Limitations:
- Not suited for continuous patterns longer than plate length (max ~300 mm).
- Setup time for plate alignment.
Rotary Embossing
- Process: Neoprene sheet passes between heated, engraved rollers under tension.
- Advantages:
- Continuous pattern capability → ideal for long straps or webbing.
- Higher throughput (meter-per-minute output).
- Limitations:
- Less control over dwell time; deeper emboss may require multiple passes.
- Roller wear can degrade pattern sharpness over time.
Vacuum Press Embossing
- Process: Neoprene is placed over an embossed mold, and air is evacuated to press material into cavities. Heat may be applied via an oven or heated platen.
- Advantages:
- Uniform pressure distribution → excellent for thick items (5–7 mm neoprene).
- Reduced risk of localized scorching.
- Limitations:
- Equipment cost is higher; batch sizes more limited (max ~200 units per cycle).
- Longer cycle times (30–60 s) vs. heat press (10–20 s).
Comparative Data Table
| Technique | Ideal Thickness | Throughput | Pattern Length | Setup Cost |
|---|---|---|---|---|
| Heat Plate Press | 1–3 mm | 500–1,000 units/day | ≤300 mm per plate | $150–300/plate |
| Rotary Embossing | 0.5–2 mm | 100 m/hr | Continuous | $500–800/roller |
| Vacuum Press | 3–7 mm | 200 units/hr | Mold dimensions | $1,000–1,500/mold |
Selecting the Right Method
- Small SKUs & Complex Logos: Heat plate embossing offers the best precision for intricate shapes like detailed typography or fine lines.
- Long Runs & Straps: Rotary embossing excels for webbing, belts, or continuous edge trims.
- Thick Wetsuit Panels: Vacuum press avoids over-compression of thick panels, preserving neoprene’s insulation properties.
By matching technique to your neoprene thickness and volume needs, you’ll optimize both quality and cost. Up next: preparing your neoprene for the perfect imprint.
How Do You Prepare Neoprene for a Clean Emboss?
Preparation involves cleaning the neoprene surface of dust, oils, and mold-release residues, securing it onto a flat backing board or platen to prevent slippage, and pre-heating both the material and embossing plate to the target temperature. Proper alignment and a consistent workspace ensure crisp, defect-free embossing.
Surface Cleaning & Inspection
- Dust & Debris Removal: Use compressed air or a lint-free cloth to wipe away particles that can interrupt emboss detail.
- Oil & Release Agent: If neoprene sheets arrive with factory release coats, wipe lightly with isopropyl alcohol (70% solution) and let fully evaporate.
- Visual Check: Inspect for surface imperfections—voids, scratches, or curing blemishes—that could cause uneven emboss results.
Backing Support & Fixturing
- Flat Platen: Use a steel or aluminum platen machined flat within 0.05 mm tolerance. Secure neoprene with low-tack thermal tape at edges, avoiding the emboss area.
- Thick Boards for Vacuum: In vacuum-press setups, place neoprene atop an embossed negative mounted on a porous platen; vacuum draws the material into the mold cavities.
Material Conditioning
- Pre-Heat Cycle: Warm neoprene at emboss temperature (e.g., 140 °C) for 30–60 seconds without pressure. This relaxes internal stresses and primes the surface.
- Ambient Control: Keep room humidity below 60% to prevent moisture condensation on heated surfaces.
Plate & Mold Prep
- Degreasing: Clean embossing plates with a mild solvent, then buff gently.
- Release Spray (Optional): Light application of high-temp release spray can reduce sticking on complex designs, though it may slightly soften the finish.
Registration & Alignment
- Fixture Guides: Engrave alignment marks or use mechanical stops on the press bed to ensure each piece registers in the same spot.
- Test Runs: Perform a “dry hit” on sacrificial neoprene scraps at full temp/pressure to confirm even contact and pattern clarity before embossing production parts.
By meticulously preparing both the neoprene and your tooling, you’ll minimize rejects and rework—saving time and material costs.
What Equipment and Tools Are Required for Neoprene Embossing?
Essential equipment includes a heated embossing press (hydraulic, pneumatic, or vacuum), metal embossing plates or engraved rollers, precise temperature controllers, backing platens or fixtures, and safety gear (heat-resistant gloves, eyewear). Optional appliances like mold-release sprayers and post-press cooling stations enhance workflow and quality.
Embossing Press Types
- Hydraulic Press: Delivers consistent, high pressure (2–5 MPa) for heat-plate embossing. Ideal for batch runs up to 5 mm thickness.
- Pneumatic Press: Faster cycle times, moderate pressure; suitable for thinner neoprene (≤3 mm).
- Vacuum Press: Uses uniform negative pressure to press neoprene into molds—best for thick panels and uneven shapes.
Embossing Plates & Rollers
- Materials: Brass plates hold fine details; aluminum plates are lighter and heat up faster but wear sooner. Brass rollers offer continuous emboss options, while steel-core rollers add durability.
- Engraving Methods: CNC milling for deep, sharp patterns; chemical etching for smoother transitions and fine textures.
Temperature Controllers & Sensors
- PID Controllers: Maintain ±2 °C accuracy; monitor both platen and plate temperatures.
- Thermocouples: Embedded in both top and bottom plates to ensure uniform heat distribution.
Fixtures & Jigs
- Registration Frames: Custom frames hold neoprene pieces in place for multi-panel embossing.
- Cutting Dies: Trim embossed panels to final shape in one step using die-cut machines.
Ancillary Tools
- Mold-Release Spray: High-temp silicone sprays mitigate sticking for complex designs.
- Post-Press Cooling Station: Light pressure cooling racks prevent pattern distortion as neoprene cools.
Safety Equipment
- Heat-Resistant Gloves & Aprons: Protect operators from burns during handling.
- Ventilation Systems: Remove fumes from heated neoprene and release agents.
Workflow Optimization
- Batch vs. Inline: For high volumes, integrate embossing inline with calendering and cutting; for smaller runs, use standalone presses with quick-change tooling.
Investing in the right press and tooling pays dividends via consistent emboss quality and reduced downtime. Next, let’s examine how processing variables influence the final result.
How Do Temperature, Pressure, and Dwell Time Influence Results?
Emboss clarity depends on balancing heat (120–160 °C), pressure (2–5 MPa), and dwell time (10–25 s). Too low temp or pressure yields shallow, faint patterns; too high causes scorching or material collapse. Optimal settings vary by neoprene thickness and formulation—trial runs fine-tune the perfect emboss profile.
Temperature Effects
- Low (≤120 °C): Neoprene remains rigid; emboss impressions may be incomplete.
- Optimal (130–150 °C): Neoprene softens just enough to flow into plate cavities without melting; delivers crisp edges.
- High (≥160 °C): Material may char or develop gloss, altering color and compromising elasticity.
Pressure Variables
- Under-Pressure (<2 MPa): Fails to fully engage pattern; small details lost.
- Optimal (3–4 MPa): Uniform depth across the design, preserving both fine lines and broader areas.
- Over-Pressure (>5 MPa): Can fracture foam cells, causing visible compression lines and stiffness in embossed zones.
Dwell Time Considerations
- Short (<10 s): Patterns shallow, especially on thicker neoprene.
- Ideal (10–20 s): Balances speed with full cavity fill.
- Extended (>25 s): Risk of thermal degradation and reduced rebound of foam cells, leading to permanent compression.
Testing & Optimization Protocol
- Design of Experiments (DOE): Systematically vary two parameters at a time while holding the third constant—map response surface for depth vs. clarity.
- Sampling: Use 50 × 50 mm test coupons; measure embossed depth with a digital micrometer (0.01 mm resolution).
Troubleshooting Common Defects
- Shallow Emboss: Increase temperature by 5 °C or pressure by 0.5 MPa; check platen flatness.
- Scorch Marks: Lower temperature by 5–10 °C and decrease dwell time by 2 s; confirm release spray coverage.
- Uneven Depth: Inspect platen parallelism and adjust press alignment.
Data-Driven Quality Control
| Issue | Potential Cause | Corrective Action |
|---|---|---|
| Faint Details | Low temperature/pressure | Increase temp 5 °C / pressure 0.5 MPa |
| Glossy Surface | Over-heating | Lower temperature 5–10 °C |
| Depressed Shores | Excess dwell time | Reduce time by 2–5 s |
| Pattern Inconsistency | Misalignment | Re-fixture and re-register |
By controlling these three pillars—temperature, pressure, and time—you’ll achieve consistent emboss quality across production batches.
Are There Post-Embossing Finishing Steps to Enhance Durability?
Yes—apply liquid sealants or clear polyurethane coatings to protect raised edges, trim excess flash, and heat-set the embossed area. These steps lock in texture, resist abrasion, and extend product lifespan, especially on high-wear items like gloves or wet-suit knee pads.
Edge Trimming & Flash Removal
- Manual Trimming: Use sharp blades or rotary cutters to remove stray neoprene flash around embossed areas.
- Die-Cut Finishing: Integrate flash trimming in die-cut patterns for uniform edges.
Sealant Applications
- Liquid Neoprene Sealers: Brush-apply a thin layer over embossed areas; cures to flexible film that resists abrasion.
- Polyurethane Coatings: Spray or dip for a glossy finish; adds chemical resistance and UV protection.
Heat Setting
- Light Re-Press: Run embossed pieces back through a cool press (80–100 °C, light pressure, 5 s) to stabilize foam cell rebound.
- Cooling Under Pressure: Maintain slight pressure until the piece reaches room temperature to prevent pattern distortion.
Surface Treatments
- Anti-Microbial Finishes: Incorporate silver-ion sprays post-emboss to guard against mold in humid conditions.
- Hydrophobic Sprays: Restore water repellency that may diminish after heat cycles.
Quality Assurance Tests
- Abrasion Testing: Use Martindale or Taber testers—1000 cycles at 500 g to verify emboss integrity.
- Flexing Durability: Repeated bend tests (500 cycles at 180°) ensure patterns hold on fold lines.
Packaging for Protection
- Tissue Interleaves: Place acid-free paper between embossed panels to prevent surface sticking during transit.
- Custom Dust Bags: Provide branded neoprene dust bags for safe storage.
By completing these finishing touches, you guarantee the embossed design withstands handling, washing, and daily use, delivering a truly premium experience.
How Can You Customize Embossed Neoprene for Branding?
Customize embossed neoprene with multi-color inks in recessed areas, selective spot UV coatings, or combine emboss with deboss for dual-tone effects. Leverage low-MOQ runs to test color fills, foil stamping on raised surfaces, or alternating matte/gloss finishes for standout logos and patterns.
Color Filling & Inking
- Recessed Ink: After embossing, inject flexible inks into pockets for contrast—ideal for white-on-black logos.
- Two-Stage Process: Emboss first, then print via pad or screen printing to add color only to designated areas.
Foil Stamping Over Emboss
- Metallic Finish: Apply gold or silver foil on raised sections for a luxe look.
- Heat-Sensitive Foils: Use thermo-chromic foils that change color with temperature—eye-catching on fashion accessories.
Selective UV Coating
- Spot Gloss: Mask flat areas and flood coat raised patterns with UV-cured gloss for tactile contrast.
- Matte vs. Gloss: Experiment with alternating finishes to direct attention to specific design elements.
Combined Deboss & Emboss
- Dual Depth: Emboss outer border while debossing inner logo for a sculpted, shadow-play effect.
- Stencil Techniques: CNC-cut dual-layer plates for precise depth transitions.
Workflow & Low-MOQ Strategy
- Digital Proofing: Provide clients with 3D-rendered previews based on their logo to confirm placement and scale.
- Sample Runs: Offer 5–10 prototypes under 100-unit runs to perfect customization before mass production.
Case Study: Neoprene Koozie Branding
- Client: Craft brewery ordering 500 koozies with an embossed logo.
- Process: Heat plate emboss at 140 °C/3 MPa/15 s → color-fill with one-pantone ink → UV clear coat.
- Outcome: Crisp, durable branding that survived dishwasher tests and outdoor events without fading.
By integrating these creative touches, brands can leverage embossing not just for texture but as a core differentiation mechanism—delighting customers and justifying premium pricing.
Ready to Elevate Your Neoprene Products with Expert Embossing?
At Szoneier, our 18+ years of neoprene R&D and manufacturing expertise ensure we deliver flawless embossing—from initial concept through low-MOQ sampling to high-volume production. Whether you need custom neoprene bags, koozies, wetsuits, or covers, we’ll guide you through selecting the ideal emboss method, tooling, and finishing steps. Contact us today to request free samples, discuss your design, and get a tailored quote for your next embossed neoprene project!