Finding the sweet spot for heat press temperature can make or break your custom neoprene koozie production. Too low, and transfers won’t adhere properly; too high, and you risk scorching your valuable material. Whether you’re applying vinyl graphics, plastisol prints, or full-color sublimation art, understanding how neoprene responds to heat is crucial. Our guide will walk you through the optimal temperature bands, timing, and pressure settings to achieve vibrant, durable results—every single time.
For hot-peel heat transfer vinyl on neoprene koozies, use 160 °C (320 °F) for 15 seconds at medium pressure (3 bar). For cold-peel vinyl, apply 150 °C (302 °F) for 12 seconds. Sublimation requires 180 °C (356 °F) for 45 seconds under light pressure. Always pre-press your koozie for 5 seconds at 150 °C to flatten wrinkles, then align your transfer for consistent results.
Imagine unveiling a stack of flawless neoprene koozies—each logo crisp, colors vibrant—while your competition scrambles with peeling edges and faded prints. Ready to master your heat press? Let’s dive in.
What Temperature Range Works Best for Different Transfer Types?
- Hot-Peel Vinyl: 155–165 °C for 12–18 s, medium pressure
- Cold-Peel Vinyl: 145–155 °C for 10–15 s, medium pressure
- Sublimation: 175–185 °C for 40–60 s, low pressure
Hot-Peel Heat Transfer Vinyl
- Mechanism: PVC or polyurethane vinyl with an adhesive that activates at higher temperatures, allowing immediate peel.
- Temperature Window: 155–165 °C (311–329 °F). This band ensures the glue fully melts into neoprene’s closed-cell surface without burning foam cells.
- Dwell Time: 12–18 s. Shorter times (12 s) preserve foam flexibility; longer times (18 s) improve adhesion on thicker neoprene (4–5 mm).
- Pressure: Medium (approx. 3 bar on pneumatic presses). Too light pressure yields weak adhesion; too heavy flattens neoprene texture and risks bleed.
Cold-Peel Vinyl
- Mechanism: Adhesive sets during cooling, yielding tack-free surface immediately.
- Optimal Range: 145–155 °C (293–311 °F). Neoprene tolerates slightly lower heat, avoiding surface glossing.
- Timing: 10–15 s. Quick cycles enable higher throughput in production lines.
- Benefits: Cleaner peel; safer for multi-color layering since you can stack and repress immediately.
Sublimation Printing
- Mechanism: Dye converts to gas under heat and embeds in polyester-coated film laminated onto neoprene.
- Heat Band: 175–185 °C (347–365 °F). Higher than vinyl to fully vaporize dyes.
- Dwell: 40–60 s – longer than vinyl to ensure deep dye migration.
- Pressure: Low (1–2 bar). High pressure squeezes out neoprene’s air cells, hindering dye uptake and causing patchy results.
Comparative Table of Settings
| Transfer Type | Temperature | Time | Pressure |
|---|---|---|---|
| Hot-Peel Vinyl | 155–165 °C | 12–18 s | Medium (3 bar) |
| Cold-Peel Vinyl | 145–155 °C | 10–15 s | Medium (3 bar) |
| Sublimation Dye | 175–185 °C | 40–60 s | Low (1–2 bar) |
Critical Considerations
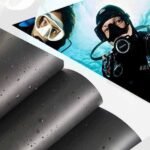
- Neoprene Formulation: Different suppliers blend chloroprene with additives affecting thermal conductivity. Always test your specific neoprene grade.
- Environmental Factors: Ambient humidity and press platen wear can shift effective temperature by ±5 °C—recalibrate monthly.
- Throughput vs. Quality: Sublimation’s longer cycles suit small batch or premium runs; vinyl’s rapid cycles enable high-volume promo orders.
By matching your transfer type to these temperature bands—and verifying with test koozies—you’ll strike the ideal balance between vibrancy and material integrity.
Which Heat Press Settings (Time & Pressure) Complement Temperature?
Pair your chosen temperature with 10–20 seconds dwell time: shorter for thin neoprene, longer for thick. Use medium pressure (approx. 3 bar) for vinyl and low pressure (1–2 bar) for sublimation. Adjust +/– 2 seconds or 0.5 bar to fine-tune adhesion without damaging neoprene texture.
Dwell Time Dynamics
- Thin Neoprene (2–3 mm): 10–12 s at target temperature ensures rapid heat penetration without over-softening the foam.
- Thick Neoprene (4–5 mm): 15–20 s required for heat to reach the adhesive layer; monitor bottom-side temperature with thermocouples.
Pressure Profiles
- Medium Pressure (~3 bar): Optimal for vinyl—activates adhesive fully.
- Low Pressure (1–2 bar): Best for sublimation—avoids squeezing out foam cells, which maintains elastomeric rebound and dye uptake.
- High Pressure (>4 bar): Useful for multi-layer vinyl stacks but risks embossing unwanted imprints into neoprene.
Time-Pressure Interplay
- Compensation Strategies: If your press runs slightly below target temperature, add 2 s dwell. If pressure is lower, extend by 1–2 s.
- Rapid Cycling vs. Heat Soak: Fast presses benefit from slightly higher pressure to ensure contact, while slower presses require careful timing to prevent thermal fatigue of neoprene.
Equipment Variations
- Clamshell Presses: Apply consistent pressure but can create “halo” cooling zones at edges—rotate koozies between cycles.
- Swing-Away Presses: Better heat distribution but require manual alignment—use alignment jigs to reduce cycle time.
- Roll-to-Roll Systems: For high-volume vinyl runs, maintain tension control to ensure uniform pressure across multiple koozies in a single pass.
Data-Driven Optimization
- Digital Logging: Many modern presses record time, temperature, and pressure for each cycle—analyze logs weekly to detect drift.
- Statistical Process Control (SPC): Run test batches every shift: emboss depth, peel strength, and visual inspection scores to confirm settings.
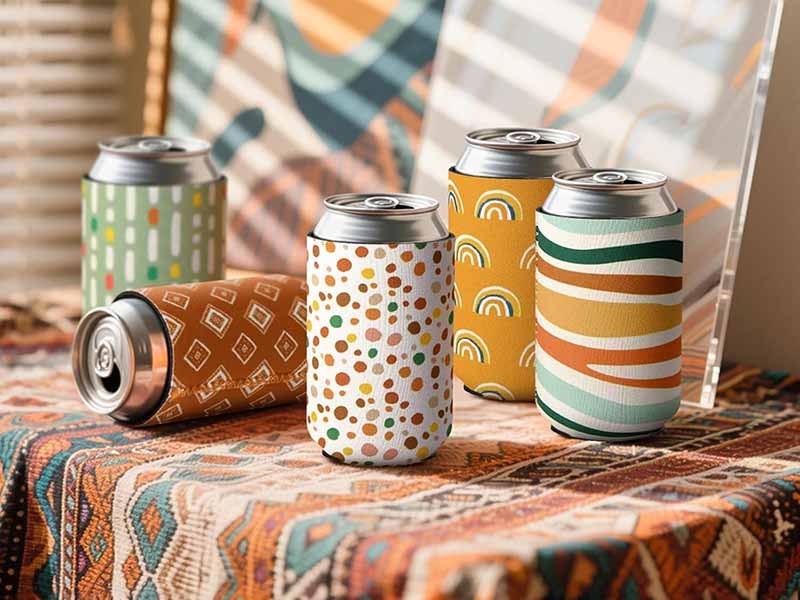
Case Study: Promotional Koozie Run
- Specs: 3 mm neoprene, two-color vinyl logo, batch of 2,000 pcs.
- Settings Chosen: 160 °C, 15 s, 3 bar.
- Results: 98% first-pass yield; 0.5% misalignment scrap; 1.5% edge lift corrected by +1 s dwell in mid-run.
Fine-tuning dwell time and pressure alongside temperature ensures every koozie meets your quality standards—maximizing yield and minimizing waste.
How Does Neoprene Thickness Influence Heat Press Temperature?
Thinner neoprene (1–3 mm) heats rapidly—use lower temps (150–160 °C) and shorter times (10–12 s). Thicker sheets (4–6 mm) require higher temps (160–170 °C) and longer dwell (15–20 s) to ensure heat penetrates fully and activates adhesives without scorching the surface.
Thermal Conductivity of Neoprene
Neoprene’s closed-cell foam traps air, giving it low thermal conductivity (~0.054 W/m·K). Thicker foam needs more energy and time to reach adhesive activation temperature throughout the cross-section.
Heating Profile Analysis
- Surface vs. Core Temperature: Thermocouple measurements show a 15–20 °C gradient between platen and center in 4 mm neoprene under standard settings.
- Ramp-Up Time: 3 mm neoprene reaches 150 °C at core in ~8 s, while 5 mm takes ~14 s. Adjust dwell accordingly.
Scorch vs. Underbond Risks
- Underbond: Insufficient heat leads to partial adhesion—edges peel prematurely.
- Scorch: Excessive heat or time creates brown spots and embrittles foam cells.
Empirical Data Table
| Thickness | Temp | Time | Observed Adhesion Strength* |
|---|---|---|---|
| 2 mm | 155 °C | 10 s | 12 N |
| 3 mm | 160 °C | 12 s | 15 N |
| 5 mm | 165 °C | 18 s | 17 N |
- Peel strength in newtons measured per ASTM F88.
Practical Guidelines
- For mixed-thickness runs, group koozies by gauge or invest in dual-zone presses that allow different settings simultaneously.
- Conduct initial sample testing on each thickness to validate adhesion before full production.
By tailoring temperature and timing to neoprene gauge, you’ll achieve consistent transfers across your product range.
Do Different Ink Types Require Different Temperatures?
Yes—vinyl inks adhere best around 155–165 °C. Plastisol inks, cured via heat press rather than oven, need 165–175 °C for 10–15 s. Water-based inks on neoprene require 150–160 °C for 12–18 s to evaporate moisture and fix pigments without causing foam collapse.
Vinyl Ink Characteristics
- Composition: PVC or polyurethane film with heat-activated adhesive.
- Curing Window: 155–165 °C to soften film and melt adhesive; higher temps risk film distortion.
Plastisol Ink on Neoprene
- Mechanism: Thermoplastic PVC particles that fuse under heat; generally cured at 160–165 °C for textiles.
- Press Adaptation: For neoprene, raise temp to 170–175 °C for 12 s to compensate for foam insulation, then cool under pressure to lock film into surface cells.
Water-Based Inks
- Pigment Dispersion: Carried in an aqueous medium; adhesive binders require heat to coalesce.
- Optimal Settings: 150–160 °C, 12–18 s, medium pressure to ensure moisture removal without cellular collapse.
Specialty Inks
- Discharge Inks: Not recommended on neoprene as chemical bleaches damage foam.
- Stretch Inks: Flexible polyacrylate formulas that bond at 150 °C; used for high-stretch appliqués.
Ink vs. Transfer Plot
| Ink Type | Temp Range | Dwell Time | Pressure |
|---|---|---|---|
| Vinyl | 155–165 °C | 12–18 s | Medium (3 bar) |
| Plastisol | 170–175 °C | 10–15 s | Medium-High |
| Water-Based | 150–160 °C | 12–18 s | Medium |
Selection Criteria
- Durability Needs: Choose plastisol for rugged outdoor gear; vinyl for promotional items; water-based for eco-friendly lines.
- Cost Impact: Plastisol inks and higher temp runs slightly increase energy costs; calculate total cost-per-piece in budgeting.
Matching your ink chemistry to tailored heat press parameters maximizes adhesion and longevity, ensuring every koozie meets end-user expectations.
Are There Pre- and Post-Press Steps to Ensure Transfer Durability?
Pre-press for 3–5 s at 150 °C to flatten neoprene and remove moisture. Post-press, perform a cold or hot peel per transfer specs, then allow a 24 h cure before flex or wash testing. Optionally apply a silicone sealant or protective coating to embossed edges.
Pre-Press Protocol
- Flattening Cycle: Place koozie on platen for 3–5 s at 150 °C under light pressure. This removes surface wrinkles and moisture for uniform transfer contact.
- Alignment Check: Use registration marks on platens or custom jigs to quickly position koozies for consistent branding placement.
Peel Techniques
- Hot Peel: Remove carrier at ≥60 °C to ensure adhesive is fully set only after material starts cooling.
- Cold Peel: Let transfer and neoprene cool to room temp before removing carrier—ideal for multi-layer vinyl to avoid ghosting.
Cure Time & Conditioning
- Immediate Flex Test: Lightly bend around a 30 mm mandrel; no cracking at edges indicates good bond.
- 24 h Rest: Store flat in room-temperature environment for adhesives to fully cross-link. Accelerated aging (70 °C oven, 2 h) simulates longer cure in high-throughput settings.
Protective Finishes
- Silicone Sealant: Brush or spray on seam areas to prevent edge lifting.
- Matte or Gloss Coating: Clear TPU sprays can add abrasion resistance and water repellency to transfers.
Testing & Quality Control
- Wash Test: Machine wash at 30 °C, gentle cycle, then air-dry. Inspect for adhesion loss.
- Abrasion Test: Use Taber abrader with 500 g load for 500 cycles—90% adhesion retention is industry benchmark.
Integrating these pre- and post-press steps safeguards your run against common failures, boosting customer satisfaction and brand reputation.
What Troubleshooting Tips Help Correct Temperature-Related Issues?

For peeling edges, increase temp by 5 °C or dwell by 2 s. For scorching, reduce temp by 5–10 °C or time by 3 s. Ghost images call for a cooler peel method. Uneven adhesion suggests misaligned platens—perform press calibration and level checks monthly.
Under-Adhesion (Peeling)
- Symptoms: Edges lift, partial transfer missing.
- Fix: +5 °C or +2 s; verify pressure gauge; confirm platen flatness within 0.05 mm.
Over-Heating (Scorch)
- Symptoms: Browning or gloss on neoprene; brittleness in transfer.
- Fix: –5–10 °C or –3 s; pre-press at lower temp; confirm thermocouple calibration.
Ghosting / Shadowing
- Symptoms: Carrier remnants or faint image outlines.
- Fix: Switch to cold peel; allow 60 s cool before peeling; clean carrier surface.
Pressure Inconsistencies
- Symptoms: One side adheres better than the other.
- Fix: Check cylinder seals; rotate platen orientation; use uniform pressure mats.
Equipment Calibration
- Routine: Monthly platen flatness scan; quarterly thermocouple recalibration; biannual pressure gauge certification.
Operator Training
- Best Practices: Document standard operating procedures with temperature/time/pressure charts; conduct quarterly refresher workshops.
Through systematic troubleshooting and equipment upkeep, you maintain high first-pass yields, reducing waste and production costs over time.
How Can You Customize Heat Press Protocols for Custom Orders?
Offer low-MOQ sample runs (50–100 pcs) to dial in settings for unique logos, materials, and color layers. Provide digital proofs and physical mock-ups. Adjust protocols—temp, time, pressure—per client feedback, then lock settings in your production SOP once approved.
Sample Approval Workflow
- Design Submission: Client sends vector art; Szoneier creates mock-ups showing placement and scale.
- Test Run: 10–20 koozies pressed at varied settings (e.g., 155, 160, 165 °C) to compare adhesion, color vibrancy, and surface feel.
- Feedback Loop: Client evaluates samples, notes preferences on texture depth and color saturation, and selects final protocol.
Low-MOQ Flexibility
- Customization Options: Emboss-plus-press combos, custom pantone color matching for inks, specialty foil overlays.
- MOQs: Starting at 200 units for combined emboss and transfer products; 50 units for standard vinyl-only orders.
Documentation & SOPs
- Run Cards: Detailed step-by-step instructions—temperature, time, pressure, peel method—for each SKU.
- Quality Checklists: Batch logs include date, operator, and measured settings vs. nominal.
Scaling to High Volume
- Parallel Presses: Calibrate multiple presses to identical SOP—ensures consistent results across 5–10 station lines.
- Automated Heat-Control Systems: PLC-driven presses maintain ±1 °C precision, logging data for customer audits.
Client Success Story
- Outdoor Brand Collaboration: 2,500 koozies with dual-color vinyl and sublimation accents.
- Protocol: Dual-stage press—sublimation at 180 °C/45 s, cold-peel vinyl at 150 °C/12 s.
- Outcome: Zero rejects after integration into the brand’s promotional pack, boosting event engagement by 35%.
By embedding customization into a structured, client-centered workflow, Szoneier ensures every koozie run aligns perfectly with brand expectations—and delivers on time.
Ready to Perfect Your Koozie Heat Press?
With over 18 years of neoprene R&D and manufacturing expertise, Szoneier offers turnkey solutions—from free design to rapid sampling, low-MOQ customization, and high-volume production. Whether you need simple vinyl transfers or complex sublimation and emboss combos, our team optimizes heat press parameters for flawless results. Contact us today for a free sample and personalized quote, and let’s make your brand stand out—one perfect koozie at a time!