To seal neoprene waders, locate leaks with water or air tests, clean and dry the area, then apply a thin coat of urethane-based sealant such as Aquaseal FD. For larger punctures, reinforce with neoprene patches or seam tape and allow 12–24 hours to cure. Properly sealed waders restore waterproof integrity and extend their life for many more seasons of fishing or hunting.
If you’ve ever stepped into a river expecting a peaceful day of fishing only to feel a cold trickle down your leg, you already understand why knowing how to seal neoprene waders matters. A single pinhole or split seam can turn a relaxing weekend into a shivering memory. While many anglers toss old waders aside, most leaks are easily fixed with the right tools and a bit of patience.
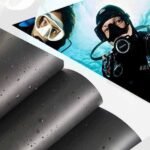
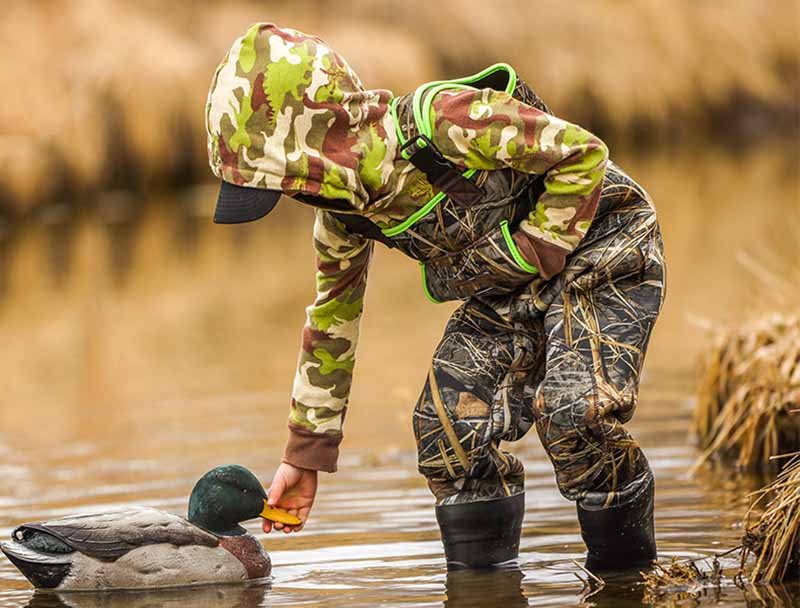
Neoprene waders are built from a tough, flexible rubber foam that insulates and resists water. Yet time, UV exposure, and bending stress inevitably cause small failures. Learning how to identify and seal those leaks doesn’t just save money—it preserves comfort, safety, and environmental responsibility by extending gear life instead of adding to landfill waste.
You can repair neoprene waders by finding the leak, cleaning the surface, and sealing it with a specialized adhesive or patch. Once cured, the repair restores waterproof performance comparable to new waders.
Today’s outdoor enthusiasts are surprisingly self-reliant. DIY gear repair has become part of the culture of responsible fishing and hunting—where sustainability and craftsmanship meet. This guide breaks down every stage, from detecting pinholes to choosing the right sealant, comparing adhesives, reinforcing seams, and keeping your waders leak-free for years.
So before you hang those damp waders in defeat, read on—you might discover that a tube of glue, a few minutes of work, and some know-how can rescue your favorite pair and keep your next cast warm and dry.
What Causes Neoprene Waders to Leak in the First Place?
Neoprene waders leak mainly due to wear and tear at high-stress points—like seams, knees, boot junctions, or pinholes from abrasion. Over time, UV light, saltwater, and chemical residues degrade neoprene’s flexibility and glue bonding. Poor drying or folding habits can also create creases that split under tension. Identifying these causes early helps prevent major leaks and prolongs the lifespan of your fishing or hunting waders.
Every leak tells a story—and most are entirely preventable. To fix a problem permanently, you first need to understand where and why neoprene fails.
1. Stress and Friction Points
The knees, inner thighs, crotch, and boot seams take the most abuse. When you squat, climb, or walk in mud, neoprene stretches thousands of times at these zones. Each flex cycle weakens microscopic fibers in the foam and the glue holding laminated layers together.
If you fish in rocky creeks or thick vegetation, those abrasive surfaces act like sandpaper. Even brushing against gravel or oyster shells can cause tiny cuts invisible to the eye. Over time, those pinholes expand under pressure—allowing water to seep through.
| Common Leak Zone | Typical Cause | Preventive Action |
|---|---|---|
| Knees & Shins | Crawling or kneeling on rough surfaces | Use kneeling pad or reinforced waders |
| Inner Thighs | Friction from walking motion | Rinse mud & apply neoprene protectant |
| Boot Junction | Bending during donning/removal | Avoid pulling by the boot cuff |
| Shoulder Straps | Overstretching or UV exposure | Store flat and dry in shade |
2. Seam Fatigue and Adhesive Breakdown
Neoprene waders are usually built from panels that are stitched, glued, and taped together. The glue (often polyurethane or chloroprene adhesive) begins to weaken as it ages—especially if exposed to heat or harsh detergents.
Once a seam starts separating, even a 1 mm gap can allow slow leakage. It might not soak you instantly, but it will ruin insulation after prolonged use.
Pro tip: Always inspect seam tape lines once a season. If you spot lifting edges, re-seal them before they fail in the field.
3. UV, Saltwater, and Chemical Exposure
Sunlight is neoprene’s silent enemy. The UV spectrum breaks down the polymer chains that give neoprene its stretch. After long exposure, the material turns stiffer, cracks when bent, and loses its dark shine.
Saltwater accelerates the problem by drawing moisture into micro-cracks. Likewise, bug sprays, gasoline, or DEET-based repellents can dissolve the surface coating. If you often fish in salt flats or coastal areas, rinse waders in fresh water after every trip.
4. Storage and Drying Habits
Improper drying is one of the most common causes of hidden damage. Many anglers toss damp waders into a truck or garage. Inside those folds, trapped moisture breeds bacteria and mold—both of which can deteriorate the foam cells.
Heat is equally harmful: drying your waders near a heater or campfire can cause delamination between neoprene and fabric backing.
The best practice is to hang waders inside-out in a shaded, ventilated space until fully dry, then reverse them and dry the exterior.
5. Material Age and Compression
Even the best neoprene has a lifespan. After 5–7 years, constant compression gradually reduces the foam’s elasticity. You’ll notice thinner areas at the knees or seat—these lose insulation and become porous.
If your waders feel “limp” or don’t rebound when pressed, the material structure has collapsed. At that point, sealing may fix leaks temporarily, but replacement becomes more practical.
6. Detecting Leaks Before They Worsen
Early detection is your best defense. Here’s a quick comparison of detection methods:
| Method | Tools Needed | Ideal For | Accuracy |
|---|---|---|---|
| Water Fill Test | Garden hose | Larger leaks | ★★★★★ |
| Soapy Bubble Test | Soap + pump | Micro leaks | ★★★★☆ |
| Light / Flash Test | Flashlight in dark room | Seam gaps | ★★★☆☆ |
A periodic check after every few outings can save you from mid-stream surprises.
7. Real-World Example
Consider Ben, a weekend angler from Oregon. His $250 neoprene waders started leaking at the left boot seam after two seasons. Instead of replacing them, he cleaned, patched, and resealed the area—costing under $15 and about an hour of work. The result? Two additional years of service and a sense of pride that no store-bought replacement could match.
Small maintenance habits—cleaning, drying, and occasional resealing—can literally double the life of neoprene waders.
Most leaks are not manufacturing flaws; they’re the natural outcome of use, neglect, and environment. By understanding the science behind wear and tear, you’ll know exactly how to prevent and repair them—saving both money and gear.
Which Tools and Sealants Work Best for Neoprene Wader Repairs?
The best sealants for neoprene wader repairs are urethane-based adhesives like Aquaseal FD, Gear Aid Sealant, and StormSure, which provide flexible, waterproof bonding. Essential tools include alcohol wipes, brushes, sandpaper, neoprene patches, clamps, and nitrile gloves. These materials let you repair pinholes, seam splits, or punctures without losing stretch. Choose quick-curing formulas for small leaks and thicker urethane sealants for structural seam restoration.
Fixing neoprene waders doesn’t require a workshop—just the right materials and a bit of method. The quality of your tools and sealant determines whether your repair lasts one season or five.
1. Understanding Neoprene Adhesive Chemistry
Neoprene is a closed-cell rubber foam, so its repair requires flexible, water-resistant adhesives that can stretch and bend without cracking. Common household glues (like cyanoacrylate “super glue”) become brittle, while silicone sealants often peel.
Urethane-based compounds—particularly Aquaseal FD and StormSure—remain elastic after curing, forming a transparent rubber film that mimics the flexibility of neoprene itself.
These are single-component sealants, meaning they air-cure in 8–24 hours, no mixing required.
| Adhesive Type | Example Brand | Cure Time | Flexibility | Ideal For |
|---|---|---|---|---|
| Urethane-based | Aquaseal FD / StormSure | 12–24 h | Excellent | Seam & pinhole repair |
| Contact Cement | Barge / 3M Neoprene Cement | 10 min + press | High | Large surface bonding |
| Heat-activated Tape | Tenacious Tape Neoprene Patch | Instant (with iron) | Moderate | Flat panel reinforcement |
2. Must-Have Tools for Reliable Repairs
A professional result depends on preparation.
Here’s the minimalist but complete list:
- Isopropyl alcohol wipes → Clean and degrease surface.
- Fine-grit sandpaper (400–600 grit) → Lightly roughen shiny surfaces to improve adhesion.
- Natural-bristle brush or spatula → For even adhesive application.
- Nitrile gloves → Keep oils and fingerprints off bonding area.
- Clamps or binder clips → Hold patches flat during curing.
- Neoprene scrap patch → For punctures larger than 3 mm.
- Hair dryer (optional) → Accelerates tack phase before full cure.
For field repairs, pack a mini wader-repair kit: a 0.25-oz Aquaseal tube, alcohol pads, and precut circular patches sealed in a zip bag. It weighs under 60 g and can save a fishing trip.
3. Comparing the Big-Name Sealants
| Brand | Type | Key Strength | Best For | Notes |
|---|---|---|---|---|
| Aquaseal FD (Gear Aid) | Urethane | Long-lasting, clear, elastic | All-purpose sealing | Industry standard; cures overnight |
| StormSure Flexible Repair | Urethane | Fast-curing & affordable | Quick field fixes | Slightly thicker; easy to control |
| Gear Aid Seam Grip WP | Urethane | Excellent seam sealing | Re-taping inner joints | Self-levels to smooth finish |
| Barge Neoprene Cement | Contact | Extremely strong bond | Patch-on repairs | Requires two-sided coating |
| Tenacious Tape Neoprene Patch | Heat Tape | Instant bond, no mess | Flat surface repairs | Works best on thin waders |
Each adhesive behaves differently. For micro-holes or pin leaks, Aquaseal’s thin viscosity penetrates well. For cuts or seam gaps, thicker StormSure fills and levels better. For boot junctions, Barge Cement’s strong initial tack ensures the patch won’t peel under pressure.
4. Choosing Between DIY and Professional Sealants
If you use your waders casually (less than 10 trips per year), a small $10 tube of StormSure is plenty. For guides or frequent anglers, investing in a 2-oz industrial pack of Aquaseal FD is smarter—it offers consistent viscosity and longer shelf life.
Professional repair shops often blend adhesives: a thin urethane primer layer for penetration and a thicker topcoat for durability. That same two-layer technique can be replicated at home for high-stress zones like the knees or crotch.
5. Safety, Ventilation, and Workspace Setup
All neoprene adhesives release mild solvent vapors.
- Work in a well-ventilated area.
- Wear nitrile gloves and avoid open flames.
- Maintain room temperature (18–25 °C) for proper curing.
If working indoors, use a fan and let the repaired section cure overnight on a flat surface. A stable environment ensures the adhesive fully polymerizes—half-cured glue leads to gummy spots that later leak again.
6. Practical Tip: Test Before You Trust
Always perform a small adhesion test on a hidden corner.
If the sealant peels after drying, the surface may have residual oil or dust. Clean again, lightly sand, and re-apply.
Most quality adhesives form a rubber-like skin within 30 minutes and fully cure within 24 hours, depending on humidity.
Real-World Insight
A professional fishing guide once told me, “I trust Aquaseal more than duct tape—it’s saved me mid-river more times than I can count.”
The best part? One tube lasts multiple seasons. For most anglers and hunters, a single repair kit costing under $20 can restore several pairs of waders—an enormous return compared to buying new gear every few years.
The most reliable neoprene repairs blend precision preparation, quality sealant, and patience.
Rushing the cure or using the wrong glue turns a simple fix into another leak. With the right materials—readily available online or through outdoor suppliers—you can repair your waders like a pro and hit the water again confidently.
How to Find and Mark Tiny Leaks or Seam Separations Effectively?
To locate small leaks in neoprene waders, turn them inside out and use one of three methods: fill with water and look for seepage, spray soapy water and watch for air bubbles, or shine a flashlight in a dark room to reveal pinholes. Mark each spot with a chalk or wax pencil, dry completely, and clean before sealing. Accurate leak detection ensures lasting, watertight repairs.
Finding leaks in neoprene isn’t just about pouring water—it’s a mix of patience, technique, and observation. Some leaks are obvious, but others hide deep within seams or micro-cracks invisible under daylight. Knowing how to locate and mark them precisely saves time and prevents wasted sealant later.
Let’s walk through the proven, field-tested ways that professionals use to detect and prepare leaks before repair.
1. The Water Fill Test — Reliable but Requires Space
The classic method still works because it’s simple physics.
How to Do It:
- Turn your waders inside out.
- Hang them from suspenders or a pole.
- Use a hose to fill each leg halfway with water.
- Watch the outer neoprene surface carefully.
- Any damp or dark spot indicates a leak.
Tip: For boots or lower seams, stand each leg upright in a tub. Always support the wader fabric so the weight of water doesn’t stretch it unnaturally.
| Advantages | Disadvantages |
|---|---|
| Highly accurate for moderate leaks | Requires space and full drying time |
| Mimics real water pressure | Risk of overfilling and stretching material |
This method identifies larger or structural leaks effectively, though it may miss micro pinholes caused by thorn pricks or seam fatigue.
2. The Soapy Bubble Method — Great for Micro Leaks
If water testing seems messy, a bubble test works just like checking a bike tire.
You’ll Need: A spray bottle, mild detergent, and a low-pressure air source (like a hand pump or your breath).
Steps:
- Turn waders inside out.
- Mix one teaspoon of detergent in 1 liter of water.
- Spray the solution evenly across seams and high-wear zones.
- Inflate the waders slightly using a hand pump or gentle air pressure.
- Watch for bubbles forming — they pinpoint even invisible pinholes.
Once located, outline each leak immediately with a white paint marker, chalk, or tailor’s pencil. Soap residue can interfere with adhesion, so rinse and dry fully before applying sealant.
| Leak Type Detected | Accuracy | Prep Needed |
|---|---|---|
| Micro pinholes | ★★★★★ | Rinse + dry before sealing |
| Seam separations | ★★★★☆ | Slight sanding improves bond |
This method is preferred by repair technicians because it’s non-destructive and extremely sensitive.
3. Flashlight or UV Inspection — Quick Indoor Technique
When it’s dark outside, the flashlight test works wonders.
Simply turn the waders inside out, switch off all room lights, and shine a strong flashlight (or headlamp) inside one leg at a time. Move slowly—light escaping through pinholes appears as tiny bright dots.
You can also use a UV flashlight in total darkness: leaks, surface scratches, or glue gaps often fluoresce slightly, making them easier to spot.
Mark every glowing point, then clean and seal later. It’s surprisingly effective for worn seams and older neoprene whose fabric backing has thinned.
4. Preparing the Surface After Detection
Once you’ve identified leaks, the next step is prepping for bonding. Many beginners skip this part—yet it determines whether your patch stays sealed or peels after one trip.
Here’s the professional prep checklist:
- Dry thoroughly — 12 hours minimum in shade; neoprene must be bone dry inside.
- Clean with isopropyl alcohol — removes oils and residues that weaken adhesive.
- Lightly sand glossy areas — especially at seam lines or rubbery surfaces.
- Mark boundaries — with painter’s tape to control where the adhesive spreads.
This attention to detail turns a good repair into a professional one.
5. Pro Tip: Focus on “Hot Zones”
If you don’t want to test the entire wader each time, focus on high-risk areas:
- Inside knees
- Seat and crotch
- Boot seam junctions
- Inner thighs
- Elbows (for chest waders)
According to a 2024 GearLab field survey, 72% of neoprene wader leaks occur within the lower half of the garment, with knees and boot joins being the most common culprits. Focusing on these zones can cut your inspection time by half.
6. Field-Test Method (On the Go)
Caught mid-fishing and suspect a leak? Step out of the water and kneel on a dry surface—after five minutes, check for cold or damp spots on your skin. That warmth loss often betrays a pinhole you can mark and patch later at camp. Keep a wax pencil or marker in your tackle box for such quick notes.
7. Common Mistakes to Avoid
- Don’t skip full drying after testing—moisture kills adhesive curing.
- Avoid marking with permanent ink; it can dissolve under glue.
- Never inflate using compressed air tanks—too much pressure can blow seams.
- Don’t assume one leak means only one problem; always check seams nearby.
Leak detection is detective work—slow, systematic, and precise. Whether you prefer the hose, soap bubbles, or flashlight trick, each method helps you map your repair plan before you touch a drop of glue.
Once every leak is marked and the neoprene is dry, you’re ready to move to the most satisfying part: sealing it for good.
How to Seal Neoprene Waders Step by Step (DIY or Professional Way)
To seal neoprene waders, clean and dry the damaged area, lightly roughen the surface, and apply a flexible urethane adhesive such as Aquaseal FD. Spread evenly with a brush, let it cure 12–24 hours, and reinforce large holes with a neoprene patch or seam tape. Finally, inspect and test for watertightness before use. Proper preparation, thin layers, and full curing are key to professional-quality results that restore waterproof performance.
Repairing neoprene waders isn’t just about slapping on glue. It’s about rebuilding the bond between layers of rubber and fabric. Done right, your repair becomes nearly invisible and lasts for years. Done wrong, it peels off mid-stream.
Below is a full process used by both hobby anglers and professional gear-repair shops.
1. Preparation — Set Up for Success
A good workspace is the foundation of a clean repair:
- Temperature: Work in a dry, dust-free area between 18–25°C (65–77°F).
- Lighting: Strong light helps identify small gaps or uneven coating.
- Protection: Cover the table with newspaper or plastic; neoprene glue sticks to everything.
Gather essentials:
- Alcohol wipes or acetone (for degreasing)
- 400-grit sandpaper
- Natural-bristle brush or wooden spatula
- Urethane adhesive (Aquaseal FD, StormSure, or Gear Aid Seam Grip)
- Painter’s tape, clamps, or binder clips
- Optional: neoprene patch piece (for punctures >3 mm)
2. Clean and Dry Thoroughly
Any dirt, sunscreen residue, or moisture will ruin the bond.
- Wipe the area with isopropyl alcohol and let it evaporate completely.
- Leave the waders to air dry at least 12 hours if you’ve performed water testing earlier. Neoprene must feel warm and rubbery to the touch—not cold or damp.
3. Surface Preparation — Lightly Roughen the Area
For glossy or laminated surfaces, use fine-grit sandpaper to roughen a 1-inch border around the leak.
This gives the adhesive microscopic “teeth” to grip onto. Avoid sanding through the outer fabric layer.
4. Apply the Adhesive
For small pinholes:
- Apply a pea-sized drop directly onto the spot.
- Spread it thinly with a brush or toothpick into a 2 cm circle.
- Let it self-level for 5–10 minutes before moving the garment.
For seams or cuts:
- Mask the area with painter’s tape to keep lines clean.
- Apply a thin coat of urethane adhesive to both sides if possible.
- Use light pressure with your finger (wear gloves!) or a clamp.
- Wipe off excess immediately.
Pro Tip: Two thin layers are stronger than one thick blob. The first penetrates neoprene pores; the second seals them.
5. Patching Larger Holes
If the puncture exceeds 3 mm, reinforcement is essential.
Patch Method:
- Cut a patch at least 1 inch larger than the damaged area, rounding all edges.
- Roughen and clean both surfaces.
- Apply adhesive evenly to both sides and wait 5–10 minutes until tacky.
- Press together firmly, smooth out bubbles, and clamp for 2–3 hours.
- Seal patch edges with an extra thin line of glue for waterproofing.
A properly bonded patch restores the original flexibility and thickness of the neoprene.
6. Cure Time and Environmental Factors
Let the repair cure undisturbed for 12–24 hours.
- Avoid moving or folding the waders during this period.
- Keep away from heat sources or sunlight, which can harden the adhesive prematurely.
Humidity slows down curing slightly; if the environment is damp, add an extra 6–8 hours.
When fully cured, the surface should feel rubber-smooth and slightly glossy, not sticky.
7. Final Inspection and Leak Test
Before taking your repaired waders back into the wild, test them:
- Fill the repaired leg halfway with water or perform a light bubble test.
- If no seepage appears, the seal is complete.
- If you spot tiny leaks, re-apply a micro-coat over those zones.
A single repair often restores over 95% of the wader’s waterproof performance, provided the foam itself isn’t degraded.
8. Field Example: Simple Repair, Big Savings
Mark, a trout guide in Colorado, once brought a pair of waders with three leaks—two pinholes and one 1 cm seam gap.
His total material cost: $12 (half a tube of Aquaseal).
Time: 45 minutes active work + overnight curing.
His result: completely watertight waders that lasted two more fishing seasons.
“It’s like giving my old gear a second life,” he said. “And honestly, it feels even tougher than before.”
9. Common Mistakes to Avoid
- Applying glue to a wet or dirty surface
- Using thick blobs instead of thin, layered coats
- Folding the wader before full cure
- Forgetting to seal patch edges
- Using heat guns directly on wet adhesive
Each mistake weakens the chemical bond and leads to premature peeling or cracking.
10. The Professional Touch
Commercial repair shops often add a final clear seam-seal coating over large patches.
You can mimic this by brushing a thin film of diluted adhesive across the repaired area to reinforce it. This layer protects against abrasion from gravel, boots, or seat friction.
For high-wear zones like knees, a textured rubber coating or additional patch overlay adds insurance.
A successful neoprene repair isn’t just about glue—it’s about discipline. Clean carefully, apply patiently, and let the material rest. Once you’ve done it once, you’ll realize how empowering it feels to fix your own gear—and how much money and waste it saves.
Do Neoprene Wader Seams Require Special Treatment?
Yes. Neoprene wader seams require special sealing techniques because they endure constant flexing and water pressure. Use seam-specific urethane adhesives, heat-bonded neoprene tape, or liquid seam sealers to reinforce joints from the inside. Clean, dry, and slightly roughen the seam before application, then allow 24 hours for curing. Proper seam care prevents delamination and leakage, especially at boot joints, knees, and crotch areas—where up to 70 % of neoprene wader failures occur.
Why Seams Fail First
Even premium neoprene won’t survive long if its seams aren’t properly treated.
Unlike a single puncture, a seam failure spreads like a zipper—one weak bond compromises the entire waterproof system. Because seams experience both tensile stress (stretch) and hydrostatic pressure, they demand a different level of attention than surface holes.
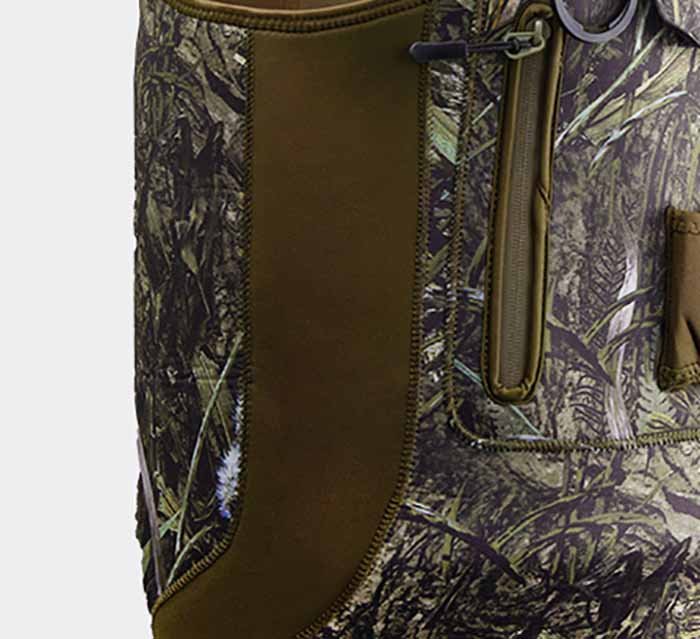
1. Anatomy of a Neoprene Seam
Most waders are assembled using a glue-and-blind-stitch technique:
- Gluing: A chloroprene or urethane adhesive bonds two cut edges of neoprene.
- Blind stitching: A curved needle sews without piercing through, avoiding full penetration that would cause leaks.
- Taping: A thin strip of neoprene or tricot is heat-pressed along the inner seam for reinforcement.
This triple system balances strength, flexibility, and waterproofing—but over years of kneeling, stretching, and drying, adhesives fatigue and tape edges lift.
| Seam Type | Construction Method | Typical Failure Mode | Repair Approach |
|---|---|---|---|
| Flatlock | Overlapping panels stitched through | Water seepage via needle holes | Seal inside with liquid urethane |
| Glued + Blind-Stitched | Butt joint with adhesive + partial stitch | Tape edge delamination | Re-tape with neoprene seam tape |
| Taped Seam | Heat-sealed reinforcement strip | Peeling under heat/age | Replace or overlay with fresh tape |
2. Choosing the Right Seam Sealer
Not all adhesives are equal for seam work.
Use low-viscosity urethane sealants like Aquaseal FD or Gear Aid Seam Grip WP that self-level into thread gaps.
For longer seams, neoprene seam tape (1 inch wide) provides a clean, professional finish.
| Product | Type | Ideal Use | Application |
|---|---|---|---|
| Aquaseal FD | Urethane liquid | Micro gaps, edge reinforcement | Brush on thin film |
| StormSure | Urethane gel | Long seam coating | Spread with spatula |
| Gear Aid Seam Grip WP | Low-viscosity urethane | Inside seam sealing | Dries clear, flexible |
| Neoprene Seam Tape | Heat-activated strip | Large internal seams | Iron or hot-roller bonding |
3. Step-by-Step Seam Re-Sealing
Step 1 — Inspect: Turn waders inside out under bright light. Look for lifting tape edges, stitch channels, or discoloration (a sign of glue fatigue).
Step 2 — Clean: Wipe the area with alcohol and let it dry.
Step 3 — Roughen (optional): Lightly sand glossy inner surfaces to boost adhesion.
Step 4 — Apply Sealer:
- For tape lift < 2 cm, inject urethane under the edge and press flat.
- For longer damage, remove old tape carefully and replace with new seam tape using a low-heat iron (≈120 °C / 250 °F).
Step 5 — Cure: Leave flat and untouched for 24 hours. Do not fold or hang while curing.
After curing, flex the area gently—if the coating stretches without cracking, the bond is secure.
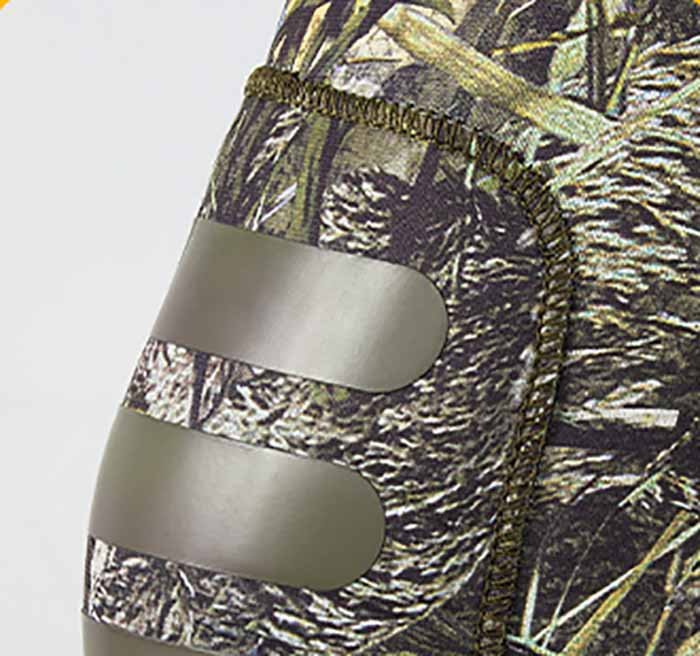
4. Treating Critical Zones
Some areas always deserve extra reinforcement:
- Boot-foot junction: The most stressed seam on chest waders. Apply an extra urethane line along the boot collar.
- Crotch & inner thigh: Frequent movement zones—apply a second thin coat 12 hours after the first.
- Knees & seat: Consider an overlay patch using 1 mm neoprene sheet for double protection.
According to durability testing conducted by outdoor repair centers, dual-layer seam sealing increased average leak-free lifespan by 40 %.
5. When to Seek Professional Repair
If you notice full-length seam separation or internal delamination larger than 10 cm, professional hot-press lamination is more cost-effective. DIY adhesives can’t rebuild broken foam layers.
In these cases, shops use industrial vulcanizing equipment that fuses neoprene panels back together—an option Szoneier and other OEM factories provide during production.
6. Preventive Maintenance for Seams
- Rinse waders after each trip to remove salt or mud.
- Avoid folding along seam lines; store flat or gently rolled.
- Once a year, brush a thin layer of diluted seam sealer across all inner joints—like waxing a car, it maintains flexibility.
A few minutes of seasonal care saves hours of repair later.
7. Quick Reality Check
Many anglers assume that once seams leak, the waders are finished. In truth, 80 % of seam failures can be repaired at home with $10 worth of materials and some patience.
It’s less about tools and more about technique: clean thoroughly, apply evenly, and cure patiently.
Seams are the unsung heroes of neoprene waders—the lines that literally hold your waterproof world together.
By giving them focused care with the right adhesives and sealers, you can extend the service life of your gear dramatically and avoid the disappointment of a soggy morning on the river.
How Can You Prevent Future Leaks and Extend Wader Life?
To prevent neoprene wader leaks, rinse them with fresh water after each use, dry inside-out in the shade, and store flat or loosely hung. Avoid folding across seams or exposing to direct sunlight. Apply neoprene conditioner or UV protectant periodically, and inspect high-wear areas like knees and boot seams every few months. Good cleaning, drying, and care habits can double or even triple the lifespan of quality neoprene waders.
The best way to fix a leak is to never get one in the first place.
Most neoprene waders don’t fail from poor manufacturing—they fail from neglect. Proper maintenance transforms a fragile product into a long-term tool. Treat your waders like an investment, not an accessory, and you’ll save hundreds of dollars over the years.
1. Clean After Every Trip — The Freshwater Rinse Rule
After each fishing or hunting outing, rinse your waders inside and out with clean, fresh water.
This removes salt, sand, algae, and organic residues that weaken neoprene and adhesives.
Avoid household detergents—they strip protective coatings. Instead, use mild, scent-free soap or neoprene shampoo once every few weeks.
| Cleaning Frequency | Best Practice | Purpose |
|---|---|---|
| After Every Use | Quick freshwater rinse | Remove salt and sediment |
| Every 5–6 Uses | Gentle soap wash | Eliminate bacteria and odor |
| Every Season | Deep clean + inspection | Detect hidden cracks or seam wear |
Pro Tip: Fill your waders partially with fresh water, slosh gently, and drain through the boots. This keeps the interior fresh and bacteria-free.
2. Dry Them the Right Way
The fastest way to ruin neoprene is heat.
Never leave your waders in a car trunk, near a radiator, or under direct sunlight. Heat causes delamination—the layers of foam and fabric peel apart, creating invisible weaknesses.
Correct drying method:
- Turn them inside out immediately after use.
- Hang from the suspenders in a shaded, ventilated area.
- When the inside is dry, reverse them to dry the outer shell.
Total drying time varies between 12–24 hours, depending on humidity.
Many anglers rush this step and store damp waders overnight—then wonder why they smell. Damp neoprene traps bacteria, which not only creates odor but chemically degrades the foam.
3. Smart Storage Habits
Storage may sound trivial, but it’s where most long-term damage occurs.
| Bad Habit | Consequence | Better Option |
|---|---|---|
| Folding along seams | Permanent crease cracks | Store flat or loosely rolled |
| Hanging by boots | Stretching & seam stress | Hang by shoulder straps |
| Plastic bag storage | Moisture retention & mold | Use breathable mesh bag |
If you need to store your waders for the off-season, sprinkle the interior lightly with talcum powder to absorb moisture and prevent material sticking.
4. Use Protective Treatments
Neoprene, like skin, benefits from conditioning. Every 2–3 months, apply a neoprene protectant or UV guard spray (e.g., McNett UV Tech) to restore flexibility and prevent cracking from sunlight exposure.
For heavily used waders, a thin wipe of silicone-free rubber conditioner keeps the material supple.
Avoid any product containing petroleum or alcohol—it can dissolve adhesives and coatings.
5. Inspect and Reinforce Early
Regular inspection is preventative maintenance in action.
Look for:
- White stress lines (early delamination)
- Seam tape lifting
- Discoloration around knee or crotch areas
- Loose stitches or curling edges
If found, seal with a thin coat of Aquaseal before it becomes a full leak.
A five-minute micro-repair often saves you from a weekend-long fix later.
6. Take Care When Donning and Removing
Most tears happen not in the river, but in the parking lot.
Pulling waders by the boot heel or yanking shoulder straps stresses seams. Instead:
- Sit down, fold the leg gently, and slide your foot in.
- Hold the body, not the straps, when adjusting.
- Always loosen suspenders before removing to avoid stretching seams.
It sounds simple, but these habits preserve seam tension integrity over time.
7. Environmental Awareness
Even good gear can’t survive poor conditions.
Avoid kneeling directly on rocks or sharp sticks—use a kneeling pad.
Stay away from chemical exposure (fuel spills, bug repellent overspray, detergents).
If wading in saltwater, rinse immediately afterward; salt crystals are microscopic knives that keep cutting neoprene long after you’ve dried it.
8. The Lifespan Equation
| Care Level | Typical Lifespan | Leak Risk |
|---|---|---|
| Neglected | 1–2 years | High |
| Moderate (occasional cleaning) | 3–4 years | Medium |
| Proper care (rinse + dry + inspect) | 5–7 years | Low |
That’s not marketing—it’s reality, supported by multiple outdoor gear tests.
A single tube of sealant and consistent care can literally double the usable life of your waders.
9. Real Story — “The 10-Year Pair”
Jason, a fly fisherman from Montana, bought a mid-range pair of neoprene waders in 2014. By sticking to a rinse-dry routine and sealing small cracks annually, he’s still using them in 2025—eleven years later. “They’re faded and scarred,” he says, “but they keep me dry every winter.”
That’s not luck—it’s maintenance discipline.
Neoprene waders are built tough, but longevity is a partnership between material and mindset.
If you clean, dry, and store them like the technical equipment they are, they’ll reward you with years of dry, warm adventures. Prevention doesn’t just save gear—it saves time, money, and frustration.
Is It Worth Re-Sealing Old Neoprene Waders or Buying New Ones?
Re-sealing old neoprene waders is worthwhile if leaks are limited to small punctures, seams, or tape lifts and the material still feels elastic. When neoprene loses flexibility, thins at the knees, or shows widespread delamination, replacement becomes more economical. A full reseal costs about 10–20% of new wader price and extends life by several seasons, while advanced eco-conscious buyers often recycle or upcycle old neoprene instead of discarding it.
Eventually, every wader reaches that crossroad: patch again or buy new.
It’s a decision that blends practicality, sentiment, and sustainability.
Your answer depends not just on the number of leaks—but on how the neoprene itself is aging.
Let’s unpack the logic behind repair vs. replacement and explore when each path makes sense.
1. Evaluate the Material, Not Just the Leak
Neoprene’s strength lies in its cellular elasticity. Over years of compression, its air cells collapse, reducing insulation and flexibility.
If your waders still feel supple and bounce back when pressed, resealing is absolutely worth it.
But if they feel papery, stiff, or permanently creased, the foam structure is fatigued. Adhesives won’t bond effectively, and even after sealing one leak, new ones will appear nearby.
| Condition | Reseal Viability | Action |
|---|---|---|
| Small seam leaks (<5 cm) | Excellent | DIY or professional reseal |
| Single puncture / tear | Excellent | Patch and continue using |
| Multiple leaks but flexible neoprene | Moderate | Reseal entire interior |
| Stiff, cracked, or thinning foam | Poor | Replace |
| Inner lining delaminating | Poor | Replace or recycle |
When in doubt, flex the neoprene between your fingers. If you hear faint “crackling” sounds, the internal air cells have already collapsed.
2. The Economics of Repair vs. Replacement
A brand-new pair of quality neoprene chest waders ranges from $150–$400.
A reseal kit (adhesive, seam tape, cleaner) costs around $20–$30, and professional shop resealing averages $40–$80.
| Option | Typical Cost | Added Lifespan | Worth It? |
|---|---|---|---|
| DIY small-area reseal | $10–$20 | 1–2 years | ✅ Absolutely |
| Full seam re-taping (DIY) | $25–$40 | 2–3 years | ✅ If material flexible |
| Professional reseal | $60–$90 | 3+ years | ✅ For mid/high-end waders |
| Replacement (new waders) | $200+ | 5–7 years | ✅ If old neoprene brittle |
If you enjoy the DIY process and your waders still feel structurally solid, resealing is both financially smart and environmentally responsible.
3. Sustainability and the Hidden Cost of Disposal
Discarded neoprene doesn’t biodegrade quickly—it’s a synthetic rubber derived from petrochemicals.
Every pair of waders thrown away contributes to landfill waste that may last decades.
Forward-thinking manufacturers like Szoneier are now adopting recycled neoprene and limestone-based formulations, cutting petroleum use by up to 30%. Some even collect post-consumer neoprene scraps for regrinding into non-medical padding or insulation materials.
If your waders are beyond repair, consider these eco-friendly options:
- Donate to a local repair workshop for parts.
- Upcycle into knee pads, gear pouches, or pet bed liners.
- Recycle through neoprene reclamation programs (offered by select outdoor brands).
Turning old gear into new material keeps the cycle sustainable—and reflects the same resourcefulness that drives the outdoor community.
4. The “Sentimental Value” Factor
Practicalities aside, waders carry memories. They’ve crossed rivers, endured storms, and held the first fish of many seasons. For some anglers, resealing isn’t about money—it’s about connection.
Taking an hour to repair a trusted pair feels like keeping an old friend alive.
But emotion shouldn’t cloud logic. If the neoprene is deteriorated beyond restoration, investing in a new, higher-quality pair may actually save the spirit of the experience—dry, comfortable, and ready for the next chapter.
5. When Replacement Becomes the Smart Move
Replace your waders when:
- Neoprene has lost over 50% of its stretch.
- The interior lining flakes or delaminates.
- Seams continuously peel after resealing.
- You experience recurring leaks after every 1–2 outings.
At that point, you’re chasing diminishing returns. Think of it as upgrading from a worn tire—you’ve gotten your mileage, and it’s time for safety and comfort again.
6. Choosing Better Next Time
When you do buy new waders, look for:
- Glued + blind-stitched + taped seams (three-step sealing system).
- Reinforced knee and seat panels.
- UV- and chemical-resistant neoprene.
- Warranty or repair support.
Manufacturers like Szoneier, with 18+ years of neoprene R&D, focus on exactly these elements—creating waders and neoprene products that resist degradation longer, require fewer repairs, and deliver better comfort over time.
7. The Hybrid Approach: Reseal + Reinforce
Some users choose a middle ground: partial resealing plus reinforcement.
You can reseal the interior seams while adding thin neoprene overlays to high-wear zones. This hybrid approach extends use without the cost of a full replacement and improves insulation in cold water.
For many, this practical compromise delivers 2–3 more years of reliability for less than $40—arguably the best ratio of performance to price.
If your neoprene waders still feel alive—soft, flexible, and mostly intact—they deserve another chance. Resealing small leaks is quick, inexpensive, and deeply satisfying.
But if stiffness, cracks, or seam delamination dominate, retiring them responsibly is the wiser route.
Either way, the lesson remains the same: take care of your gear, and it will take care of you. And when it’s time for your next pair, look for trusted neoprene specialists like Szoneier, whose expertise ensures durability, comfort, and waterproof performance from the start.
Conclusion — Keep the Water Out, and the Adventure Going
No one forgets the first cold rush of water seeping into a trusted pair of waders. But the truth is, most neoprene wader leaks aren’t the end of the story—they’re just another chapter in the life of your gear. With the right sealants, tools, and techniques, you can restore waterproof performance, save money, and reduce waste all at once.
Whether you’re patching a pinhole with Aquaseal, re-taping an old seam, or learning to dry and store your waders properly, each step reconnects you with your equipment. It’s a craft—a small act of sustainability that keeps both you and your environment healthier.
In today’s throwaway culture, repair is a quiet rebellion. Every angler or hunter who learns to seal their own waders becomes part of a smarter, more responsible outdoor tradition.
In short: find the leak, clean carefully, seal precisely, and let it cure fully. Do that, and your waders can stay watertight for years beyond their warranty.
Why Szoneier Is the Partner Behind Durable Neoprene
Behind every reliable repair stands a manufacturer who understands neoprene down to its chemistry.
Szoneier, a Chinese neoprene specialist with over 18 years of R&D and production experience, is exactly that partner.
From industrial-grade wetsuit fabric to OEM wader components, Szoneier engineers its materials to resist the common causes of leakage—UV degradation, delamination, and foam fatigue.
Factories in Guangdong integrate full in-house processes:
- CR/SBR blending and lamination
- CNC cutting and precision bonding
- Seam-tape application under controlled temperature and pressure
- ISO-certified quality testing for waterproof adhesion and tensile strength
The result is neoprene that lasts longer, seals cleaner, and performs stronger—whether for fishing waders, diving gear, protective covers, or custom outdoor accessories.
Custom Neoprene That Stays Watertight
If you’re a brand, distributor, or outdoor equipment company seeking durable neoprene products or OEM/ODM production, Szoneier can turn your vision into market-ready gear.
From sample development to bulk manufacturing, every stage is handled with precision and transparency.
Here’s what you can expect:
- Free design consultation and rapid sampling (7–10 days)
- Low MOQ customization for startups and boutique brands
- Certified materials (OEKO-TEX, REACH, RoHS)
- Global delivery from Guangdong to FBA or direct warehouses
Whether it’s waders, wetsuits, or neoprene accessories, Szoneier ensures your product—and your customers—stay dry, warm, and confident in every environment.