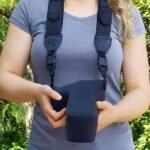
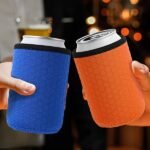
When summer hits and the kids are lining up for popsicles, what if you handed them a fun, insulated sleeve that not only keeps their treat cold but also carries your brand logo and looks premium? Enter the world of neoprene popsicle holders—stylish, functional and perfect for custom merchandise, promotional giveaways or retail add-ons. This article dives into how you can design, manufacture and scale neoprene popsicle holders—whether you are a DIY craftsman or a brand sourcing from a seasoned factory.
A neoprene popsicle holder is an insulated sleeve made from synthetic neoprene rubber (usually backed with knit fabric) designed to hold a frozen ice-pop, reducing sweat, keeping the treat colder and offering a clean surface for branding.
Picture a bright summer afternoon at a pool-party: each guest grabs a popsicle wrapped in a vivid neoprene sleeve imprinted with your logo. Not only does it raise your brand visibility, it also gives them a keepsake. Let’s walk through all the practical details—from material choices, tooling, design patterns, printing methods, production pitfalls, to scaling up for private-label OEM orders via a factory like Szoneier. You’ll stay reading because we’ll reveal trade secrets that separate low-cost throwaways from premium merch that people actually keep. So let’s get started.
What Are Neoprene Popsicle Holders and Why Do They Matter?

Neoprene popsicle holders are insulated sleeves made from foamed or sheet neoprene (synthetic rubber) with a fabric backing, sized to slip over an ice-pop or frozen treat. They matter because they provide thermal insulation, reduce condensation (less drippy mess), provide a clean branded surface, and serve as a reusable promotional item rather than single-use packaging.
To fully appreciate why neoprene popsicle holders are a compelling product, we need to look at their material heritage and how they compare with alternatives.
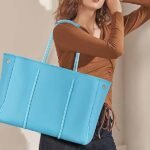
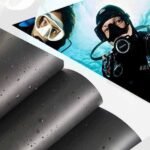
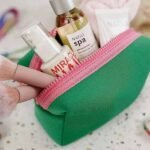
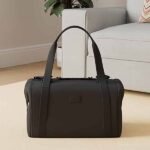
First: what is neoprene? According to material guides, neoprene (also called polychloroprene) was originally developed by DuPont in 1931 and is prized for its flexibility, chemical resistance and thermal insulation. In fabric form it’s often laminated with knit fabric backing for durability. For example, this same type of material is widely used for laptop sleeves, sports gear, and bags.
Why use it for popsicle holders? Traditional paper or cardboard sleeves provide minimal insulation, can become soggy, and aren’t meant to be reused. Cotton sleeves wrinkle, absorb moisture and don’t keep things cold. In contrast, a neoprene holder adds a value-perceived premium feel, better thermal performance (thanks to the foam core and closed cell structure resisting rapid heat transfer) and becomes a keepsake item. Plus, for a brand, every time a consumer holds that cooler sleeve, your logo is visible.
From a marketing vantage: offering a neoprene sleeve aligns with premium positioning, sustainability (if reused), and the brand story of “cool treats, cool merch”. For a manufacturer like Szoneier—which offers customization, low MOQ, free design, fast sampling and OEM/ODM capabilities—this product category fits perfectly into the value chain for overseas small-to-mid buyers and high-end brands.
Hence, neoprene popsicle holders matter both functionally and commercially: functionally for insulation, condensation reduction and durability; commercially for branded merchandise, repeat use, and higher perceived value than single-use packaging.
Which Materials, Tools, and Specs Do You Need to Get Started?

Select the right neoprene grade (e.g., 2–3 mm thickness, closed-cell foam sheet, fabric-backed), match with appropriate lining knit (polyester tricot, nylon jersey), and prepare tools such as a rotary cutter, heat-resistant tape, sewing machine (zigzag or overlock), and optional heat-press. Define specs: outer diameter for ice-pop fit, seam allowance, edge finish.
Neoprene Grade & Structure
When making popsicle holders, you usually use sheet or foam neoprene (versus thick wetsuit grade). The foam provides the “insulation” effect – small gas bubbles reduce heat transfer. Material guides show that neoprene is produced through foaming and processing via polymerisation of chloroprene, then cut into sheets. For example, closed-cell foam neoprene shows lower thermal conductivity and better resistance to water intrusion.
Spec wise, typical thickness ranges for accessories (bags, sleeves) are 1.5–4 mm. For popsicle holders you might go for approx. 2–3 mm to balance insulation + ease of sewing. The fabric backing (e.g., tricot knit, stretch knit) gives dimensional stability and a surface for printing. A manufacturing guide for bags states that neoprene gives “modern aesthetic and outstanding functionality”.
Tools and Equipment
Cutting & Layout
- A rotary cutter or die-cut template for consistent shape.
- Heat-resistant masking tape/clips to hold layers together (neoprene can shift).
- Milling table or flatbed for plug-and-play for small runs.
Sewing / Bonding
Neoprene needs specific handling: Many sewing machines will struggle unless correct needle (ballpoint or stretch) and thread (polyester or nylon) are used. Over-lock or zigzag stitch is standard. For clean, high-end finish you might also consider adhesive tape bonding or heat-sealed edges (for no-stitched look). The manufacturing of wetsuits, for example, uses seam taping and blind-stitching to avoid leakage. For a popsicle sleeve you won’t require full waterproof sealing, but minimize edge fraying and ensure durable seams.
Heat Press & Branding Tools
If you plan to do full-colour sublimation printing or heat-transfer graphics, you’ll need a heat press with correct temperature (often 160-180°C) and pressure settings. Additionally, screen-printing setups (manual or semi-auto) are common for large runs.
Specification Planning
Before production, define:
- Inner diameter/opening size to fit a standard ice-pop (for example 30 mm diameter x 110 mm length) plus seam allowance.
- Height of sleeve (e.g., 120–140 mm) so that enough of the popsicle remains for the user to hold.
- Seam allowance e.g., 5–8 mm.
- Edge finish style: folded hem vs. raw cut with binding.
- Print area: front panel width/height for logo/graphic.
Critical material considerations
- Make sure the neoprene is food-adjacent safe (even if only used with the popsicle in wrapper) and low odor. While neoprene is technically a synthetic rubber, its production and curing agents (e.g., ETU in vulcanisation) have been flagged in some contexts. While most accessories won’t touch food directly, it’s wise to specify compliant additives and post-wash to remove residuals.
- Keep stretch & recovery in mind: If the sleeve is too stretchy or too stiff, fit will be poor.
- Thermal performance: While not a high-tech thermal jacket, you still benefit from neoprene’s insulation properties versus paper or cotton.
Summary
By choosing the right neoprene grade, aligning your cutting and sewing tooling, and defining precise specs, you set the foundation for a quality popsicle holder that performs functionally and looks premium. This foundational planning is critical before moving into design and patterning (which we will explore next).
How Do You Design the Pattern and Choose the Right Dimensions?

Designing the pattern begins with measurement of your target popsicle, adding seamless allowances and stretch margin. Choose a simple cylindrical sleeve pattern or slightly flaring top for easy insertion. Decide whether you include bottom base or leave open. Add trim, binding, or notch for hang-tag. Use digital CAD or template to ensure repeatability and ease of conversion for manufacturing.
Starting with Target Popsicle Size
One of the first steps in pattern design is to define your target popsicle—i.e., the frozen treat you are going to accommodate. Suppose the popsicle is 26 mm diameter, 100 mm long. You’ll want the sleeve to be slightly larger to allow insertion but snug enough for insulation and grip. So you might design an inner opening of 30 mm diameter and a height of 110–120 mm. If you plan multiple sizes (mini vs regular), you might create two pattern sets.
Flat Pattern vs 3-D Shape
Neoprene sleeves are typically made from flat panels that are sewn/bonded into a tube. A common pattern:
- A rectangle: Width = inner circumference + seam allowance (e.g., circumference of 30 mm diameter ≈ 94 mm + allowance)
- Height = e.g.,120 mm + hem/fold allowance. Alternatively, you might design a slightly tapered shape (wider at top) to ease sliding popsicle in/out, which adds aesthetic and functional benefit.
Adding Features & Branding
- Top edge finish: You may choose to flare out top for easy grab, or add binding for clean look. A notch or grommet might allow hang-tag or key-chain clip.
- Bottom finish: Either sewn closed (if you want full containment) or open (so melted drip can exit). Many brands prefer open bottom for easy drip drainage and cost saving.
- Branding zone: On your pattern, allocate front panel width and height for logo/graphic. For example 70 mm wide × 40 mm high. Ensure pattern includes extra margin so printing does not wrap seam.
- Seam allowance: Typically 5–8 mm, depending on your machine and finish. Overlock needs about 5 mm; flatlock may need more.
Mock-up & Prototype
Once pattern is drafted, create a mock-up using inexpensive fabric or scrap neoprene to test fit. Insert real popsicles (or mock shapes) to test grip, ease of insertion/removal, insulation feel, condensation behaviour. Adjust dimensions as needed (e.g., reduce height if user’s hand covers too much, increase diameter if insertion is too tight).
Scale and Repeatability
If you are moving toward manufacturing (OEM/ODM) with a factory like Szoneier, you’ll want to digitise your pattern (e.g., DXF file) so that cutting (manual or CNC) can repeat accurately. For multiple SKUs (colour, print variant), maintain the pattern but change print artwork, binding colour, etc., to reduce cost.
Critical Design Considerations & Trade-offs
- Fit vs Ease: Tighter fit = better insulation, but harder to insert popsicle and may stress seam. Looser fit = easier insertion, but less thermal contact and may flop.
- Height vs usability: A taller sleeve gives more branding space but may obscure the treat and look awkward in hand. A shorter sleeve is easier but gives less branding real-estate.
- Bottom open vs closed: Closed bottom means melted drip is contained but may require maintenance or drain hole. Open bottom is lower cost, easier cleaning, and better for outdoor use (drip falls).
- Material stretch: If the neoprene is highly stretchable, pattern must anticipate recovery so sleeve doesn’t sag.
- Print alignment: Seam placement matters—avoid placing a full-colour graphic split across seam if visually distracting.
Example Pattern Table
| Parameter | Example Value | Notes |
|---|---|---|
| Inner diameter | 30 mm | Fits standard popsicle ~26 mm dia |
| Sleeve height | 120 mm | Includes grip zone + treat holder |
| Panel width (flat) | 100 mm | ~Circumference + seam allowance |
| Seam allowance | 6 mm | For overlock finish |
| Branding zone | 70 mm × 40 mm | Front panel |
| Top edge finish | Binding (3 mm) | Improves aesthetic and durability |
| Bottom finish | Open | For drip drainage and cost saving |
From Design to Manufacturing
Once your pattern is finalised and mock-tested, send the technical package (pattern file, spec sheet, material grade, print artwork, colour codes, branding placement) to your manufacturer (e.g., Szoneier). They can then generate a tech-pack, produce a sample (free in Szoneier’s case) and you can test insertion, fit, print clarity, seam strength, drip behaviour, packaging fit. This iteration loop ensures the final product meets your brand’s standard before scaling production.
Thus, designing the pattern and setting the right dimensions is the bridge between concept and manufacturing. Getting it right ensures fewer surprises, smoother sampling, and better cost control when you ramp to full order.
How Do You Cut, Stitch, or Heat-Seal Neoprene for Clean Edges?
To produce clean, durable neoprene popsicle holders, layers should be laid flat, cut with precision (manual rotary, die-cut, or CNC), edges finished by overlock/zigzag stitching or heat-sealed bonding (TPU tape or hot-melt film). Seams should be aligned to avoid puckering, glue or tape can reinforce bonding, and inspection (peel/edge strength) should be done.
Cutting Techniques
Neoprene, particularly foam sheet forms, can shift when cut—so best practice is to use a stable cutting table, secure layers with heat-resistant tape or clips, and use a sharp rotary cutter or die-cut machine for volume. For very high precision (especially for branding accuracy), CNC laser or water-jet cutting is possible (used in high-end bag production). While for small runs manual cutting is acceptable, ensure clean edges to avoid fraying or inconsistent dimensions which will affect fit and assembly.
Edge Finishing Options
Sewing (Overlock/Zigzag)
This is the most common for accessory-type neoprene items. Use a ball-point/stretch needle, polyester or nylon thread, and stitch length around 3–4 mm. Overlock allows the raw edge to be serged, reducing fray. Zigzag or flatlock may be chosen for aesthetic detail. On the downside, sewing punches holes through neoprene, which may allow moisture ingress or compromise insulation slightly—though for popsicle sleeves this is usually acceptable.
Heat-Sealing / Tape Bonding
For higher-end finishes (no visible stitch), you might use hot-melt film bonding or TPU heat-tape. For example, in wetsuits/bags, seam taping and gluing are used to prevent leakage. In a popsicle holder you might consider using a narrow heat-seal bonding strip at the seam, then optionally a topstitch for durability. Benefits: clean edge, minimal bulk, no needle holes. Challenges: requires heat-press equipment, proper bonding adhesive, and training to avoid delamination.
Combined Approach
Many manufacturers adopt a “glue + stitch” method: apply neoprene-compatible adhesive to the seam edge, press together, then overlock/stitch for reinforcement. This yields a strong seam with neat appearance.
Seaming Alignment & Quality Checks
Accurate alignment is essential: if panels are misaligned, the sleeve may twist, graphic may misregister, or fit may be compromised. Quality control should include:
- Seam symmetry check
- Stitch count per inch (SPI): For example aim for 10–12 SPI for durability.
- Peel strength test: Grab seam with pliers and pull; adhesive should not separate easily.
- Dimensional tolerance: Inner diameter, height within ±2 mm.
- Edge flatness: Edge should lie flat without waviness or tunnelling (common in neoprene if stitch tension too tight).
Volume Production Considerations
When you move from prototypes to volume production with an OEM like Szoneier:
- Use template jigs to hold material for cutting.
- Pre-bundle panels by colour/print variant for batch cutting to save time.
- Set standard machine parameters (needle size, stitch length, tension) in factory SOP.
- Consider bundle testing: After sewing 10 samples, run a “fit test” with actual popsicle.
- Document defect rates (AQL) and specify acceptance criteria (e.g., seam unravel ≤1 %, dimension variance ≤2 mm, print mis-registration ≤1.5 mm).
Manufacturing Pitfalls & Fixes
- Edge tunnelling: Caused by excessive stitch tension, material stretch. Fix: reduce tension, use stabilized backing or binding.
- Delamination: Bonded seam peels. Fix: ensure correct adhesive, sufficient dwell time, correct temperature.
- Warped shape: Cutting pieces without grain or backing orientation may cause one side stretch more than the other. Fix: maintain consistent fabric backing direction.
- Print misalignment: If seam is too close to graphic, printing may get distorted. Fix: align pattern graphic zone further away from seam margin.
Final Thoughts
The cutting and assembly stage is where good design meets real production reality. For a custom order of neoprene popsicle holders, a reliable OEM will have established tooling, jigs, quality checks—and you as the buyer should ensure those are documented. At Szoneier, with 18+ years of neoprene manufacturing experience, free design and rapid sampling, you get these processes streamlined. Ensuring clean edges, durable seams and consistent sizing means your finished popsicle holder acts as both a high-function accessory and an effective marketing vehicle.
What Printing and Branding Methods Work Best on Neoprene?

Effective branding on neoprene popsicle holders can be achieved via sublimation printing, screen-printing, heat-transfer decals or embroidered patches. Choose based on colour complexity, run size and durability. Ensure ink adhesion to the fabric backing, test wash-resistance and exposure to cold/moisture. For low MOQ custom OEM orders, transfer or screen print is cost-effective; for premium runs, full-colour sublimation elevates perceived value.
Printing Methods Overview
Sublimation Printing
Ideal when you’re using polyester-backed neoprene or a fabric layer that supports dye sublimation. You print the artwork on transfer paper, then heat-press to impart ink into the fabric. Benefits: full-colour, photo-quality visuals, no cracking/stick peeling. Limitation: typically requires 100 % polyester backing and is done before assembly (so pattern flattening must account for seams). Cost is higher per piece, so more suited for bigger runs or premium packaging.
Screen Printing
Common for simpler knock-out designs (one or two colours), on plain neoprene with knit backing. Works well on curved surfaces like sleeves. Cost per colour; initial stencil cost. Great for mid-runs (several hundreds to thousands). Durability is good if ink is flexible and properly cured. For example, in bag manufacturing the compatibility of neoprene and printing is emphasized.
Heat-Transfer Decals / Vinyl
Use when you want small batches or mix & match colours. Artwork is cut/printed on vinyl/film then heat-pressed on the sleeve. Cost-effective for short runs, but may feel less integrated and may crack with heavy use or washing. Choose high-quality flexible vinyl and pre-test for bending/stretch durability.
Embroidered Patches / Rubber Labels
Less common for ultra-small accessories like popsicle holders (due to cost and bulk) but serve a premium brand impression. A woven or rubber label stitched onto the sleeve adds texture and perceived value. Consider if your brand wants “premium merch” positioning.
Branding Placement & Specifications
- On a typical popsicle holder (height ~120 mm), best placement for visual impact is centred front panel at ~70 mm wide × 40 mm high.
- Allow a margin (5-10 mm) from the seam so artwork isn’t distorted.
- For repeated runs with variant colourways, maintain logo placement consistent to support brand recognition.
- Use PMS/ Pantone colour codes for consistent colour across fabric, print, welding etc.
- Use mock-ups or samples to verify print clarity, especially charge on foam surface (sometimes foam layer bleeds if ink too heavy).
Quality & Durability Considerations
- Ensure inks or adhesives are compatible with neoprene’s stretch and flex. Poor choice = cracking or peeling.
- Test for condensation or frozen drip: Since popsicle holders will contact cold surfaces and moisture, print zone should be resilient to low temps and moisture.
- Washing/maintenance: If the holder is meant to be reused, ensure branding survives at least 20–30 washing cycles (hand wash or machine wash low temp).
- Colour fastness: Light & UV resistance should be considered especially if used outdoors. Neoprene itself has good stability; it’s the print that can fade.
Cost & MOQ Trade-offs
- For short runs (50-500 pieces), heat-transfer or screen-print with 1-2 colours is most cost-effective.
- For larger runs (1,000+), full-colour sublimation or high-quality screen with 4+ colours is viable.
- Ask your manufacturer (Szoneier offers low MOQ) about:
- Artwork setup cost
- Colour set-up cost
- Print per piece cost
- Bundling variants (mixing colours or logos) and how that affects cost
- Additional branding elements––such as hang tags, woven labels, printed care tags—should be calculated in total cost.
Branding Beyond Print
Consider other touches to elevate brand impression:
- Use custom packaging (e.g., eco-friendly box, OPP bag with header card)
- Add a story card (“100% neoprene, free sample, custom logo”)
- Offer mixed colour combos with custom branding per colourway
- Use social media marketing: show your neoprene popsicle sleeves in use at summer events to build brand awareness
Summary
Branding is more than just logo placement. Choose print method aligned with run size and brand positioning, ensure durability in real-use conditions, and integrate packaging and story to support your brand message. When you partner with a factory like Szoneier, you’ll benefit from their in-house design assistance, rapid sampling, and OEM/ODM processes to turn your branded neoprene popsicle holder idea into reality.
Is Neoprene Food-Adjacent Safe, and How Do You Clean & Maintain Holders?
Neoprene accessories are safe for food-adjacent use when sourced with compliant materials (e.g., OEKO-TEX, REACH-compliant additives). For popsicle holders, ensure liners or contact surfaces do not leach chemicals, and specify no direct food contact or only wrapped treats. Cleaning is easy: hand wash or machine wash cold, air dry flat, avoid direct sunlight for long periods. Proper maintenance extends life and retains brand quality.
Material Safety Considerations
While neoprene is widely used in consumer goods (wetsuits, laptop sleeves, laptop cases) and decorative accessories, using it for a product that touches frozen treats raises some special concerns. While you will rarely have the popsicle directly touching bare neoprene (usually inside wrapper), best practice is:
- Confirm the neoprene foam and backing fabrics meet relevant safety standards (for example OEKO-TEX Standard 100, or comparable).
- Avoid use of prohibited accelerants or additives. For example, certain vulcanisation accelerators like ETU used in chloroprene processing have been flagged as reproductive toxins.
- Specify that your supplier (again Szoneier) uses food-safe or at least non-hazardous finishing chemicals, and that residual solvent/monomer levels are within safe limits.
- In your product spec, clearly label “For use with packaged frozen treats only. Sleeve should not come into direct contact with un‐wrapped food.” This disclaimer helps cover regulatory risk and sets proper user expectations.
Cleaning & Maintenance Instructions
Because the sleeve will likely be reused multiple times, giving the end-user (or your wholesale buyer) clear cleaning instructions is valuable for product quality and brand impression:
Recommended cleaning steps:
- Hand wash in cold or lukewarm water (≤30 °C) with mild detergent.
- Gently squeeze out excess water—do not wring, as foamed neoprene can deform.
- Machine wash is possible (delicate cycle, cold) but place in protective mesh bag to reduce abrasion.
- Air dry flat in shaded area; avoid direct sunlight or drying on radiator (UV and heat degrade foam over time).
- Do not tumble-dry, do not iron. The heat may damage foam structure or print.
- If drip from melted popsicle occurs, rinse promptly—prolonged exposure to sugary residue may attack fabric backing/adhesive.
Storage and Use Tips
- Store the sleeves flat or hanging (avoid sharp folds) to maintain shape.
- Avoid extreme temperatures (e.g., freezing for extended periods) beyond standard use, to prevent brittleness.
- If used outdoors in hot sun, suggest end-user to rinse and air dry after event to extend life.
- If branding includes metal eyelets or clips, remind users that these should not be exposed to saline or harsh chemicals (for outdoor promos).
Environmental & Reuse Angle
Promoting your neoprene popsicle holder as reusable and durable supports brand sustainability allusions. Unlike single-use paper sleeves, these can be used for dozens of events. You might even consider “wash and reuse” language on your packaging. Additionally, you can ask your manufacturer about recycled neoprene or neoprene made with eco-friendly foaming agents—some recent guides show the polymer chemistry of neoprene production is evolving.
Cleaning Quick Reference Table
| Cleaning Step | Recommendation | Why It Matters |
|---|---|---|
| Water Temperature | Cold or ≤30 °C | Prevents foam degradation |
| Detergent Type | Mild, no bleach | Harsh chemicals damage backing or print |
| Drying Method | Air dry flat, shaded | Retains shape, prevents UV/heat damage |
| Storage | Flat or hanging, not crumpled | Maintains cylinder shape |
| Post-Use Treatment | Rinse off drip residue | Prevents sticky buildup and fabric damage |
Summary
Ensuring your neoprene popsicle holders are safe for consumer use, easy to maintain, and durable enhances brand value and user satisfaction. Being transparent with end-users about cleaning and storage improves longevity, reduces returns, and reinforces your premium positioning. As a custom OEM, Szoneier can help you specify compliant materials, finalize care labels and plan packaging supporting these instructions.
Are There Common Mistakes to Avoid—and How Do You Fix Them?

Yes — common mistakes include loose fit (insufficient insulation), poor seam finishing (puckering or seam breakage), mis-registered printing, inadequate drip drainage, poor material sourcing (low grade neoprene), and packaging neglect. Fixes include tighter fit tolerance, proper seam specs, mock-up printing tests, open‐bottom design for drip, sourcing from experienced manufacturer, and designing packaging into product cost.
Below are typical pitfalls we see when aspiring brands or DIYers make neoprene popsicle holders, and how you can proactively mitigate them.
1. Fit Too Loose / Too Tight
If you cut the sleeve too large, the popsicle slides or the sleeve flops, reducing insulation and looking cheap. Too tight and it’s hard to insert or extract the popsicle, seams stress, and user experience suffers. Fix: prototype test real popsicles or mock sticks; aim for ~5–10 % clearance (e.g., if popsicle body 26 mm dia target, inner sleeve diameter ~30 mm). Use physical prototyping before mass run.
2. Seams Tunnelling or Uneven
Neoprene sewing requires correct machine settings. If tension is too high, the edge will pull and tunnel. If stitch length too long or wrong needle, you can get skipped stitches. Fix: Set machines with standard SOP (needle size #70–80 ball point, stitch length 3.5 mm, tension moderate), perform pilot run and inspect edge flatness.
3. Misaligned or Low-Quality Print
If the branding graphic crosses a seam or is distorted due to panel curvature, the final look suffers. Also, cheap ink peeling leads to complaints. Fix: Design pattern with front panel clearly demarcated; ask factory for print registration tolerance (e.g., ±1.5 mm); specify print durability standards (wash cycles, UV test). Do a print sample and a dip test (insert popsicle, allow condensation drip, then inspect).
4. Drip/Bottom Design Neglect
Frozen treats melt; if the sleeve bottom is fully sealed, you risk pooling liquid inside or messy removal. Some partners inadvertently design closed bottoms, only to get complaints. Fix: Opt for open bottom or small drain holes. Communicate to buyer: “melt will drip — ensure internal liner/fabric is washable.” In your spec, highlight bottom style.
5. Low-Grade Material or Unknown Suppliers
A low-grade neoprene may degrade quickly, may smell, may delaminate, or may not insulate well. In your case, choosing a reputable supplier like Szoneier (with 18+ years in neoprene manufacturing) means you’re less likely to get surprises. Always ask for material certificates (foam density, cell count, backing fabric weight, shrinkage).
6. Packaging & Presentation Ignored
Even a well-designed sleeve will appear cheap if shipped loose with no label, no hang-tag, no protective bag. Think of your holder as both a functional product and a brand statement. Fix: Include packaging spec in your order: e.g., each sleeve in an OPP bag with header card print, or in a small box with your brand logo and care instructions. Consider FBA-compliant packaging if you’re selling via Amazon.
7. Lead Time & MOQ Mis-Calculation
Some clients assume they can jump into mass production without sampling; then problems occur (fit, print colour, seam issues) and delays set in. Fix: Build in a sample phase (Szoneier offers rapid sampling), approve pre-production sample, and then progress to pilot run of e.g. 100 pieces before full output. Agree on lead time explicitly.
Summary
Avoiding these common mistakes elevates your product from “just another sleeve” to a premium branded accessory. Leveraging a factory partner with strong neoprene experience (like Szoneier) means you gain expertise, design support, and risk-mitigation. Always prototype, test, verify, refine and then scale.
How Do You Scale from DIY to Small Batch or Private Label Production?
Scaling involves transitioning from in-house or low-volume runs to structured manufacturing: cost-out material/fabric yield, labour minutes, print/branding cost; prepare tech-pack; negotiate MOQ, pricing, packaging and logistics; maintain quality via standard checks; handle logistics (FBA, container shipping). For private label through Szoneier, you benefit from low MOQs, rapid sampling, and full service from design to delivery.
Costing & Yield
When scaling, you need to break down costs: material cost (neoprene sheet per square metre, fabric backing, print/label), cutting loss (yield waste), labour (cutting, sewing, finishing), print/branding cost, packaging, and logistics. Here’s a simplified table:
| Cost Element | Example Value | Note |
|---|---|---|
| Neoprene sheet (2.5 mm) | US$ 6.50/m² | Supplier quote |
| Fabric backing + prep | US$ 1.20/m² | Knit polyester |
| Yield loss | 15% | Due to shape cutting |
| Labour (cut + sew) | US$ 0.80/piece | Low-volume factory rate |
| Print cost | US$ 0.45/piece (1-2 colours) | Screen print set-up + run |
| Packaging | US$ 0.30/piece | OPP bag + hang tag |
| Logistics & overhead | US$ 0.25/piece | FOB China basis |
| Total estimated cost | ≈ US$ 3.80 per piece | For 1,000 piece run |
Of course this is illustrative; your actual cost may vary based on sheet width, colourways, print complexity, packaging specification. The key is to negotiate lower material cost as volume increases and design for efficient cutting (nesting shapes, minimal waste).
MOQ, Lead Time & Production Workflow
A factory like Szoneier typically offers low MOQ (custom start from a few hundred pieces) with fast sampling (free sample offer) and reasonable lead time (4-6 weeks typical for small run). For scaling you should map the workflow:
- Design & tech‐pack
- Approve material & print sample
- Pre-production sample (10–20 pieces)
- Pilot production (100–300 pieces) for market test
- Full production run (1,000+ pieces)
- Quality inspections (in-line & end-line)
- Packaging + shipping
Ensure your contract covers lead time, approval gates, defect rates (e.g., ≤2 % for visible defects), colour matching, and logistics (FOB/EXW, term).
Private Label Branding Strategy
When selling under your own brand or for a client brand:
- Maintain consistent brand identity (logo location, colour palette, packaging design)
- Offer product variants (colour, print, hang tag text) to expand SKU range easily
- Emphasize value-added features to your buyer: “Insulates 15% better than paper sleeve”, “Reusable up to 50 washes”, “Custom colours in 2-weeks sample turnaround”
- Use story/marketing angle: summer promo, corporate gifting, frozen treat brand tie-in
Quality Assurance & Logistics
For scaling you must lock in quality controls:
- Define AQL (Acceptable Quality Level) for defects
- Specify dimensional tolerances, print clarity, seam strength thresholds
- Use third-party QC if necessary (e.g., SGS)
- For packaging, ensure protection from moisture, stacking damage during shipping
- Logistics: Choose FOB port, scout freight forwarder, ensure boxing fits container efficiently
Why Partnering with an Experienced Factory Matters
When you reach production scale, choosing a partner with deep expertise in neoprene accessories makes a difference. With 18+ years of R&D, manufacturing, and OEM/ODM experience, Szoneier knows how to:
- Source quality neoprene sheet with consistent foam density and backing
- Cut and sew neoprene accurately at scale
- Manage print/branding for multiple colour variants
- Handle packaging, logistics, private-label workflows
Working with them helps reduce risk (fit issues, seam defects, print mis-match), accelerates time to market (rapid sampling, short lead times), and keeps MOQ flexible (ideal for small-to-mid sized overseas buyers).
Conclusion
Scaling from DIY prototype to private-label production is a structured process: cost breakdown, pattern and workflow, quality systems, branding strategy, logistics plan. With the right factory partner, you can go from concept to market-ready merchandise efficiently. Your neoprene popsicle holder thus becomes a viable product line—or promotional offering—instead of a one-off hobby item.
If you’re ready to develop your own custom neoprene popsicle holders—with your unique logo, colour scheme, print design and packaging—then contact Szoneier today. With over 18 years of neoprene R&D and manufacturing experience, Szoneier offers free design, low MOQ, rapid sampling and 100% quality assurance. Whether you’re a small-to-mid overseas buyer or a high-end brand, Szoneier can support your custom, private-label or OEM/ODM order from concept through to shipping. Reach out now for a quote and design consultation—start turning your summer promotional idea into a tangible product.