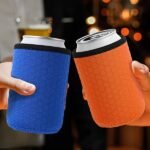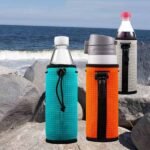
Dyeing neoprene fabric—on its surface—often sounds like a “cool DIY trick” for customizing wetsuits, bags, sleeves, koozies, or masks. But for many, it ends up a frustrating mess: splotches, weak color, delamination, or foam collapse. The secret is that neoprene is a complex, composite material (foam core + face fabric) and conventional textile dyeing rules don’t always apply. If you try blindly, you’ll waste time and material. However, with the right strategy, you can achieve vivid, durable results—even in small batches or custom orders.
To dye neoprene successfully, you must first identify whether it is fabric-laminated (polyester, nylon, etc.) or bare foam, then choose the matching dye system (e.g. disperse for polyester, acid for nylon, pigment coating for foam). Control bath temperature, pH, agitation, and pre-treatments to avoid delamination or damage. Proper post-treatment and testing (wash, rub, UV, salt) secure long-term performance.
Imagine a surf brand that wanted to drop a limited edition neoprene sleeve in midnight blue. Their first sample faded and blistered under UV. Their second sample (using the right disperse dye system and carrier chemistry) stayed rich even after saltwater exposure. That turnaround story is what every buyer and OEM wants—and that’s what this guide will walk you through, step by step. If you’re curious how your custom neoprene pouch or wetsuit could stay true in color, read on—you’ll learn more than in any dye catalog.
What Exactly Is Neoprene (And Which Constructions Can Actually Be Dyed?)

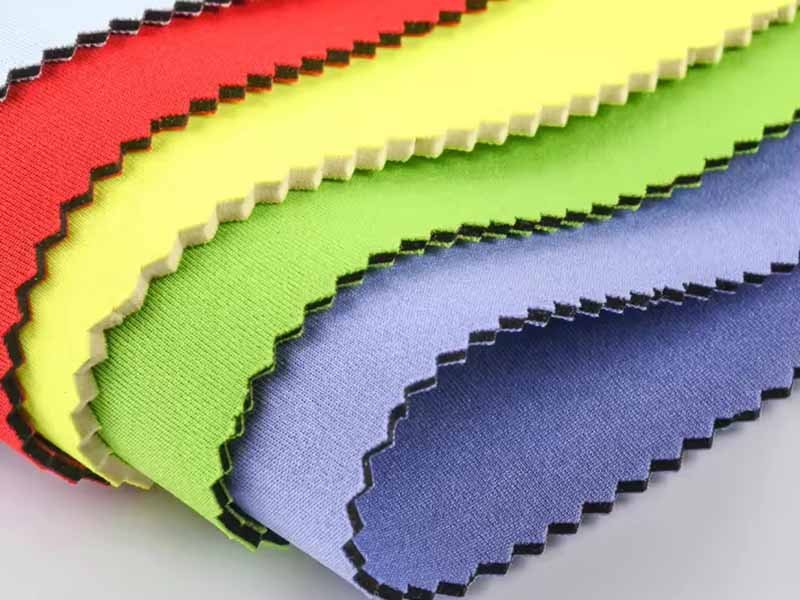
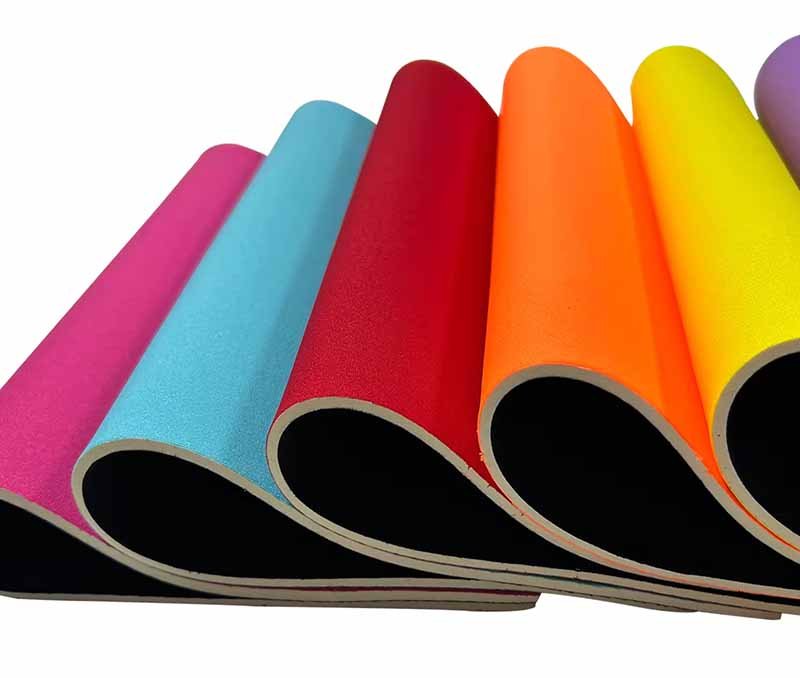
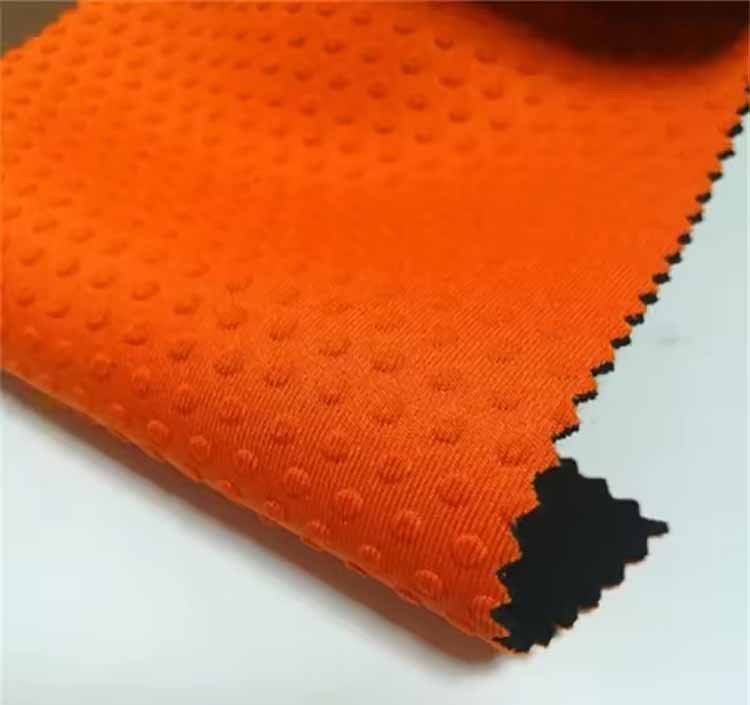
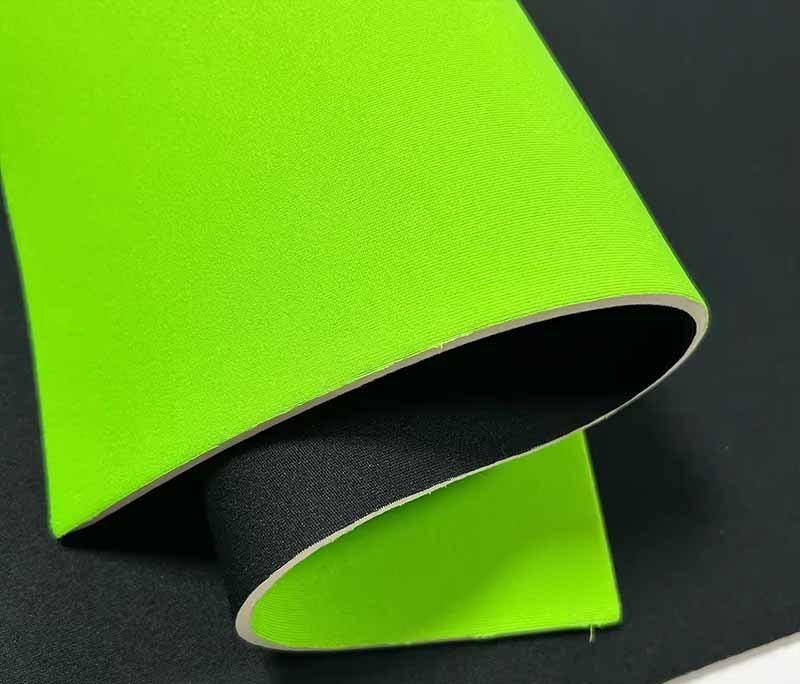
Neoprene is a synthetic rubber foam (chloroprene) usually laminated on one or both sides with fabrics (polyester, nylon, sometimes spandex). Only the fabric face (or any decorative coating) is truly dyeable in a conventional sense. The closed-cell foam core itself is generally inert to dyes, so coloring it relies on surface treatments (pigment coating or solution-color compounding) rather than immersion dyeing.
Understanding what neoprene is lays the foundation for knowing what you can and cannot dye. Let’s break it down:
Neoprene Core vs Fabric Laminate The heart of the material is a chloroprene-based foam core. This foam is closed-cell—meaning it resists penetration by liquids—and chemically inert toward most dye molecules. Over this core, manufacturers often laminate (glue) or knit/bond fabric skins: polyester knit, nylon tricot, nylon/spandex, or even stretch woven fabrics. Occasionally, a polyurethane (PU) or silicone coating or water-repellent finish is added on top of the fabric layer. Because of this structure, only the surface fabric layer is truly receptive to dyes, not the foam core itself. If you try to bulk-dye a neoprene sheet immersion, the core will reject most dye molecules, and you’ll get poor penetration or color only on edges.
Face Fabric Types and Their Chemistry
Polyester-faced neoprene: best dyed using disperse dyes (i.e. hydrophobic dye molecules that dissolve in high-temperature carriers).
Nylon / polyamide-faced neoprene: generally amenable to acid dyes or cationic dyes, though compatibility depends heavily on finishing and pretreatments.
Spandex / elastane blends: possible but riskier, as they are stretch-sensitive and may degrade under heat.
PU / silicone coatings or DWR finishes: these top coats may block dye uptake entirely. You might need to strip finishes or use strong carriers/co-solvents.
Which Constructions Are Dyeable? Only neoprene products with a non-blocking, open-face fabric are realistically dyeable. Some neoprene covers, bags, or sleeves are entirely printed or coated rather than dyed. If a product has a heavy laminate, glue layers, or stiff backings, dye penetration might be inconsistent.
Testing and Lab Dip Imperative Even two rolls from the same supplier may differ in surface finish, adhesive migration, foam density, or binder presence. Always start with lab dips—small swatches from the exact production lot—and run them through your dye recipes and postprocessing before full-scale runs.
By seeing neoprene as a layered system, not a simple textile, you’ll recognize why dyeing must be approached strategically—and why many failures occur at the interface between chemistry and physical structure.
Which Dyeing Or Coloring Methods Work On Neoprene And Why?
Effective approaches include: disperse dye for polyester-faced neoprene, acid or cationic dye for nylon-faced neoprene, pigment / coating systems for coloring the foam surface, and sublimation or heat transfer printing (if a white polyester face is present). Each method has trade-offs in durability, cost, and foam compatibility.
Once you know your neoprene’s fabric composition and finishing, the next step is picking an appropriate coloring method. Let’s explore each option, their pros/cons, and when they’re appropriate.
1. Disperse Dyeing for Polyester-Faced Neoprene
Why it works: Disperse dyes are finely ground, hydrophobic dyes that dissolve in carrier systems (often high-boiling solvents or auxiliaries). They are designed to color polyester fibers by molecular diffusion at high temperature. Because polyester is chemically inert (like the neoprene foam), disperse dyes are among the few dye classes that can penetrate polyester fabrics.
Key considerations / pitfalls:
- You’ll need carriers, dispersing agents, and high temperature (~130–140°C) to drive dye into the fiber.
- Foam core must be protected from overheating or extended exposure.
- If a DWR or PU coating exists, you may need to strip it first.
- Lack of agitation or uneven temperature will yield blotchy patches.
2. Acid / Cationic Dyeing for Nylon-Faced Neoprene
Why it works: Nylon has amine and carboxyl groups that can bind acid dyes under acidic conditions. In properly pretreated nylon-faced neoprene, acid dyes can yield strong, vibrant colors.
Cautions:
- The pH must be tightly controlled (often pH 4–5).
- High temperatures or long dwell times risk damaging the foam or adhesive layer.
- The adhesive layer between fabric and foam may hydrolyze under acid conditions.
- Some nylon facings have surface treatments that block dye uptake.
3. Pigment / Coating Methods (Topcoat / Surface Application)
Why it works: Instead of trying to change the molecular color of fiber, pigment systems sit on top, forming a binder + pigment layer. This is especially useful for coloring the foam or for dark, opaque colors.
Pros:
- Good for foam-only or non-fabric surfaces.
- Easier to control color for dark shades or metallics.
- Lower temperature risk to foam core.
Cons:
- It is essentially a surface film; may crack or rub off if not optimized.
- Flexibility and adhesion to neoprene must be carefully formulated.
- It may reduce breathability or stretch if over-applied.
4. Sublimation / Heat-Transfer / Printing
Why it works: Sublimation transfers dye into polyester fibers when they are heated and pressurized. If your neoprene has a white polyester face, you can print designs as though it were a garment.
Limitations:
- Only works effectively on white or very light polyester faces (dark faces block transfer).
- Foam core must tolerate press temperature (usually 180–200°C), so test carefully.
- For multi-color images, this method can yield vivid, photographic results.
5. Solution Color / Pre-colored Foam
Why it works: Rather than dyeing after production, the foam is compounded with pigment during mixing. When you laminate or cut, the color is inherent.
Advantages:
- Uniform color throughout (not just surface).
- No risk of delamination or dye bleed.
Disadvantages:
- Higher cost, longer lead time, bulk minimums.
- Less flexibility for small custom runs or print variation.
6. Hybrid or Mixed Methods
Some advanced manufacturers may combine methods, e.g., solution-yellowed base foam + pigment topcoat + printed overlay. This can improve shade uniformity and shadow depth.
Choosing the Right Path: A Decision Matrix
| Face Fabric | Best Method | Risks / Notes |
|---|---|---|
| Polyester (white/uncoated) | Disperse dye or sublimation printing | Must strip finishes; high temperature risk |
| Nylon / blended | Acid/cationic dye with carrier | Adhesive stability, pH control critical |
| Foam-only / no face | Pigment coating or surface printing | Surface durability is the challenge |
| Dark-colored fabric | Pigment/print (rather than dialysis) | Dyeing may not penetrate dark ground |
When designing custom neoprene goods (bags, covers, koozies, wetsuits), your choice will affect cost, durability, and visual appeal. Always insist on small lab batches, and review wash, UV, and abrasion test results before scaling.
How Do I Identify My Neoprene Type Before Choosing A Process?

You can identify neoprene type by simple tests: a burn/melt test to see if the face is polyester or nylon, a surface wipe test to detect coatings, and reviewing supplier spec sheets. Also inspect for DWR, backing adhesives, or PU coating presence. Once identified, you’ll know whether disperse, acid dye, or pigment/printing is your correct path.
Before dyeing, you must know exactly what your substrate is. Blindly applying a dye recipe can destroy the laminate or produce failure. Here’s how to reverse engineer your neoprene:
1. Burn / Melt Test
Cut a small scrap (5 mm × 5 mm) from the fabric face (not core). Use tweezers to hold it in a small flame (e.g. lighter or candle):
- Polyester (PES): Burns with a blue flame, drips slightly, smells like burning plastic, and forms a small bead.
- Nylon / Polyamide (PA): Burns with a yellow flame, produces a fishy smell, and leaves a more “soft” residue.
- Spandex / Elastane blend: Smells somewhat like burning rubber or elastic, may char rather than drip.
Be cautious: test only a scrap piece, and safety first.
2. Surface Wipe / Solvent Test
Dampen a cotton cloth with isopropyl alcohol (IPA) or a mild solvent (like acetone) and rub the fabric surface:
- If color or binder comes off, there may be a topcoat or finish you must strip before dyeing.
- If the fabric remains inert, proceed.
- If the surface is slippery or “waxed,” there’s likely a finish (e.g. DWR) blocking dye uptake.
3. Microscopic / Cross-section Examination
Using a cross-section of the neoprene (cut perpendicular), examine under moderate magnification:
- You may visually see the adhesive glue line between fabric and foam.
- You might detect a thin PU / barrier coating on the face.
- You can see layer thicknesses and uniformity.
4. Consult Supplier / Mill Specs
Your neoprene supplier (e.g. Szoneier) should supply technical sheets:
- Face fabric content (e.g. 65% PES / 35% PA).
- Surface treatment (e.g. DWR, PU, silicone).
- Adhesive / bonding system used.
- Foam density, compression, and physical tolerances.
5. Pilot Dye Swatches (Lab Dips)
Once you think you know the composition, cut several small lab swatches (different colors) and run them through your prospective dye recipes. Evaluate color yield, evenness, delamination, foam performance, and durability (wash, rub, UV). The lab dip is your final check before applying to full runs.
By combining chemical tests, visual inspections, and supplier specs, you minimize risk. You’ll move into dyeing with clarity about which recipe or method stands a chance of success.
How Do You Dye Polyester-Faced vs. Nylon-Faced Neoprene Step-By-Step?
For polyester-faced neoprene, use disperse dyes in a high-temperature bath (≈130–140 °C) with carriers, pH neutral medium, and good agitation. For nylon-faced, use acid or cationic dyes in a controlled acidic pH bath (~pH 4–5) with salts and leveling agents. In both, protect the foam from overheating, and rinse and cool gently to prevent layer delamination.
This section breaks down a reliable workflow for both polyester-faced and nylon-faced neoprene. Adapt the steps to your lab scale, pilot runs, and full production, always watching for foam integrity.
A. General Preparation Steps (Common to Both)
- Cut size-appropriate swatches or blanks — ensure edges are sealed if the foam can soak water in.
- Pre-wet / pre-soak — Soak in lukewarm water with a surfactant to open fabric pores and remove dirt, oils, release agents, or residual packaging grease.
- Degassing / vacuum treatment (optional) — for heavy laminates or thicker products, you might vacuum-degas the swatch to help get better dye penetration.
- Mask foam edges (if you don’t want foam color infiltration) — use cling film or heat-resistant tape.
B. Dyeing Polyester-Faced Neoprene (Disperse Method)
- Bath preparation
- Use a stainless steel dye vessel.
- Fill with enough water to ensure proper liquor ratio (e.g. 1:10 to 1:20 WLR).
- Add dispersing agent, leveling agent, carriers (co-solvents), and dye in pre-dissolved form.
- Temperature ramp & dyeing
- Raise temperature gradually (~2–3 °C/min) to ~130–135 °C (some recipes go up to 140 °C) under gentle stirring or circulation.
- Hold for 30–60 minutes (or as needed) for full absorption.
- Avoid sudden temperature jumps, which stress adhesion.
- Cooling & reduction clearing
- Cool slowly (1–2 °C/min) to ~80 °C.
- Use reducing agents or clearing agents to remove loosely bound surface dye.
- Rinse, neutralize, and post-treatment
- Rinse in warm water, gradually cooling to ambient.
- Neutralize pH if necessary.
- Possibly apply softeners or water-repellent finishes (compatible with dyed surface).
- Dry flat, in shade, avoid overcompression.
C. Dyeing Nylon-Faced Neoprene (Acid / Cationic Method)
- Bath preparation
- Use stainless vessel, fill with water.
- Add leveling agents, wetting agents, salts (e.g. sodium sulfate or sodium chloride) to assist penetration.
- Dissolve dye, adjust to pH ~4.0–5.0 (using acetic acid or formic acid).
- Temperature ramp & dyeing
- Heat gradually up to ~98–100 °C (or the safe maximum for your laminate).
- Hold for 30–60 minutes.
- Use gentle circulation to avoid foam agitation damage.
- Cooling & clearing
- Cool carefully (1–2 °C/min), clearing bath if needed.
- Use mild reducing agent if safe for fabric/foam adhesive.
- Rinsing & finishing
- Rinse warm-to-cold, check bleeding.
- Neutralize (if acid remains).
- Possibly apply surface finishes, softeners, or sealants.
- Dry flat and gently, restoring shape.
D. Safety, Foam Protection & Troubleshooting
- Temperature ceilings matter: Foam can degrade above certain thresholds; test beforehand.
- Adhesive stability: High heat or extreme pH may weaken bonding between fabric and foam.
- Foam collapse: Rapid heating or improper surfactants may cause foam collapse or shrinkage—monitor carefully.
- Edge penetration: Dye might seep into foam around edges; masking helps.
- Batch consistency: Always keep heating profiles, liquor ratios, and agitation uniform.
E. Example Pilot Recipe (Hypothetical)
| Component | Amount (per 1 kg neoprene blank) | Purpose |
|---|---|---|
| Disperse dye | 1.2% owg | Main coloration |
| Dispersing agent | 1.5 g/L | Keep dye particles stable |
| Carrier / co-solvent | 10 g/L | Promote dye penetration |
| Leveling agent | 0.5 g/L | Promote uniform uptake |
| Water | 12 L (1:12 WLR) | Dye bath medium |
| Temperature schedule | 25 → 135 °C @ 2 °C/min | Dye diffusion |
| Hold time | 45 min | Full uptake |
| Cooling | 135 → 80 °C @ 1.5 °C/min | Safe descent |
| Reducing agent | 2 g/L (if needed) | Clear unbound dye |
| Rinse / neutralize | pH 7 buffer | Remove excess dye & stabilize |
Run small lab dips first. Check shade, uniformity, and adherence. Record results, then scale.
By following this methodology, you can control shade reproducibility, reduce batch failures, and produce market-ready neoprene goods that satisfy even discerning clients.
How Do You Sublimate Or Print On Neoprene For Rich, Durable Color?
Sublimation or heat-transfer printing works when your neoprene has a white or light polyester face. Under high heat and pressure, sublimation dyes permeate the polyester. For dark or coated faces, you may need underbase (white ink) or hybrid printing (e.g. UV or film). Key is balancing press time, temperature, pressure—and minimizing foam damage or delamination.
For custom neoprene bags, sleeves, covers, or promotional items, a full-color printed design is often more eye-catching than a solid-dye shade. Let’s analyze how to do it well:
1. Preconditions for Sublimation
- White / light-colored polyester face: The substrate must be light enough for printed dyes to show.
- No blocking coatings: PU / silicone coatings or strong barrier finishes will block transfer.
- Foam tolerance to heat: The neoprene must withstand press temperatures (commonly 180–200 °C) for a few seconds.
2. Press Parameters & Techniques
- Temperature & time: Typical settings might be 190–200 °C for 30–60 seconds, depending on thickness and face material.
- Pressure: Medium to firm pressure is needed to ensure uniform transfer.
- Pre-heating: A brief pre-press to flatten and condition the fabric before transfer can help.
- Cooling under pressure: Let the substrate cool under pressure to avoid delamination or wrinkling.
3. Handling Foam Sensitivity
- Use a lower dwell time if the foam is heat-sensitive.
- Use a backing plate or thicker rigid platen to spread heat evenly.
- Allow the foam to gradually release pressure—not sudden rips or deformation.
4. Underbase / White Ink for Dark Faces
If your face is not white or light, use a white underbase (opaque ink under your design) to mask the dark ground. Then print CMYK on top. This requires a capable printer (e.g., DTG or hybrid printer) and careful curing.
5. Hybrid Printing Options
- UV / UV LED printing: Directly print pigment inks onto neoprene face. Good for opaque designs, but flexibility and adhesion need validation.
- Film transfer (e.g. PU film, vinyl): Cut designs in colored vinyl films and heat-press onto the neoprene. Works well for simple shapes (logos, names).
- Sublimation + pigment overlay: Sublimate background and then overprint pigment inks for detail or white highlights.
6. Durability and Testing
Because prints are surface-bound, durability is a concern:
- Check adhesion (peel/adhesion test).
- Test abrasion, flex, wash, UV exposure to ensure inks don’t crack or fade.
- Use flexible inks/formulations, bend the substrate during curing to mimic real use.
Case Example
A neoprene laptop sleeve with a photographic print was transferred at 190 °C for 45 seconds, then cooled under pressure for 2 minutes. The client tested 500 folding cycles, salt spray, and UV exposure; no visible cracking or fading occurred.
With proper selection of materials, press parameters, and ink systems, printing can yield more compelling aesthetics than plain dyeing—especially for branding, logos, or promotional lines.
Do Dyes And Heat Affect Neoprene Performance And Safety?
Yes—they can. High heat, extreme pH, or strong chemical agents may degrade neoprene’s elasticity, thickness, rebound, or bond strength. Colorants may introduce VOCs or residual chemicals that affect skin safety or odor. A rigorous testing and validation protocol is necessary to ensure that performance properties (compression set, rebound, bond integrity) remain within spec.
While achieving color is exciting, you can’t neglect the functional integrity of neoprene. It’s typically used in applications (wetsuits, sleeves, medical supports) where performance matters. Let’s delve into potential impacts, mitigation, and testing strategies.
1. Thermal Degradation Risks
- Foam collapse or blistering: If heated too quickly or above safe temperature, gas bubbles in the foam can expand abruptly and cause delamination or blistering.
- Adhesive breakdown: Lamination adhesives (neoprene glue, solvent-based adhesives) may soften, hydrolyze, or delaminate under extreme heat or pH.
- Compression set increase: Repeated exposure to heat or chemicals may reduce the foam’s ability to return to its original thickness (permanent set).
- Changes in density or stiffness: Heat can alter cross-link density of neoprene, affecting stiffness and flexibility.
2. Chemical / Dyeing Hazards
- Residual chemicals: If dyes, carriers, or auxiliary chemicals are not fully rinsed or neutralized, residues may remain. These can lead to odor, skin irritation, or VOC outgassing.
- Crosslink interference: Some dyes or auxiliaries may interfere with the cross-link chemistry of the neoprene, weakening mechanical properties.
- Environmental compliance: For global brands, you must ensure dyes and finishes comply with REACH, OEKO-TEX, CPSIA, or other regulatory standards.
3. Testing Performance After Dyeing / Processing
Always compare dyed samples against undyed control samples using tests such as:
| Test | Property | Acceptable Deviation | Purpose |
|---|---|---|---|
| Compression Set (ASTM D395) | % thinning after set | ≤ ±5% | Verify foam resilience |
| Tensile / Elongation | % strength vs control | ≥ 90% | Check degradation |
| Adhesion / Peel | Force to delaminate | ≥ spec (e.g. N/cm) | Confirm lamination integrity |
| Hardness / Shore | Change in shore “A” or “OO” | ≤ ±3 units | Ensure foam softness consistent |
| Outgassing / Odor | Subjective / VOC testing | No strong odor | Safety & quality |
| Flex / Fatigue | After cycles | No cracking or surface damage | Real-world durability |
4. Mitigation Strategies
- Use conservative temperature and dwell time limits—not always push to extremes.
- Use milder carriers or dyes vetted for elastomer compatibility.
- Ensure thorough rinsing, neutralization, and drying to remove residuals.
- If testing reveals unacceptable changes, revert to pigment/coating or solution-color strategies.
In short: like with human skin, color is important—but you can’t compromise functionality or safety. Always validate against physical, chemical, and sensory performance after dye processing.
How Do I Test Colorfastness For Real-World Use (Salt, Sweat, Chlorine, UV)?
Use industry-standard tests (ISO, AATCC) for wash, rub, UV, salt spray/corrosion, and chlorine exposure. For neoprene goods destined for marine or sports use, simulate real conditions (sweat, chlorine pools, sea salt, UV light). Set failure thresholds for staining, fading, abrasion, and crocking, and compare to control samples.
You don’t just want pretty color—you need durable color under real-world use. Let’s walk through the essential tests and best practices for neoprene goods.
1. Key Standard Tests
- Crock / Rub Test (AATCC 8 / 16 / ISO 105-X12): Rub a white microfiber cloth over the dyed surface a set number of times and evaluate stain transfer.
- Wash / Soaping (ISO 6330 / AATCC 61): Machine or hand-wash the sample in detergent to simulate laundering.
- UV Exposure (Xenon or QUV): Simulate sunlight over extended time. Use colorimeters to measure ΔE.
- Salt Spray / Chlorine Soak (ASTM B117 / ASTM D1264): Expose samples to salt fog or chlorinated water, then dry and inspect for fading or coating failure.
- Sweat / Perspiration (ISO 105-E04): Soak in acidic or alkaline artificial sweat solution and test for color bleed or staining.
2. Accelerated Aging vs Real Use
Accelerated tests compress years of wear into days/weeks. But real use includes mechanical stress (stretch, flex), abrasion, temperature swings, and contamination (sunscreen, oils). Always supplement lab tests with field trials.
3. Pass/Fail Criteria and Targets
Set internal benchmarks. Example:
| Test | ΔE (Max) | Staining (Rating 1–5) | Notes |
|---|---|---|---|
| UV | ≤ 3 | No significant fade | After 200 hours |
| Crock | ≤ 2 | ≤ Grade 2 | 100 rubs dry & wet |
| Chlorine soak | ≤ 5 | No delamination | 24h at 10,000 ppm |
| Salt spray | ≤ 2 | No blistering/fade | 72h exposure |
If a sample fails one test (e.g., large ΔE in UV), you need to revisit dye recipe, pigment binder, or protective finish.
4. Documenting and Iterating
- Always keep test records with production lots, a color recipe, process sheet, and performance data.
- If a failure arises, analyze root cause (e.g. weak pigment binder, poor cure, underdosed rinse).
- Iterate small lab batches before full production.
By applying rigorous colorfastness protocols, you ensure customers won’t see fading, bleeding, or stain issues in the field—critical for brand trust, warranty claims, and long-term reputation.
What Are Common Mistakes And How Do Pros Troubleshoot Them?
Mistakes include uneven agitation, blocked pores (finish residue), sudden temperature changes, adhesive incompatibility, unoptimized dye recipes, and skipping lab dips or tests. Professionals troubleshoot by analyzing shade drift, edge blotting, delamination, low uptake, or performance failures—then adjust agitation, carrier dosage, pH ramps, or switch method (pigment vs dye).
Even experienced dyers hit snags. The difference is how you diagnose and remedy issues. Below is a collection of common pitfalls and strategies to fix or prevent them.
1. Uneven Color / Blotches
Causes:
- Inadequate agitation or stagnant zones.
- Uneven temperature in the bath.
- Partial blocking by residual finishes (oil, size, wax, DWR).
- Edge bleeding into foam.
Fixes:
- Use better circulation (pumps, flow baffles).
- Pre-treat with surfactants / stripping agents.
- Mask edges or pre-seal foam.
- Run a mild leveling or reserve bath.
2. Shade Drift / Inconsistency Between Runs
Causes:
- Variation in water quality or pH.
- Inconsistent temperature ramp or dwell time.
- Differences in fabric finishing or supplier batch variation.
- Carryover contamination in dye vessels.
Fixes:
- Use deionized water where possible.
- Strictly standardize temperature, time, and chemical dosing.
- Conduct lab dips for every new lot.
- Rinse vessels thoroughly between colors.
3. Delamination or Foam Damage
Causes:
- Excessively high heat or abrupt temperature change.
- Harsh chemicals or pH extremes attacking adhesive.
- Overexposure during clearing or reducing.
Fixes:
- Reduce top-end temperature or shorten dwell.
- Use milder clearing agents.
- Employ slower ramp rates, especially during cooling.
- Test adhesive compatibility before full scale.
4. Low Dye Uptake / Pale Results
Causes:
- Under-dosing dye or carrier.
- Strong blocking finish not removed.
- Inadequate time or temperature.
- Chemical imbalance (pH, salt, leveler).
Fixes:
- Increase dye/auxiliary dosage within safe limits.
- Strip finish or treat with surfactants.
- Extend dwell time or adjust heating profile.
- Adjust pH, add leveling aids or auxiliary solvents.
5. Poor Durability (Cracking, Fading, Peeling)
Causes:
- Weak pigment binder or curing undercooked.
- Inflexible inks or coatings.
- Inadequate adhesion between coating and substrate.
- Incomplete curing or post-treatment.
Fixes:
- Use more flexible binders and proper curing cycles.
- Optimize ink or pigment formulation for elastomeric use.
- Add adhesion promoters or primers.
- Retest with extended fatigue cycles.
6. When to Abandon Dyeing & Switch Strategy
If repeated lab trials fail (e.g. persistent non-uniformity or adhesion issues), consider:
- Solution-coloring the foam in compounding stage
- Using pigment or coating approaches
- Adopting printed overlays
- Changing substrate (e.g. opting for a more dye-friendly face fabric)
Good OEMs or factories (like Szoneier) often maintain multiple methods so they can pivot if a dye route fails. The flexibility to choose the method that ensures reliability for your product is what separates amateurs from professionals.
Conclusion
Dyeing neoprene is not a trivial “dip-and-go” process. It requires understanding the layered structure (foam + face), choosing the right chemistry (disperse, acid, pigment, printing), controlling thermal and pH stress, and validating performance with rigorous tests. When done correctly, you can deliver vivid, durable, high-quality neoprene products—whether wetsuits, bags, sleeves, covers, or accessories—that delight your customers.
If you’re looking for a trustworthy partner to bring your custom neoprene product ideas to life—complete with coloring, printing, and performance assurance—Szoneier is uniquely equipped. With 18+ years of R&D and end-to-end manufacturing, we specialize in custom, private-label, OEM/ODM neoprene products. We offer free design, low MOQ, fast prototyping, and 100% quality guarantee.
Let’s talk—send us your design, preferred color (Pantone, sample), substrate (poly, nylon, spandex), and performance specs, and we’ll quote and sample quickly. With our technical expertise, we can guide you to the right dye or print method and deliver a final product that holds true in color and performance.
Contact Szoneier today—let’s turn your vision into a high-quality, color-fidel neoprene product you can trust.