Skip to content
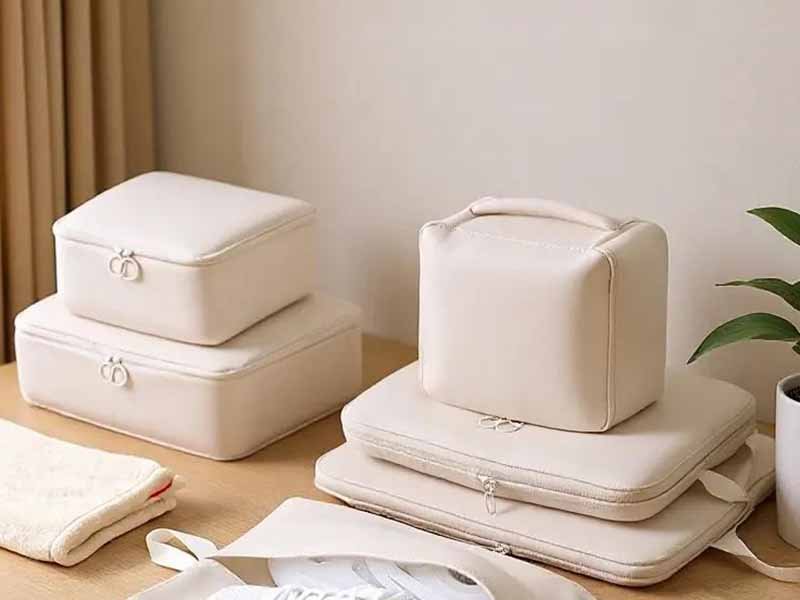
A product collection may look perfectly coordinated in a digital mockup and still feel disconnected when the physical samples arrive. The lunch bag may appear darker than the bottle sleeve, a logo that looks balanced on a laptop case may overwhelm a small pouch, and the same print may look completely different when stretched around a curved product. These problems rarely come from one obvious production error. They usually result from developing each item separately without a shared collection system.
To create matching neoprene product sets, begin with one customer scenario and one hero product. Establish shared rules for colors, artwork, branding, trims, packaging, and quality, while allowing each SKU to use the neoprene thickness and construction its function requires. Sample every product individually, compare the complete set together, and control bulk production through approved materials, SKU-level specifications, BOMs, revision records, and set-wide inspections.
The strongest collections are not created by placing the same logo on several unrelated products. They are built by deciding what must stay consistent, what must change for performance, and how every decision will be reproduced during bulk manufacturing. A bottle sleeve, lunch bag, and snack pouch can become a natural collection because they support one routine. Without common design and production rules, however, they may still look like products from three unrelated suppliers.
What Makes a Neoprene Product Set Match?
A matching neoprene product set combines products that serve the same customer, support one usage scenario, and follow a recognizable visual and quality system. The products do not need identical thicknesses, sizes, or structures. They need coordinated colors, artwork, logo hierarchy, trims, packaging, and finishing standards while preserving the construction required for each product’s function.
Build One Collection Logic
The development process should begin with the reason the products belong together rather than with colors, prints, or logos. A lunch bag, bottle holder, and snack pouch form a believable collection because they support the same eating and drinking routine. A laptop sleeve, tablet case, and cable organizer work together because they solve related protection and organization problems for the same user.
This shared purpose gives the collection a clear commercial story. Customers understand how the products relate to one another, retail teams can display them as a coordinated range, and sales teams can explain why supporting items add value to the hero product. When the usage connection is unclear, the collection becomes a group of unrelated items carrying similar artwork rather than a useful product system.
Before sampling begins, the product team should prepare a collection brief that defines the target customer, primary use scenario, hero product, supporting products, desired price level, sales channel, packaging approach, intended colors, and possible future extensions. These decisions allow designers, material buyers, sample technicians, packaging suppliers, and inspectors to work toward the same result.
The hero product normally carries the strongest functional identity, largest branding area, and highest perceived value. Supporting products should increase convenience, enable bundling, support gifting, or create a lower-priced entry point into the collection. Every supporting SKU should have a clear reason to exist rather than being added only to make the range appear larger.
Separate Matching from Uniformity
Matching does not mean making every product technically identical. Forcing all SKUs to use the same neoprene thickness, print scale, logo size, closure, binding width, and structural method can reduce performance and create unnecessary cost. Products can share one visual language while using different specifications based on their functional requirements.
A koozie requires flexibility and close contact with a container. A laptop sleeve needs cushioning, dimensional accuracy, and smooth device access. A bottle carrier may need a reinforced handle or shoulder strap, while a lunch bag may include a zipper, lining, handles, internal organization, and additional structural support. These products should not be engineered in exactly the same way.
The collection should instead separate shared design standards from product-specific engineering. Shared decisions may include the primary colors, artwork family, logo hierarchy, label design, binding direction, packaging appearance, and general workmanship expectations. SKU-level decisions include thickness, dimensions, stretch direction, lining, reinforcement, closure type, seam construction, and carrying features.
This distinction keeps the range recognizable without weakening individual products. A small accessory does not need expensive structural details simply because the hero product uses them, while a protective item should not lose necessary cushioning because a lighter product uses thinner material. Customers should see one family of products, but they should also understand the distinct purpose of every item.
Control the Visual System
Collections often become inconsistent through a series of small decisions. The main fabric may match, but the zipper tape is slightly different. The same logo file may be used, but its proportions vary without a clear rule. One item may have black binding while another uses a dark charcoal that appeared similar on a computer monitor.
A physical collection control system reduces these inconsistencies. Pantone references, digital artwork, approved material swatches, trim cards, logo measurements, and final samples should work together. Screens alone are not reliable because lighting, display calibration, surface texture, print method, and material finish can change how colors appear.
| Design Variable | What Should Be Standardized | What May Vary by SKU | Practical Approval Method |
|---|---|---|---|
| Main color | Pantone reference and approved physical swatch | Appearance across different substrates | Side-by-side material review |
| Artwork | Motif, style, color family, and visual hierarchy | Scale, crop, and orientation | Product-specific print layout |
| Logo | Approved artwork files and hierarchy | Size and application method | Measured placement drawing |
| Binding | Color family, texture, and finishing direction | Width required by construction | Trim card and sewn sample |
| Zippers | Tape color, puller style, and quality level | Length and zipper gauge | Component specification |
| Labels | Brand design, typography, and information structure | Size based on available space | Final artwork and placement sample |
| Packaging | Graphic system, copy style, and label order | Box, bag, band, or insert format | Physical packaging prototype |
A trim card should place the neoprene surface material, binding, zipper tape, thread, webbing, labels, patches, and hardware beside one another. This comparison often reveals undertones and finishing differences that are difficult to detect when components are approved separately.
Design for Real Use
A matching set must work together during real use rather than only in a product photograph. Buyers should consider how customers carry, open, store, clean, pack, and combine the items. The relationship between products should make daily use easier, not simply create an attractive group image.
A food-and-drink set may look impressive with several large printed items, but it may feel inconvenient if the products cannot fold, nest, or fit into one another for storage. A technology collection may contain multiple protective sleeves but still fail to organize chargers, cables, and adapters. A pet set may look coordinated while using hardware or attachments that are uncomfortable during repeated outdoor use.
The final samples should be tested as a group. Place the intended contents inside each product, carry or wear the items as the customer would, open every zipper or buckle, and check whether the supporting products improve the use of the hero item. Review the balance of size, weight, flexibility, and product care requirements.
This process often reveals that one well-designed accessory can replace two weak products. A handle may need repositioning, a small pouch may require a contrasting lining, or a package may need clearer instructions. The final standard is straightforward: every product should have a reason to belong, and the complete collection should be easier to understand and use than the individual products developed separately.
Which Neoprene Products Work Best Together?
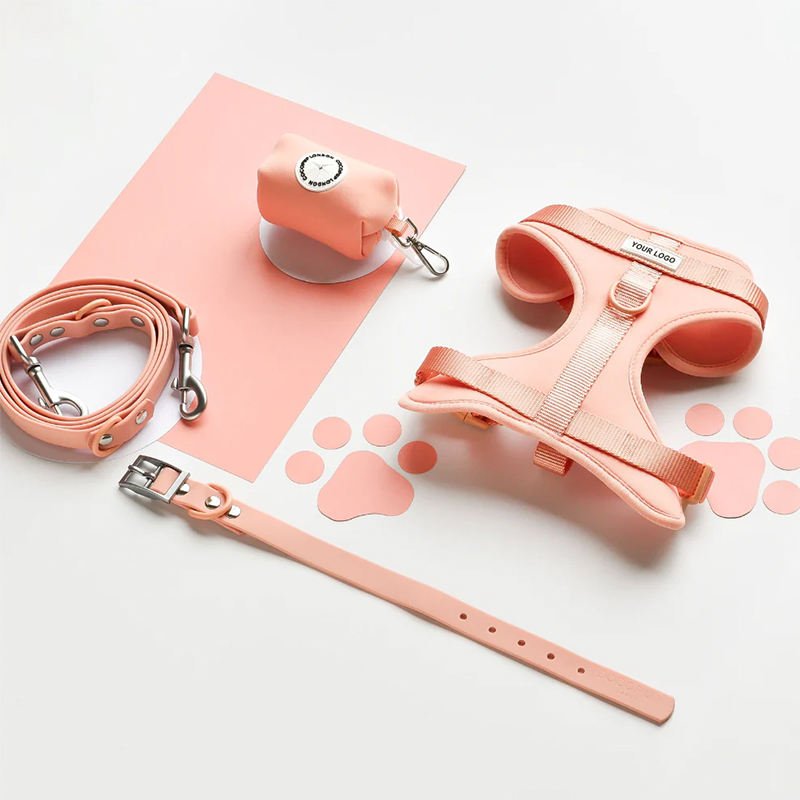
Neoprene products work best together when they are used by the same customer during the same activity. Begin with one hero product and add two or three complementary items that solve connected needs. Effective combinations include lunch bags with bottle sleeves, laptop sleeves with cable pouches, pet harnesses with treat bags, and sports carriers with small protective accessories.
Start with a Hero SKU
The hero SKU gives the collection its primary purpose, visual direction, and expected quality level. It is usually the product customers notice first and the item that carries the strongest retail price, largest branding area, or most important functional benefit.
For a food collection, the hero product may be a lunch bag. For a technology collection, it may be a laptop sleeve. In a pet range, it may be a harness or padded collar. A promotional program may use a larger branded tote, sleeve, or bottle carrier as the hero while adding smaller, more economical accessories.
The hero item should solve a recognizable customer problem, support a realistic target price, provide sufficient surface area for the brand identity, and lead naturally to supporting products. It should also be suitable for repeat production rather than depending on a temporary material, uncommon component, or difficult construction method.
Supporting products should extend the hero product’s use instead of repeating it. A bottle sleeve complements a lunch bag by protecting and carrying a separate item. A cable organizer complements a laptop sleeve by managing accessories that the sleeve cannot hold. A treat pouch supports a pet walking collection by solving a need during the same activity.
This structure also allows buyers to manage purchasing risk. A larger portion of the order can be allocated to the proven hero item, while supporting products can be introduced in quantities that reflect component availability, packaging requirements, and expected sales.
Build Around Real Use Cases
Neoprene works across many soft-goods categories because it provides flexibility, cushioning, a soft surface, some thermal insulation, and compatibility with multiple printing and sewing processes. Common custom options include approximately 2 mm, 3 mm, 4 mm, and 5 mm materials, although the final specification also depends on foam density, surface lamination, structure, lining, and the intended product function. Szoneier’s documented capabilities cover neoprene bags, koozies, bottle holders, lunch bags, laptop sleeves, covers, pet products, and related sewn accessories.
| Collection Type | Hero Product | Suitable Supporting Products | Common Starting Thickness Range* | Main Development Risk |
|---|---|---|---|---|
| Food and drink | Lunch bag | Bottle sleeve, snack pouch, koozie | 2–4 mm | Color and structural consistency |
| Technology | Laptop sleeve | Tablet sleeve, cable pouch, mouse pouch | 3–5 mm | Device fit and zipper clearance |
| Travel | Organizer pouch | Passport sleeve, luggage accessory, small case | 2–4 mm | Overlapping product functions |
| Sports | Bottle carrier | Armband, support sleeve, equipment pouch | 2–4 mm | Stretch, comfort, and seam stress |
| Pet | Harness or padded collar | Leash padding, treat pouch, waste-bag holder | 2–4 mm | Hardware and load-bearing areas |
| Promotional | Branded sleeve or carrier | Koozie, pouch, bottle holder | 2–3 mm | Logo clarity and unit cost |
| Beverage gifting | Bottle carrier | Coasters, bottle sleeve, koozie | 2–4 mm | Packaging size and presentation |
| Mobile work | Laptop sleeve | Tablet sleeve, cable roll, accessory pouch | 2–5 mm | Different protection requirements |
- These figures are practical starting references rather than universal specifications. Material density, surface fabric, finished dimensions, reinforcement, desired flexibility, cost target, and product use may change the final choice.
The strongest collections are easy to describe in one sentence. When a product team needs a lengthy explanation to justify why the items belong together, the range may need to be simplified or reorganized.
Limit the First Collection
A first collection does not need six product types, five sizes, and eight colors. That amount of variation creates a large number of purchasing, packaging, production, and inventory combinations before the brand has reliable sales information.
A manageable launch often includes one hero product, two supporting products, one optional gift or premium item, and two or three coordinated colors. This is not a universal rule, but it gives most brands enough variety to create a meaningful collection without spreading quantities too thinly.
A range with four product designs, three colors, and two sizes for one item may appear simple in a presentation. In practice, it can quickly create more than a dozen separate SKUs. Each SKU may require its own barcode, label, packing method, carton allocation, inspection record, sales forecast, and replenishment plan.
Before adding a new product, color, or size, the team should determine whether customers will understand the difference, whether it serves a separate need, whether the channel can present it clearly, and whether the expected sales justify the required quantity. The team should also confirm whether the variation requires new material, packaging, labels, or components.
A controlled first release allows the brand to learn which combinations deserve expansion. Launching too many variants without evidence can place working capital into slow-moving inventory and make repeat-order planning unnecessarily complicated.
Avoid Weak Product Combinations
Some products look related on a mood board but do not make sense as a commercial set. Common warning signs include duplicated functions, conflicting user groups, large differences in perceived value, and products that cannot share a meaningful design or material direction.
Combining a low-cost promotional koozie with a highly structured premium laptop case may create an unclear retail story. Their construction time, protection requirements, branding expectations, and target prices are significantly different unless a strong concept connects them.
Weak collections often contain products that solve almost the same need, require conflicting material properties, or would rarely be used during the same activity. Packaging may become excessively large, one accessory may require a component MOQ that distorts the whole order, or the set may depend entirely on identical artwork rather than a useful relationship.
A practical test is to imagine the products without their logo and printed graphics. When they still make sense together because of their functions and usage scenario, the collection has a strong foundation. When the relationship disappears as soon as the surface design is removed, the range may be relying too heavily on decoration.
How Do You Match Materials and Branding?
Match materials and branding by standardizing the visible design system while selecting each product’s construction according to function. Use approved physical swatches, documented color references, separate artwork layouts, logo rules, and coordinated trims. Neoprene thickness may vary across the set, but surface quality, brand hierarchy, finishing, and visual direction should remain controlled.
Select Thickness by Function
Thickness affects flexibility, cushioning, shape, product weight, sewing behavior, packing volume, and cost. It should be chosen according to what the product needs to do rather than because one thickness was selected first for the collection.
Common sewn neoprene projects may use approximately 2 mm, 3 mm, 4 mm, or 5 mm material. An experienced developer also evaluates the surface fabric, foam density, stretch, lamination, lining, edge finishing, seams, and finished dimensions. Two materials described as 3 mm neoprene may feel noticeably different when their density or face fabric is not the same.
A lightweight koozie may work well with flexible 2 mm material, while a bottle holder may benefit from 3 mm construction. A laptop sleeve may require 4 mm or another specification that provides more cushioning and shape. A selected protective case may use 5 mm material, although thicker material can increase sewing bulk, zipper pressure, weight, and shipping volume.
The material specification should record more than a general thickness description. It should identify the foam or neoprene reference, thickness tolerance where relevant, surface fabric, lamination, stretch direction, color, hand feel, and approved physical sample.
A coordinated collection can use different thicknesses while sharing the same surface fabric, print family, binding color, logo hierarchy, and finishing quality. This produces better functional results than forcing every item into one material specification.
Match Colors Across Materials
Color matching is one of the most misunderstood areas of multi-SKU product development. A Pantone reference is valuable, but it does not guarantee that laminated fabric, printed polyester, zipper tape, webbing, thread, rubber patches, silicone labels, and packaging paper will appear identical.
Different substrates absorb and reflect light differently. A smooth printed surface may appear brighter than textured webbing. A matte rubber patch may look darker than the same nominal color printed on fabric. Several black components may reveal blue, brown, or gray undertones when placed beside one another under neutral lighting.
A practical approval process starts with the target Pantone or physical master sample. The team should then review available stock colors, approve the neoprene face fabric, approve patterned print strike-offs, and build a trim card containing binding, zipper tape, thread, webbing, labels, patches, and hardware.
All materials should be reviewed together rather than approved separately. The buyer should also decide whether the goal is an exact visual match or a controlled tonal relationship. An exact match may be unrealistic across very different materials, while a coordinated palette can create a more deliberate and natural result.
Repeat orders should be considered during color approval. Stock materials may show batch variation, while custom-dyed materials can require higher minimum quantities. The color system should therefore be practical for future replenishment rather than attractive only during the first sample round.
Scale Artwork for Each Product
Artwork should be adapted to each product rather than reduced or enlarged by one fixed percentage. A lunch bag, bottle sleeve, laptop case, koozie, and accessory pouch have different proportions, visible surfaces, seam allowances, curves, zipper positions, handles, and logo-safe areas.
A large repeat pattern may look balanced on a wide bag but become crowded on a narrow sleeve. A character illustration may lose an important feature when a seam passes through the image. A centered logo may look correctly positioned on a flat product but appear too low after the item is filled or stretched around an object.
Every SKU should have its own artwork layout showing the finished product outline, cut line, seam allowance, print direction, visible area, logo dimensions, focal points, and critical positions. For repeat prints, the file should define the repeat scale and intended orientation. For placement prints, the position should be measured from stable product edges.
Products that stretch around bottles, cans, devices, sports equipment, or body areas should be reviewed both flat and in use. Print distortion may not be visible in a two-dimensional file.
The complete collection should also be reviewed from a normal customer viewing distance. Details that appear precise on a design monitor may become too small or visually weak when produced at actual size.
Coordinate Logos and Trims
Neoprene products can support branding methods such as screen printing, sublimation printing, digital printing, heat transfer, embroidery, woven labels, rubber patches, silicone patches, reflective logos, jacquard webbing, and customized zipper pullers. The appropriate method depends on surface fabric, artwork detail, color count, quantity, flexibility, durability expectations, brand positioning, and budget.
One logo method does not have to be forced onto every product. A large hero item may use a full printed graphic, while a small pouch uses a woven side label. A sports product may use a reflective logo, while a gift accessory uses a rubber patch. The applications can differ while maintaining the same brand hierarchy.
The collection should define primary branding for hero products, secondary branding for smaller products, and identification branding for care labels or understated details. Logo size, spacing, orientation, color, and general placement logic should be documented rather than decided independently for every sample.
Trims are equally important because binding, zipper tape, thread, webbing, buckles, pullers, and metal finishes create a visual frame around the neoprene. A collection can lose its premium appearance when these components are selected without coordination.
The final trim specification should record colors, widths, materials, finishes, component codes, and approved alternatives. This reduces the risk that a visually similar but noticeably different component is introduced during bulk production or a later replenishment order.
How Should You Sample and Test the Set?
Every SKU should be sampled separately and the complete collection should be reviewed together before production. Each product needs its own fit, construction, artwork, closure, and packaging approval. Use measurable revision comments, dated sample versions, individual specifications, approved swatches, and one clearly identified final reference sample for every SKU.
Sample Every Product Structure
Sharing the same material does not mean one sample can represent the entire set. Neoprene behaves differently when folded, curved, compressed, stretched, bound, zipped, or combined with webbing, handles, lining, and reinforcement.
A flat pouch may sew cleanly in a material that becomes bulky around the corners of a structured case. A bottle sleeve may fit correctly when empty but twist after the intended bottle is inserted. A laptop sleeve may meet the requested width but create pressure around the zipper opening. A koozie may look correct on a table while fitting too loosely around the intended container.
Every SKU should be checked for finished dimensions, opening size, fit with the intended object, stretch direction, seam construction, binding tension, zipper clearance, handle position, strap comfort, artwork placement, logo proportion, and packaging fit.
An efficient sampling sequence usually begins by confirming the core material, color system, artwork direction, and hero product. Once those elements are stable, the supporting products can be developed using the approved collection rules.
Supporting SKUs still require individual samples, even when their construction appears simple. Small products often create unexpected difficulties because there is limited space for seams, binding, labels, zippers, and branding.
Use Measurable Revisions
Sample comments should be clear enough for a technician to execute and for an inspector to verify. Instructions such as “make it more premium,” “improve the shape,” or “move the logo slightly” can be interpreted differently by each person involved.
A measurable instruction describes the current condition, required change, exact measurement or reference, reason for the adjustment, and whether the change affects any other SKUs. For example, “Reduce the front logo width from 68 mm to 58 mm, keep it centered horizontally, and place the top edge 32 mm below the zipper seam” can be reproduced and checked.
A collection revision log should record the sample version, date, requested adjustment, responsible person, completion status, and final approval. When a shared element changes, such as binding color, label content, or logo proportions, the record should identify every affected SKU.
This system prevents a common multi-product problem in which one sample reflects the latest decision while another continues using an older specification. Without a central revision record, both versions may appear valid to production teams.
The approved sample, BOM, measurement sheet, artwork, material swatches, packaging files, and QC checklist should carry matching version information. Old samples and obsolete files should be clearly marked so they cannot be mistaken for final references.
Approve the Collection Together
Individual approval confirms that each product works. Collection approval confirms that the range looks and feels consistent. Both levels are necessary.
All final samples should be placed side by side under the same lighting. The team should compare surface color, print saturation, artwork scale, logo hierarchy, trim quality, binding width, zipper finish, product proportions, and packaging presentation.
| Approval Stage | Main Checks | Required Reference | Final Output |
|---|---|---|---|
| Material approval | Thickness, surface, color, stretch, hand feel | Physical swatches and material specification | Approved material card |
| First sample | Shape, dimensions, construction, initial branding | Development brief or tech pack | Detailed revision list |
| Revised sample | Corrected fit, artwork, trims, and function | Updated comments and files | Conditional approval |
| Final sample | Complete product and final packaging | Final BOM and specifications | Marked approval sample |
| Pre-production review | Bulk materials and first production method | Final sample and purchase order | Production authorization |
| In-line inspection | Sewing, print position, components, dimensions | QC checklist and approval sample | Corrective action record |
| Final inspection | Appearance, function, labels, quantity, packing | Final sample and packing instructions | Shipment approval |
| Collection comparison | Cross-SKU colors, branding, and presentation | All approved products together | Set-level sign-off |
A product can look acceptable alone and still feel inconsistent beside the rest of the range. This occurs frequently with dark colors, print intensity, logo proportions, zipper finishes, and edge binding.
The complete collection should also be photographed in the approved arrangement. These images can support internal confirmation and packing instructions, although physical samples and specifications should remain the primary production standards.
Test Products in Real Conditions
Testing should reflect how the final customer will use each item. Not every neoprene product requires formal laboratory testing, but every SKU needs practical checks that match its function, claims, and risk level.
A laptop sleeve should be checked with the intended device for fit, zipper clearance, cushioning, and interior contact points. A bottle holder should be loaded and carried to evaluate twisting, stretch, handle balance, and seam stress. A lunch bag should be reviewed for capacity, opening access, handle comfort, structure, and packing. Pet accessories require particular attention to hardware, attachment points, stitching, and load-related construction.
Useful checks include repeated zipper operation, seam inspection, fit verification, stretch recovery, print and logo adhesion, binding stability, handle loading, odor and cleanliness review, packaging fit, barcode scanning, and appearance after temporary compression.
The test method, sample quantity, acceptance criteria, and responsible party should be agreed before production begins. Claims involving waterproofing, thermal performance, protection, load capacity, or safety should only be used when the material, construction, and testing support them.
Practical use testing often identifies issues that are not visible during a desk review. A product can meet its dimensions and still feel uncomfortable, difficult to open, unstable when carried, or inconvenient to pack.
How Do You Prepare the Set for Production?
Prepare the collection with one master design standard and separate BOM, specification, artwork, packaging instruction, and QC checklist for every SKU. Confirm shared materials, component minimum quantities, production sequence, color allocation, carton organization, and repeat-order requirements before purchasing bulk materials or approving the production schedule.
Build SKU-Level Documents
A master collection guide records the design elements shared across the range, but it cannot replace individual production documents. Every SKU needs its own bill of materials, measurement specification, artwork file, packaging instruction, and inspection checklist.
The master guide should define the collection identity, approved color system, shared materials, branding hierarchy, trim direction, packaging style, and general workmanship expectations. Individual files should define the product code, dimensions, neoprene specification, surface lamination, panel construction, seams, binding, zippers, hardware, straps, reinforcement, artwork placement, labels, packing method, carton quantity, and critical inspection points.
Avoid unclear instructions such as “same as the lunch bag” unless the exact component is identified by a material or part code. When the lunch bag is revised later, an unclear reference may unintentionally change another product or create a conflict between files.
For repeat production, patterns, BOMs, approved materials, print files, labels, packaging documents, SKU lists, QC standards, and revision records should be archived. This reduces the need to reconstruct the project from memory and makes future replenishment more stable.
Good documentation also protects the collection when staff members, component suppliers, or production lines change. The approved result should be repeatable from recorded standards rather than depending on one employee’s personal knowledge.
Plan MOQ by Component
The finished-product MOQ is only one part of multi-SKU planning. The range may also be affected by minimum quantities for laminated neoprene, custom colors, printed fabric, binding, zipper tape, webbing, labels, rubber patches, silicone logos, customized pullers, boxes, and printed inserts.
For many suitable standard custom projects, Szoneier’s MOQ begins from approximately 200 pieces, although exact requirements depend on material availability, product structure, colors, logo processes, accessories, packaging, and development needs. Szoneier is positioned as a Shenzhen-based factory-backed bags and soft-goods OEM/ODM manufacturer with more than 18 years of manufacturing experience and support for multi-SKU product development.
Projects using available materials, regular colors, mature structures, standard zippers, simple branding, and ordinary packaging are generally easier to organize at lower quantities. Custom-dyed neoprene, exclusive laminations, molded patches, special zipper pullers, jacquard webbing, unusual hardware, complex retail boxes, tooling, or special testing may increase minimums or development costs.
The buyer should request an MOQ breakdown by product, color, material, and component. This makes it possible to adjust the assortment intelligently. A custom patch may be shared across several SKUs, while a specialized zipper or box may only be needed for one product.
Unit cost should also be separated from one-time expenses. Sampling, print setup, molds, packaging development, and testing should be identified clearly rather than hidden inside an artificially low product price.
Schedule Shared and Unique Work
Multi-SKU production should combine shared processes where doing so reduces variation while keeping product-specific operations under separate control.
Shared work may include purchasing the main neoprene material, printing common artwork, ordering labels, preparing trim cards, coordinating packaging graphics, and confirming color standards. Unique work may include product patterns, cutting layouts, zipper preparation, edge binding, strap assembly, reinforcement, functional testing, and individual packing.
The production sequence should reflect complexity. A flat koozie may pass through cutting and sewing relatively quickly, while a zippered lunch bag or fitted laptop sleeve requires more components, stricter measurement control, and additional inspection.
A realistic production schedule should identify material approval, final sample approval, bulk material arrival, printing completion, cutting start, first-piece approval, in-line inspection, packing start, final inspection, and shipment handover.
Material readiness should be confirmed before the delivery timeline is treated as final. Custom colors, printed laminations, molded branding, special packaging, and peak-season capacity can add time before sewing begins.
A milestone schedule gives buyers better visibility than one general promise. When an issue occurs, both sides can identify whether it relates to materials, printing, production, inspection, packaging, or shipping and take corrective action before it affects the full collection.
Inspect Every SKU and the Complete Set
Quality inspection should operate at two levels. Each SKU must meet its individual construction, measurement, and functional requirements, while the complete range must meet shared standards for color, artwork, branding, trims, packaging, and overall presentation.
Individual checks should cover materials, thickness, dimensions, print position, logo size, zipper performance, binding quality, seams, reinforcement, cleanliness, product fit, labels, and packing method. Collection-level checks should compare color relationships, print intensity, logo hierarchy, trim consistency, packaging design, barcode accuracy, carton organization, and set completeness.
A structured process begins with incoming material inspection, continues through pre-production confirmation, first-piece approval, cutting review, in-line checks, finished-product inspection, and packing verification. The final comparison should use the approved products and material card rather than relying on photographs or memory.
Bulk goods should also be reviewed according to the intended sales format. When products are sold as individual items, each SKU must be packed and labeled correctly. When sold as a bundle, inspectors must confirm that every set contains the correct product, color, size, insert, barcode, and packaging.
Matching collections are created through controlled decisions rather than visual guesswork. When materials, samples, artwork, BOMs, revisions, packaging, and inspection records are connected, the range becomes easier to manufacture, replenish, and expand.
Create Your Neoprene Product Set with Szoneier
A successful neoprene collection should feel simple and intuitive to the customer even though the development process behind it is detailed. Customers see a coordinated lunch collection, technology kit, pet range, sports set, travel system, or branded gift package. Behind that finished presentation, the product team must control thickness, fit, colors, artwork, trims, components, samples, quantities, packaging, quality, and production records.
Szoneier is a Shenzhen-based custom bags and soft-goods OEM/ODM manufacturer with more than 18 years of manufacturing experience. The company supports the development of neoprene bags, koozies, bottle holders, lunch bags, laptop sleeves, soft covers, pet products, protective accessories, and other sewn neoprene products. Its project services cover material selection, pattern development, sampling, sample revisions, bulk production coordination, quality inspection, packaging, and export delivery.
Brands can approach a project with complete tech packs, physical samples, reference images, sketches, artwork, or an early product concept. A practical evaluation should include the intended product list, target dimensions, required quantities, Pantone references, printing or logo preferences, packaging format, destination country, required delivery date, and applicable quality expectations.
The development team can then review which materials may be shared, which SKUs require different thicknesses, how artwork should be adapted, where component MOQs may affect the order, and how the range should be sampled and inspected.
For a detailed quotation, send your product list, drawings, reference samples, artwork, target colors, expected quantities, packaging requirements, destination, and timeline to Szoneier. A well-prepared inquiry allows the manufacturer to provide more accurate material recommendations, clearer development costs, realistic MOQ planning, and a production route designed for consistent multi-SKU results.