
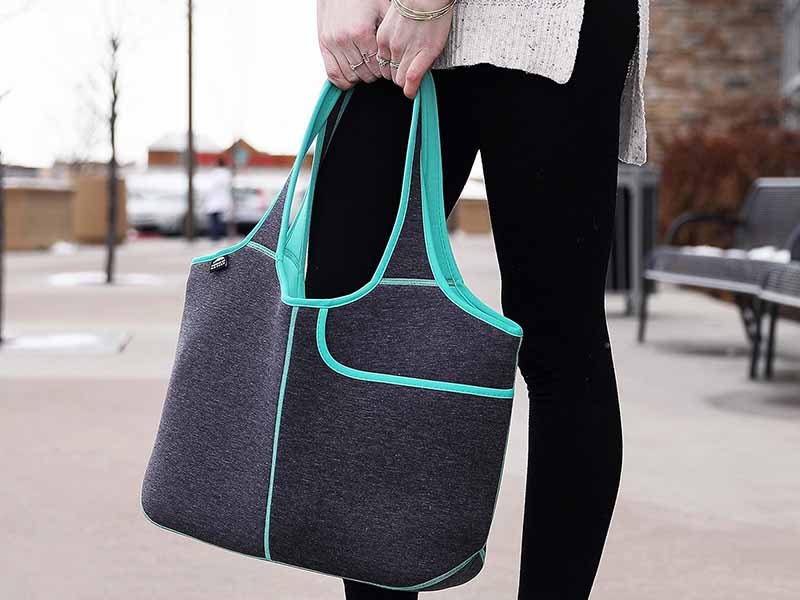
A neoprene bag can look great in a photo and still disappoint the moment someone holds it. Customers feel precision with their hands: clean edges, smooth seams, balanced shape, and a zipper line that sits straight instead of waving. When these details are off, the bag feels “cheap” even if the material is good. What many brands don’t realize is that neoprene isn’t forgiving. It stretches, compresses, and rebounds—so small process mistakes turn into visible defects: uneven panel symmetry, seam puckering, curling edges, and size drift between batches.
Neoprene bags achieve precision when panel cutting controls stretch and compression, stitching is built for elasticity, and lamination is stable enough to survive sewing tension. The most consistent factories match cutting method to thickness, use stretch-friendly seam structures, and run simple QC checks—edge quality, size tolerance, seam strength, and lamination peel resistance—before mass production.
I’ve seen brands fix returns simply by changing one thing: switching from “straight stitch everywhere” to a seam structure that moves with neoprene, or using a cutting method that stops panel slip. Those are small production decisions, but they decide whether your neoprene bag feels premium or problematic. Let’s start with the core challenge: why neoprene behaves differently on the cutting table and under a sewing machine.
Why Is Neoprene Challenging to Cut and Sew?
Neoprene is challenging because it’s elastic + compressible + laminated. Unlike stable woven fabric, neoprene can shift under pressure and “spring back” after cutting, which makes edges drift. During sewing, the foam compresses while the fabric face layer stretches at a different rate, causing puckered seams, misalignment, or skipped stitches if machine settings are not tuned.
For brands, this matters because precision problems usually show up as real customer complaints:
- “The bag looks uneven / not symmetrical.”
- “The zipper line is wavy.”
- “Edges are rough and start peeling.”
- “Two bags from the same order don’t match size.”
Below is what actually causes those problems and how manufacturers control them.
Why defects happen
Neoprene bags fail precision for three main reasons:
- Cutting deformation Foam compresses under blades and dies. If the blade is dull or pressure is wrong, the cut edge becomes angled, crushed, or slightly torn.
- Feed instability during sewing Neoprene “grips” and drags differently from woven fabric, especially with thick foam and elastic laminations. This causes panel creep, where one layer moves faster than the other.
- Lamination stress near seams If the bond between foam and fabric is weak, stitching tension can create wrinkling, bubbling, or eventual delamination around stitch holes.
“Problem → Cause → Fix”
| Customer Complaint | Most Common Root Cause | Practical Fix in Production |
|---|---|---|
| Wavy zipper / curved seam line | panel creep while sewing | walking foot + correct tension + seam tape |
| Rough edges | dull blade / wrong cutting pressure | sharpen blades + match tool to thickness |
| Bag left/right not symmetrical | cutting drift + poor panel alignment | cutting jig + registration marks |
| Puckering near seams | straight stitch too tight | zigzag / stretch stitch + lower tension |
| Surface fabric bubbling | weak lamination bond | peel test + improved curing/adhesive |
| Size inconsistency between lots | foam rebound + poor tolerance control | rest-time after cutting + batch QC sampling |
What causes rough edges and compression marks?
Rough edges and compression marks happen when neoprene is pressed more than it is cut. Foam collapses under pressure, and if the blade isn’t sharp enough, it “drags” the foam instead of slicing cleanly. That creates:
- jagged or fuzzy borders
- slightly beveled edges (one side looks larger)
- shiny compressed lines along the cut path
These edge defects matter because they don’t stay hidden. They show up later as:
- uneven binding tape lines
- misaligned seam margins
- visible differences between left/right panels
Most reliable prevention steps (simple but effective):
- keep blades sharp and replace on schedule
- reduce unnecessary pressure (especially on 1–3 mm)
- use cutting mats and fixtures that stop sheet slip
- for thicker sheets, choose a method that slices instead of tears
Edge quality targets many factories use
| Thickness | Acceptable Edge Condition | What to reject |
|---|---|---|
| 1–3 mm | smooth edge, minimal fuzz | torn fibers, shiny crush line |
| 3–5 mm | clean slice, no angled cut | bevel edge, foam tearing |
| 5+ mm | uniform profile, no “stepped” edge | jagged profile, compression dents |
Which thickness levels change cutting difficulty?
Thickness changes everything because it changes compression force, rebound, and friction. Two sheets can both be “neoprene” but behave completely differently at 2 mm vs 6 mm.
- 1–3 mm: easier to cut, but easier to stretch and distort if not held flat
- 3–5 mm: most common for bags; requires better blade control and alignment marks
- 5–7 mm: more rebound; angled edges and size drift become more likely
- 7 mm+: cutting method must control heat/friction and prevent panel distortion
Practical thickness-to-process guidance
| Thickness | Cutting Risk | Best Control Approach |
|---|---|---|
| 1–2 mm | stretching, panel slip | sharp knife + hold-down fixture |
| 2–3 mm | minor compression marks | knife or light die cutting |
| 3–5 mm | bevel edges, mismatch | die cutting + registration marks |
| 5–7 mm | rebound size drift | strong fixture + rest-time before sewing |
| 7+ mm | distortion + rough edges | industrial die cutting or specialized cutting |
Thicker neoprene often needs a short rest time after cutting before sewing so the foam can rebound consistently. Without this, panels can “grow” slightly after they are already stitched, creating shape imbalance.
How does fabric lamination affect seam accuracy?
Lamination is the silent factor that decides whether seams stay clean over time. Neoprene bags usually use laminated surfaces such as:
- nylon jersey
- polyester knit
- spandex blends
- brushed inner linings
These fabrics stretch at different rates. If the face fabric stretches more than the foam (or vice versa), sewing tension creates micro-waves along the seam line. Over time, bending and heat can turn micro-waves into visible ripples.
Where lamination issues show up most:
- around zipper tape
- at tight curves (rounded corners)
- near strap anchors (high pull zones)
Lamination stability checks that prevent problems
| Check | What it verifies | Quick factory method |
|---|---|---|
| Peel resistance | fabric won’t separate from foam | manual peel + measured force |
| Heat aging | bond won’t bubble in heat | 60–80°C exposure test |
| Needle-hole stability | stitching won’t trigger delam | sew test strip + bend cycles |
| Surface stretch match | seam line stays straight | stretch both layers and compare |
If you want a bag that looks “clean and straight,” don’t only ask “What thickness?” Ask:
- “What surface fabric is laminated?”
- “How strong is the lamination bond?”
- “What seam type is used around zippers and corners?”
Mini Spec Sheet
If you want, you can use this format when asking a factory for a quote:
| Item | Your Target |
|---|---|
| Product type | neoprene tote / sleeve / duffel |
| Thickness | ___ mm |
| Density level | soft / medium / firm |
| Surface fabric | nylon / poly / spandex |
| Inner lining | brushed / jersey / none |
| Cutting method | die / knife / laser (factory recommend) |
| Main seam type | zigzag / flatlock / glued+stitched |
| Edge finish | binding / folded edge / tape |
| Logo method | heat transfer / screen / patch |
| QC requirements | size tolerance + seam strength + peel test |
How Are Neoprene Bag Panels Cut for Clean Edges?
Cutting neoprene panels precisely is the foundation of a high-quality neoprene bag. Unlike standard fabrics, which may fray or distort under pressure, neoprene behaves like a foam material that compresses and rebounds when cut. This requires more than just a sharp blade—it requires the right cutting method and tool combination to ensure clean, straight edges that align perfectly for stitching.
The ideal cutting method depends on the thickness of the neoprene. Thinner panels (1–3 mm) can be cut with manual blades or light dies, while thicker panels (4–7 mm) demand die-cutting or laser cutting to maintain edge precision. The cutting technique directly influences panel shape consistency, edge smoothness, and overall dimensional accuracy. Without attention to these details, seams may misalign, or edges may curl, ruining the finished product.
Which tools suit 1–3 mm neoprene?
For thin neoprene panels (1–3 mm), cutting is relatively easy but must still be precise. Manual cutting with sharp rotary blades or straight-edge knives works well for straight lines, while scissors are often used for small adjustments.
However, to ensure that the cut is as smooth as possible, a cutting mat is essential to maintain consistent pressure. Die-cutting also becomes viable here, especially when you need exact shapes, like circles or intricate designs, for bags or accessories.
Practical recommendations for 1–3 mm cutting:
| Tool | Recommended Use | Pros | Cons |
|---|---|---|---|
| Rotary Blade | Straight cuts, long panels | Fast, smooth edge | Needs precise hand control |
| Scissors | Small adjustments | Easy to control | Not ideal for precision cutting |
| Die-Cutting | Intricate shapes | High precision, repeatable | Requires die setup |
Manual cutting works well for smaller production runs or custom items, but die-cutting is usually favored for larger production to ensure repeatable accuracy with less effort.
Which methods work best for 3–5 mm sheets?
For 3–5 mm neoprene, the foam’s increased density requires a more powerful cutting tool. A laser cutter or industrial die-cutting machine becomes essential for ensuring precision across multiple panels.
- Laser cutting: Uses a concentrated beam of light to cut through neoprene, resulting in extremely clean edges without fraying. The heat from the laser seals the edges, preventing unwanted edge distortion or material pull.
- Die-cutting: For larger volumes, die-cutting is often used, where a sharp steel die presses through neoprene to cut it into a precise shape. Dies are often designed to handle thicker neoprene without exerting too much pressure on the foam, thus preserving the material’s elasticity and texture.
Cutting tools comparison for 3–5 mm thickness
| Tool | Precision | Speed | Edge Quality |
|---|---|---|---|
| Laser Cutting | Extremely high | Medium | Clean edges, no fraying |
| Die-Cutting | High | Very fast | Clean, but may require post-processing |
| Manual Cutting | Low | Slow | Uneven, rough edges |
For brands dealing with mid-thickness neoprene, laser cutting is the preferred choice for high-quality products where edge smoothness and precise geometry are key.
When should die-cutting, laser cutting, or water-jet cutting be used?
The cutting method depends not just on thickness but on product design complexity, material consistency, and production scale.
Laser cutting:
Laser cutting is ideal for high-precision cuts on mid-thickness neoprene (3–5 mm), especially when intricate designs or tight tolerances are needed. Laser cutting works especially well for small, detailed logos or tight corner curves that need to stay smooth and exact.
Die-cutting:
Die-cutting is perfect for large volumes and simple shapes. It allows for fast cutting of multiple panels at once and is ideal for standard designs where repeatability is key (such as uniform-sized bags).
Water-jet cutting:
For thicker neoprene (over 5 mm) or highly detailed cuts that might distort under a laser or die-cut, water-jet cutting uses a high-pressure stream of water mixed with abrasives to slice through thick neoprene without causing deformation or excess heat.
| Method | Best For | Pros | Cons |
|---|---|---|---|
| Laser Cutting | Intricate shapes, tight tolerances | Clean, smooth edges, precise | Slower for large batches |
| Die-Cutting | High-volume, simple shapes | Very fast, repeatable | Dies are expensive, not suitable for custom designs |
| Water-Jet Cutting | Thick neoprene, detailed cuts | High precision, no heat damage | Slower, higher operational cost |
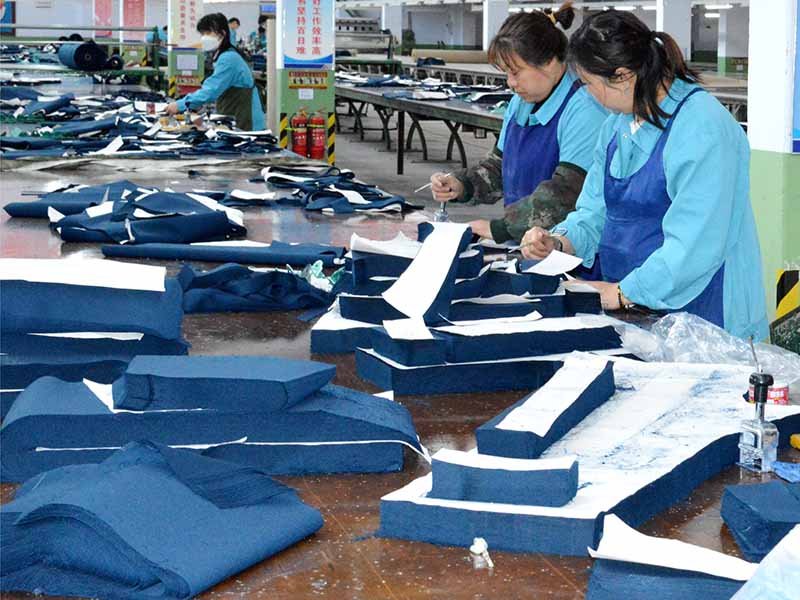 If you need precision, small batches, or intricate designs, laser cutting should be your go-to. For high-volume production with less complex shapes, die-cutting offers speed and efficiency.
How do you prevent shifting, stretching, and angled cuts?
Shifting and stretching are common challenges when cutting neoprene, especially in larger panels. Neoprene’s elasticity makes it prone to stretching under pressure, which can cause misaligned cuts.
To minimize these issues, follow these best practices:
- Use Cutting Jigs – These are templates that hold the neoprene in place while cutting, ensuring that all panels maintain the same alignment.
- Use Fabric Holders – When using a rotary cutter or scissors, fabric clips or weights help prevent material shift during cutting.
- Control Stretching – Cutting thick neoprene requires controlling how the material is fed into the machine. Using a stretchable guide or feeding system ensures the material stays in proper tension while maintaining size accuracy.
Which Stitch Types Create Strong and Neat Seams?
Neoprene’s flexibility means that its stitching must be stretch-friendly. When working with standard fabrics, a straight stitch may be sufficient. But for neoprene, the right stitch type ensures that the material stretches naturally without puckering, tension, or seam breakage over time.
Which seam types are best for neoprene bags?
Zigzag seams:
Zigzag stitching is one of the most flexible seam types used in neoprene products. It can stretch with the neoprene’s natural movement and is often used in flexible bags and supports. This type of seam prevents seam breakage and keeps the material intact under stress.
Flatlock seams:
Flatlock stitching is used for joining two pieces of neoprene without bulk, making it ideal for seamless-looking bags or designs where the seam needs to lay flat against the body. This seam type is also commonly used in sportswear and wetsuits, as it enhances comfort without added thickness.
Glued-and-stitched seams:
For added strength and waterproofing, many manufacturers opt for gluing followed by stitching. This method creates a durable, water-resistant seam without sacrificing flexibility. It’s especially useful for waterproof bags or seals around zippers.
Which Stitch Types for Which Neoprene Bags?
| Stitch Type | Best For | Benefits | When to Use |
|---|---|---|---|
| Zigzag Stitch | Flexible bags, sleeves | Flexibility + durability | Sports bags, fitness gear |
| Flatlock Stitch | Sleek, flat seams | Comfort + stretch | Fashion bags, activewear |
| Glued-and-Stitched | Waterproof needs | Strong, durable, waterproof | Outdoor bags, diving accessories |
What Needles, Thread, and Machine Settings Improve Precision?
While cutting and lamination are critical, precision stitching is the final touch that ensures a neoprene bag performs as expected. The right needles, thread, and machine settings are vital for creating seams that can handle the stretching, bending, and daily wear neoprene is known for. If stitching isn’t set up correctly, even the highest-quality neoprene will show flaws in its seams, especially in stress zones like corners, zippers, and straps.
Which needle types prevent skipped stitches?
Choosing the right needle size and type is essential to avoid skipped stitches or thread breakage when sewing neoprene. Since neoprene stretches and rebounds, a standard needle used for cotton or polyester fabrics will not perform optimally. Instead, the right needle helps maintain consistent stitch tension and prevents needle-related issues.
Recommended needle types for neoprene:
- Ballpoint Needles: Ballpoint needles are ideal for elastic materials like neoprene. Their rounded tip slides through the material without causing snags or skipped stitches, especially useful in thicker neoprene (3–7 mm).
- Jeans Needles (Denim Needles): For thicker neoprene or when using heavier thread, a jeans needle works best. This needle has a thicker shaft, making it more durable when sewing thicker materials without bending or breaking.
- Stretch Needles: These needles are designed for stretch fabrics and are particularly useful for sport and activewear bags. The elongated eye allows the thread to stretch naturally without breaking, maintaining smooth, continuous stitching.
Needle choice breakdown
| Needle Type | Best For | Recommended Thickness Range | Advantage |
|---|---|---|---|
| Ballpoint Needle | General use on neoprene | 1–5 mm | Prevents skipped stitches and fabric damage |
| Jeans Needle | Heavy-duty seams | 4–7 mm | Stronger for thicker neoprene and denser thread |
| Stretch Needle | Flexible or activewear bags | 1–5 mm | Handles elasticity and stretch without thread breakage |
Make sure to regularly check needle sharpness—dull needles cause poor stitching and can result in poor product quality.
What thread materials handle stretch best?
Neoprene requires stretchable thread that can withstand the material’s elastic nature. Regular polyester thread can snap or cause tension issues when used with neoprene, especially if the material is stretched repeatedly. To avoid these problems, manufacturers opt for specialty threads that provide flexibility while remaining durable.
Thread materials best suited for neoprene:
- Polyester Thread: While not inherently elastic, polyester thread works well for most standard applications. It has good resistance to UV rays, wear, and chemicals, making it ideal for products exposed to the sun or frequent washing (like neoprene bags or wetsuits).
- Nylon Thread: Nylon thread offers better stretchability and elasticity, making it ideal for bags that need to move with the material. It provides high tensile strength, making it suitable for stress zones like straps or reinforced seams.
- Spandex/Elastic Thread: For products that need to stretch without compromising seam integrity, elastic thread is used. It allows the seam to stretch along with the neoprene without losing elasticity. It’s commonly used in sports gear or performance bags.
Recommended thread types for different neoprene products
| Thread Type | Best For | Stretch Factor | Durability |
|---|---|---|---|
| Polyester Thread | General use | Low | High wear resistance, UV resistant |
| Nylon Thread | High-stress zones | Medium | Flexible and strong, handles tension |
| Elastic Thread | Performance bags | Very High | Stretchable, used in stretchy designs |
How do stitch length and tension affect seam quality?
Stitch length and tension are two of the most important factors in achieving high-quality seams. Poorly adjusted settings can lead to uneven stitching, puckered seams, and thread breakage.
- Stitch length determines the density of stitches along the seam. A short stitch length (2.0 mm) holds the fabric tightly together, but if the tension is too high, it causes the material to bunch up or pucker. A longer stitch length (3.0 mm) is generally used for thicker neoprene, as it allows the material to stretch more freely.
- Tension controls how tightly the needle thread and bobbin thread are pulled. Too high a tension causes thread breakage or puckering along the seam. Too low a tension leads to loose stitches that may come undone after a few uses.
For neoprene bags, the general stitch length should be around 2.5 mm–3.0 mm, and the tension should be balanced to avoid any distortion during stitching. Fine-tuning tension according to thickness helps ensure that seams are smooth and even, providing a finished product that holds together without loosening.
Stitching setup comparison
| Setting | Low Tension | High Tension |
|---|---|---|
| Result | Loose stitches, uneven seam | Thread breakage, puckered seams |
| Ideal Use | Light fabrics or decoration | Heavy-duty seams, stress points |
How Are Edges Finished and Quality Controlled in Production?
The final step in creating high-quality neoprene bags is finishing the edges and conducting stringent quality control checks. Without a clean edge, even the best neoprene will start showing wear quickly. Edges can become frayed or distorted with regular use, so manufacturers apply various techniques to secure and protect them from damage.
Which edge-finishing methods look clean and last longer?
Neoprene edges require special finishing methods to prevent fraying, curling, and bubbling. Edge finishing also helps prevent delamination, which can occur when the fabric layer separates from the foam layer after repeated use. Below are some common methods used to finish neoprene bag edges:
- Binding (Bias Tape): This method involves folding fabric over the edge and securing it with a sewing machine. It provides a clean, finished look and prevents fraying.
- Edge Taping: Neoprene tape is applied over the raw edges, either by hand or using a heat sealing machine. This technique is often used for sporting gear or outdoor bags where a seamless finish is needed.
- Folded Edge: The edge is folded inwards and stitched down, providing a stronger, thicker edge that resists wear. This method is especially useful for heavy-duty bags.
- Laser Sealing: For higher-end products, laser sealing is used to melt the edges of neoprene, providing an ultra-smooth finish that prevents fraying without extra material.
Edge finishing comparison
| Method | Best For | Pros | Cons |
|---|---|---|---|
| Bias Binding | Everyday bags, light-duty | Clean look, adds durability | Slightly bulkier edge |
| Edge Taping | Sport and outdoor bags | Fast, waterproof | Can feel thicker |
| Folded Edge | Heavy-duty bags | Strong, reinforced edge | More labor-intensive |
| Laser Sealing | Premium bags | Ultra-clean edge, no fray | Expensive equipment |
How can delamination and bubbling be prevented?
Delamination and bubbling happen when neoprene foam and fabric layers fail to stay bonded under pressure, leading to seam failure. These issues typically arise from poor lamination during production or from excessive tension during sewing.
To prevent this:
- Proper lamination curing: Ensure that adhesive layers are fully cured and that the bond between foam and fabric is strong enough to handle stitching tension.
- Use high-quality adhesives: Cheap adhesives may not hold up after repeated stress, especially in bags that flex or stretch.
- Use stretch-compatible seam types: Opt for zigzag or stretch stitches instead of straight stitches, which can cause stress concentration and lead to layer separation.
What QC checks ensure consistent size and seam strength?
Quality control is essential throughout the production process, ensuring that each neoprene bag meets the desired standards for durability and design.
Key QC checks:
- Size Tolerance Testing: Panels must be checked for accurate dimensions before stitching begins. Using cutting jigs and registration marks can help ensure panels are precisely aligned.
- Seam Strength Testing: Perform tensile strength tests on stitched seams to ensure they can withstand stress during use. A pull test can determine the breaking point of the seam and indicate areas for reinforcement.
- Edge Inspection: After cutting, inspect edges for smoothness and straightness. Any defects here will translate into visible issues once the bag is stitched together.
Turning Precision Craftsmanship Into Reliable Neoprene Bags
Cutting and stitching neoprene bags with true precision is not a single step—it is a system of coordinated decisions. Clean panel cutting controls symmetry. Stretch-compatible stitching protects seam strength. Stable lamination prevents bubbling and surface distortion. Careful edge finishing preserves appearance after months of daily use. When these elements work together, the result is a neoprene bag that feels balanced in the hand, holds its shape over time, and delivers the quiet durability customers immediately recognize as quality.
For brands, this level of precision directly affects return rates, product reviews, and long-term reputation. Many production problems that appear to be “material issues” are actually process control issues—blade condition, stitch tension, seam selection, or missing quality checks. Addressing these details early in development is far more cost-effective than correcting defects after launch.
With more than 18 years of experience in neoprene material research, cutting technology, and precision sewing, Oneier helps global brands move from concept to reliable mass production. From low-MOQ sampling and structural optimization to stable OEM/ODM manufacturing and strict quality control, every step is designed to ensure your neoprene bags meet real-world performance expectations—not just visual design goals.
If you are planning a new line of neoprene tote bags, sleeves, duffels, or custom protective carriers, the next step is simple:
share your target market, size requirements, and performance priorities.
Our engineering team can recommend the right thickness, cutting method, seam structure, and finishing solution to match your price point and durability goals.
Contact Oneier today to start developing precision-crafted neoprene bags built for long-term performance and brand confidence.