
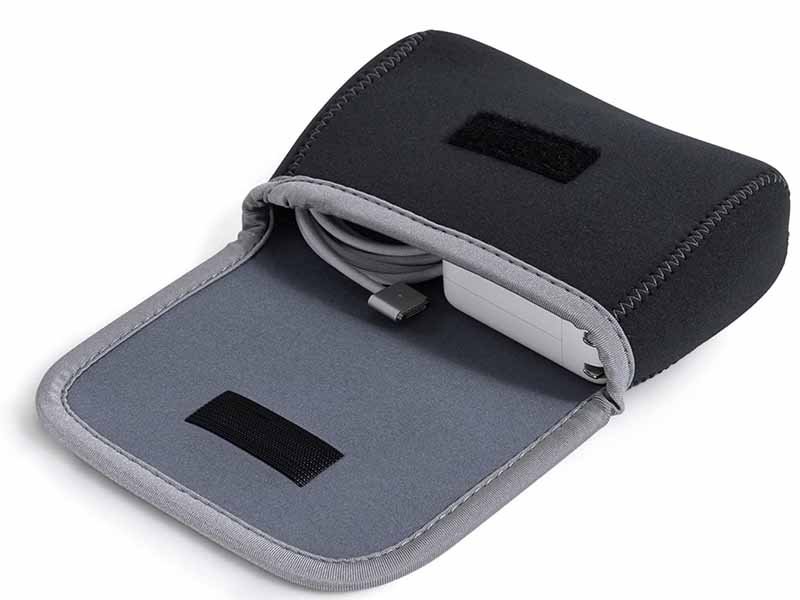
A neoprene case often looks simple from the outside, but its real value shows up only when water appears. A customer may carry it in rain, set it on a wet boat deck, use it near a swimming pool, or drop it briefly into water by accident. In all of these situations, the product is judged very quickly. If the inside stays dry, the case feels dependable. If moisture gets in through the zipper, the seams, or the opening edge, the customer stops caring how soft the neoprene feels or how nice the printing looks.
Neoprene case waterproof testing is the process of checking how well a neoprene case blocks or slows water entry under real-use conditions such as splashing, rain, wet surfaces, or short immersion. It evaluates the neoprene itself, but more importantly the seams, zippers, lamination, bonding, and structure, because these areas usually decide whether the product performs as water-resistant or truly waterproof.
In practical production, most water failures do not happen because neoprene is “bad.” They happen because the product was overclaimed, the seam method was wrong, the zipper was ordinary instead of water-blocking, or the test standard did not match the real use scene. That is why waterproof testing matters so much for custom neoprene products. A case designed for beach accessories should not be tested the same way as a medical brace pouch or an electronics sleeve. The interesting part is that two cases made from similar neoprene can behave very differently in water. The reason usually comes down to construction details, and that is where this topic gets truly important. Materials matter, but build logic matters more. Closed-cell neoprene is commonly described as resistant to water and weather exposure, while spray and rain tests such as AATCC 22 and ISO 4920 are used to assess surface water repellency rather than full submersion performance. Hydrostatic and immersion-style testing are used when higher water resistance is required.
What Is Neoprene Case Waterproof Testing?
Neoprene case waterproof testing is the controlled process of checking how much water a neoprene case can resist, where water enters first, and whether the product matches its claimed use. It is not only about the neoprene sheet. It is about the entire finished case, especially seams, zippers, edge wrapping, lamination, and closure design.
What Does Neoprene Case Waterproof Testing Check?
A lot of clients assume waterproof testing simply means pouring water on a product and seeing whether it leaks. In real manufacturing, the process is more structured than that. The goal is to find out not only if water enters, but how, where, and under what exposure level. This matters because different use scenes create different failure points.
A neoprene case may perform well against light rain but fail when placed on a soaked surface for 20 minutes. Another case may resist surface splashes but leak through the zipper during fast spray exposure. A third may pass a short immersion check but fail after repeated flexing because the seam tape starts to lift. Good testing tries to separate these situations instead of treating them as the same thing.
In product development, waterproof testing usually checks the following areas:
- surface water repellency
- water penetration through seams
- zipper leakage
- edge sealing performance
- laminated fabric stability
- water entry after pressure or immersion
- performance after repeated use or flexing
The most important point for clients is this: the neoprene foam itself is often not the first weak point. The weak point is usually where the product is joined, stitched, opened, or folded. That is why a case made from good neoprene can still fail in the field.
Below is a practical breakdown of where water-entry problems usually appear during development and mass production:
| Test Area | What It Reveals | Common Failure Risk |
|---|---|---|
| Neoprene surface | Splash shedding ability | Lower |
| Stitched seam | Needle-hole leakage | High |
| Bonded seam | Adhesive weakness | Medium |
| Zipper area | Entry through teeth or tape edge | High |
| Edge fold / binding | Wicking and corner seepage | Medium |
| Opening design | Direct access path for water | Medium to high |
For customers developing cases for electronics, medical accessories, sports gear, sunglasses, bottles, and protective pouches, this is a critical distinction. A product can feel thick and protective in the hand and still let water in within seconds if the assembly method is wrong.
Is Neoprene Case Waterproof Testing About Waterproof or Resistant?
This is one of the biggest misunderstandings in neoprene product sales. Many products are described loosely as waterproof, but from a performance point of view, there is a big difference between water-resistant and waterproof. If this difference is not handled clearly, returns and complaints can appear very quickly after launch.
In simple terms, water-resistant means the case can handle a certain level of water exposure, such as splashes, drizzle, damp surfaces, or short contact with moisture. Waterproof means the case can keep water out under a more demanding and defined condition, often involving pressure, extended exposure, or immersion depth. Testing for these two claims is not the same. Intertek notes that rain tests and hydrostatic pressure tests address different requirement levels, and that products needing higher water resistance or waterproof performance should use hydrostatic pressure testing rather than only rain testing. IEC 60529 IP testing is also used to assess whether products are appropriately watertight for their intended use.
This is where many neoprene cases get into trouble. Closed-cell neoprene has useful water-resistant behavior, but once a case is cut, stitched, laminated, and fitted with a zipper, the finished product is no longer judged by raw material alone. A stitched neoprene sleeve with an ordinary zipper may protect from daily splashes, but calling it waterproof without deeper testing is risky.
Here is a practical way to understand the difference:
| Claim Level | Real Meaning | Suitable Use Scene |
|---|---|---|
| Splash resistant | Handles light water contact | Light rain, gym use, daily carry |
| Water resistant | Handles stronger external wetting | Outdoor carry, wet surfaces, short spray exposure |
| Waterproof | Designed to block water under defined test conditions | Marine use, heavy rain, short immersion, higher-risk environments |
For clients, the safest approach is to define the real use case first:
- Will the case face rain only?
- Will it sit on a wet kayak or paddle board?
- Will it hold electronics near a beach or pool?
- Could it be dropped into shallow water briefly?
Once these answers are clear, the right test method becomes easier to choose. The real commercial risk is not low waterproof performance. The real risk is making a claim stronger than the construction can support.
Why Is Neoprene Case Waterproof Testing Needed?
Waterproof testing is needed because appearance, thickness, and hand feel cannot reliably predict performance. A 5 mm neoprene case with a nice surface print may leak faster than a 3 mm case with better seam construction. A glued zipper flap may outperform a more expensive-looking zipper without sealing support. In short, customers cannot see waterproof quality by looking, and factories should not guess it by experience alone.
From a business point of view, testing helps clients in four important ways:
- it verifies whether marketing claims are safe to use
- it shows where the weak point is before mass production
- it reduces the chance of returns and bad reviews
- it helps position the product correctly by performance level
This is especially important for OEM and private-label projects. A client may want to sell a neoprene phone pouch, EVA-neoprene equipment case, wetsuit accessory bag, or medical support pouch in different markets. But market expectations vary. In some categories, “splash safe” is enough. In others, users expect the inside to stay dry after much harsher exposure.
The cost of skipping testing can be high. Even a modest leak issue can damage repeat orders because water-related complaints feel serious to end users. When a case is meant to protect electronics, medication, sports gear, or personal valuables, the customer’s trust drops very fast after one failure.
Testing also helps technical decision-making during development. For example, it can answer questions like:
- Does blind stitching perform better than standard stitching here?
- Is seam glue enough, or is seam tape needed?
- Does the zipper need a protective cover flap?
- Is 3 mm neoprene enough, or does the structure need extra lamination support?
Below is a simple view of how testing affects product decisions:
| Before Testing | After Testing |
|---|---|
| Product claim based on assumption | Product claim based on evidence |
| Hard to price by performance | Easier to price by verified protection level |
| Weak points discovered by customers | Weak points discovered in development |
| Greater after-sales risk | Better consistency and lower complaint risk |
For serious custom development, waterproof testing is not a luxury step. It is part of quality control, claim control, and product positioning.
Which Types of Neoprene Case Waterproof Testing Are Used?
The main types of neoprene case waterproof testing include spray testing, immersion testing, seam-focused testing, and zipper-focused testing. Each one answers a different question. Spray testing looks at splash and rain performance. Immersion testing checks full water exposure. Seam and zipper tests help identify where leakage begins first.
Spray Neoprene Case Waterproof Testing
Spray testing is one of the most useful early-stage methods because it is practical, visual, and closely related to everyday use. It simulates rain, splashing, washdown, or surface water hitting the outside of the case. For many neoprene products, especially sleeves, bottle carriers, lunch accessories, sports pouches, and lifestyle cases, this kind of exposure is more common than full submersion.
Spray-based assessment is often used to judge whether water beads, rolls off, spreads, or penetrates the outer surface. Intertek lists AATCC 22 and ISO 4920 among the standards used for water repellency and notes that spray testing is used to evaluate how effectively a fabric resists water on its surface under controlled spray conditions.
For clients, spray testing is valuable because it helps answer practical product questions:
- Will the outside hold up in rain?
- Will the print or laminated face fabric wet out too quickly?
- Will water collect around the zipper seam?
- Does the case protect against common daily splashes?
However, spray testing has limits. It is mainly a surface-exposure test. It does not fully represent underwater pressure, deeper penetration through openings, or long-duration exposure. A case that performs well in spray conditions may still fail when held in water or pressed against a wet surface.
Here is how spray testing is often used in development decisions:
| Product Type | Why Spray Test Matters |
|---|---|
| Laptop / tablet sleeve | Rain and splash exposure during commuting |
| Sports accessory pouch | Sweat, wet benches, splashing |
| Bottle carrier / koozie case | Condensation and surface wetting |
| Beach accessory case | Frequent splash and sand-water exposure |
For many custom neoprene case projects, spray testing is the right starting point, but it should not be the only test if the client wants stronger water claims.
Immersion Neoprene Case Waterproof Testing
Immersion testing is more demanding because it checks what happens when the finished case is actually placed in water. This is the test that usually exposes structural weaknesses quickly. If the seams wick water, if the zipper is not sealed, or if the edge folding creates a water path, immersion tends to show it fast.
This test is especially relevant for neoprene cases used near water sports, boating, fishing, kayaking, paddle activities, outdoor fitness, and certain protective storage applications. It is also important when the case is intended to protect phones, small electronics, keys, documents, or medical accessories from accidental drops into water.
Immersion-related performance is often described through ingress concepts such as IEC 60529. Public descriptions of IPX7 commonly refer to protection against immersion up to 1 meter for 30 minutes, while IPX8 refers to continuous immersion beyond 1 meter under manufacturer-specified conditions.
For clients, the key lesson is that immersion performance depends heavily on construction. A plain stitched neoprene pouch usually does not become waterproof just because the foam is closed-cell. Once water pressure acts on seams and openings, the whole assembly is tested, not just the raw sheet.
Immersion testing is useful for checking:
- complete leakage paths
- closure weakness under pressure
- seam stability after time in water
- whether the inner compartment stays functionally dry
A practical view of immersion exposure looks like this:
| Exposure Level | What It Tells You |
|---|---|
| Brief dip | Response to accidental drop or quick recovery |
| 1–5 minutes | Short functional survival under real mishap conditions |
| 10–30 minutes | Higher-performance protection expectation |
| Repeated immersion cycles | Durability of sealing method over use time |
For product developers, immersion testing often brings a hard truth: if the case is meant for serious water protection, the zipper, seam style, and closure architecture must be designed for that purpose from the start.
Seam Neoprene Case Waterproof Testing
In many neoprene cases, the seam is the first place where water gets in. This is true even when the neoprene sheet itself resists moisture well. The reason is simple: cutting and sewing interrupt the natural barrier of the foam and face fabric. Every needle hole becomes a possible entry path. Every seam intersection becomes a stress zone.
That is why seam-focused testing deserves separate attention. It is not enough to say the case passed a splash test if water actually enters through one corner seam after a short period. Seam testing helps isolate this weakness before mass production.
Factories usually compare seam structures such as:
- standard stitched seams
- glued seams
- glued plus stitched seams
- blind-stitched seams
- taped or sealed seam structures
The right method depends on cost target, performance target, and product category. For example, a simple sunglasses pouch may not need advanced seam sealing. But an outdoor device case or premium sports pouch may need much more seam control.
From a customer point of view, seam testing helps answer practical concerns:
- Will seam holes enlarge after repeated flexing?
- Does the glue hold under humidity and heat?
- Will water wick along the seam thread?
- Does corner pressure create a leak path?
Seam-focused evaluation often saves development cost because it shows whether improvement is needed in one narrow part of the product rather than changing the whole design.
Zipper Neoprene Case Waterproof Testing
If seams are the first common leak point, zippers are usually the second. A zipper is convenient, familiar, and easy for users, but it is also a direct interruption in the case barrier. Standard zippers are usually not waterproof. Water can enter through the teeth, slider area, end stops, or the stitched zipper tape connection.
That is why zipper-focused testing is essential for many neoprene cases. A product may have strong glued seams and still fail because the zipper system was chosen for cost or appearance rather than water control.
In real development, zipper performance is affected by:
- zipper type
- zipper tape material
- flap cover design
- stitching around zipper tape
- end reinforcement
- opening orientation
For many cases, the most practical improvement is not just using a better zipper, but redesigning how the zipper sits in the product. Sometimes a protective storm flap or recessed zipper placement improves results more than simply changing hardware grade.
Here is a simplified comparison:
| Zipper Setup | Water Protection Level | Cost Impact | Best Use |
|---|---|---|---|
| Standard zipper | Low | Low | Basic daily cases |
| Standard zipper + flap | Medium | Low to medium | Light outdoor cases |
| Water-repellent zipper | Medium to high | Medium | Better splash control |
| Sealed / higher-spec zipper system | Higher | High | Stronger water-protection projects |
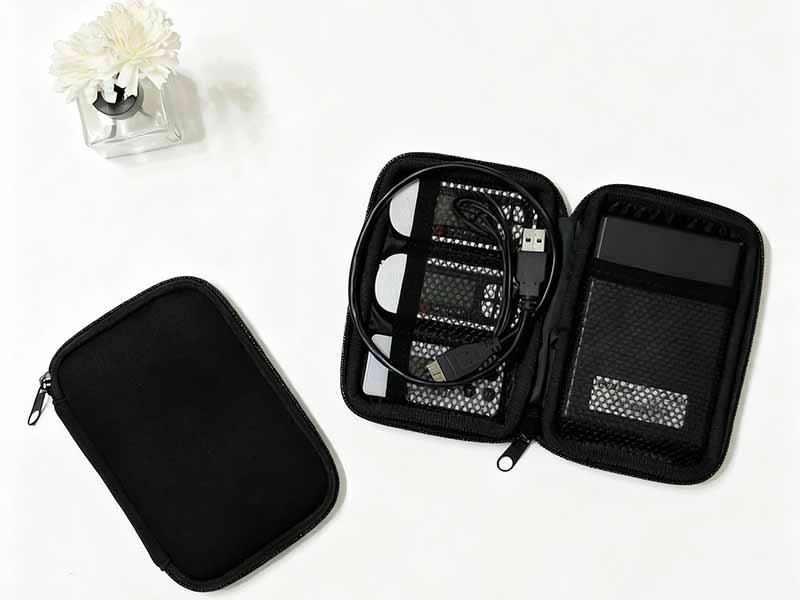
For clients, zipper testing is especially important when the case will carry phones, cards, earbuds, batteries, compact tools, or any item where even a small leak can create customer dissatisfaction. A zipper should never be treated as a small accessory choice. In water-related products, it is one of the main performance decisions.
How Does Neoprene Case Waterproof Testing Work?
Neoprene case waterproof testing works by exposing the finished product to controlled water conditions and observing where, how fast, and under what pressure water enters. The goal is not only to see if leakage happens, but to understand the exact failure point so the structure can be improved before mass production.
How Is Neoprene Case Waterproof Testing Set Up?
Testing starts with defining the real use scenario, not the test method. A case designed for gym use should not be tested like a marine product. If the scenario is wrong, the test result has little value.
In practical development, factories usually set up testing based on three levels:
- light exposure (daily use conditions)
- moderate exposure (outdoor or wet environments)
- high exposure (immersion or water-contact risk)
Each level requires a different setup.
A standard test setup includes:
- finished product (not just material sample)
- absorbent indicator inside (tissue, paper strip, or sensor)
- controlled water source (spray system or water tank)
- timing device
- visual or weight-based measurement
For more reliable results, multiple samples are tested instead of just one. This helps avoid misleading conclusions caused by small production variations.
Below is a simplified setup comparison:
| Test Level | Setup Type | Main Purpose |
|---|---|---|
| Light exposure | Spray system | Simulate rain or splashes |
| Medium exposure | Pressed wet surface / heavy spray | Simulate outdoor contact |
| High exposure | Water immersion tank | Simulate accidental drop or submersion |
One key point many clients overlook: testing must be done on fully assembled products, not flat neoprene sheets. The structure determines the result.
How Is Neoprene Case Waterproof Testing Measured?
Measurement is not only about “leak or no leak.” A more useful approach is to evaluate degree of penetration, location, and time to failure.
In real testing environments, measurement is often based on:
- visible moisture inside
- dampness level (light, moderate, heavy)
- leakage location (seam, zipper, edge)
- time until first penetration
- area affected
Some factories also use weight comparison:
- measure product weight before testing
- measure after exposure
- calculate water absorption
Example:
| Measurement Type | What It Shows |
|---|---|
| Visual inspection | Where water enters |
| Time to leak | Performance level |
| Weight gain | Amount of water penetration |
| Area mapping | Structural weak points |
For higher-end projects, testing may also include repeated cycles:
- open/close zipper 500–1000 times
- flex seams repeatedly
- then re-test waterproof performance
This is important because some structures perform well initially but fail after repeated use.
For clients, the most practical takeaway is this:
A case that stays dry for 10 minutes under controlled spray is very different from one that leaks after 30 seconds. These differences directly affect how the product should be marketed and priced.
How Is Neoprene Case Waterproof Testing Passed or Failed?
Pass or fail depends on the defined standard before testing begins. Without a clear standard, results are subjective and difficult to use for decision-making.
In real production, pass criteria are usually defined by:
- acceptable leakage level (none / minimal / visible)
- exposure duration (e.g., 5 min spray, 1 min immersion)
- specific failure zones (zipper, seam, full structure)
Example of practical pass criteria:
| Test Type | Pass Standard |
|---|---|
| Spray test | No visible moisture inside after 5–10 min |
| Light immersion | No leakage within 30–60 seconds |
| Seam test | No penetration along stitch line |
| Zipper test | No entry through zipper area |
However, not all products need the same standard. A laptop sleeve does not need to pass immersion testing. A water-sports pouch probably does.
Another important factor is consistency across samples. Passing one sample is not enough. If 2 out of 5 samples fail, the design is not stable.
In development, it is common to see these patterns:
- prototype passes, but production fails → process inconsistency
- spray test passes, immersion fails → structure limitation
- initial test passes, repeated-use test fails → durability issue
For clients, defining realistic pass standards early can prevent costly redesign later.
Which Factors Affect Neoprene Case Waterproof Testing?
Neoprene case waterproof testing results are influenced by material structure, seam construction, thickness, lamination, and closure design. Among these, seams and openings usually have the biggest impact on performance.
Does Material Affect Neoprene Case Waterproof Testing?
Material plays a role, but it is often not the main limiting factor.
Neoprene is a closed-cell foam, which naturally resists water penetration. However, most neoprene used in cases is laminated with fabric (polyester or nylon), and this changes how water behaves on the surface.
Key material factors include:
- neoprene density
- foam cell structure
- lamination quality
- fabric type (smooth vs textured)
Higher-density neoprene tends to resist compression better, which helps maintain structure under pressure. However, if the lamination is weak, water can still enter through surface layers.
From a practical standpoint:
- material affects baseline resistance
- construction determines final performance
Below is a simple comparison:
| Material Feature | Effect on Waterproof Testing |
|---|---|
| High-density neoprene | Better pressure resistance |
| Smooth laminated surface | Better water shedding |
| Low-quality lamination | Risk of delamination and leakage |
| Thin neoprene (<2mm) | Reduced structural stability |
For most projects, upgrading material alone will not solve waterproof problems if seams and zippers are not addressed.
Do Seams Affect Neoprene Case Waterproof Testing?
Seams are the most critical factor in waterproof performance.
Every stitched seam creates needle holes. These holes allow water to pass through, especially under pressure or prolonged exposure.
This is why seam design matters more than material thickness in many cases.
Common seam types and their impact:
| Seam Type | Waterproof Performance |
|---|---|
| Standard stitching | Low |
| Glued seam | Medium |
| Blind stitching | Medium to high |
| Glued + blind stitch | High |
| Seam tape sealing | Very high |
However, stronger seams often increase cost and production complexity.
Another key factor is seam position. A seam placed at the bottom of a case is more exposed to water pressure than one placed higher.
Practical improvements include:
- moving seams away from high-pressure zones
- reducing seam length
- combining glue and stitching
- adding seam sealing where needed
From a client perspective, seam design is one of the highest ROI improvements in waterproof performance.
Does Thickness Affect Neoprene Case Waterproof Testing?
Thickness affects structure, but not always waterproof performance in a direct way.
Many clients assume thicker neoprene means better waterproofing. In reality, thickness mainly affects:
- cushioning
- shape retention
- pressure resistance
Waterproof performance is more related to construction than thickness.
For example:
- a 3mm neoprene case with sealed seams can outperform
- a 5mm neoprene case with standard stitching
However, thickness still plays a supporting role:
| Thickness | Effect |
|---|---|
| 2mm | Lightweight, less structure |
| 3–4mm | Balanced performance |
| 5mm+ | Strong protection, bulkier |
Thicker material can help reduce deformation under pressure, which indirectly supports waterproof performance, especially in immersion conditions.
But excessive thickness can also create:
- bulky feel
- harder seam construction
- increased production cost
The best approach is not “thicker is better,” but “balanced thickness with strong construction.”
How to Improve Neoprene Case Waterproof Testing Results?
Improving neoprene case waterproof testing results is not about one single change. It requires coordinated adjustments in structure, materials, seams, and closure design. The goal is to reduce water entry points while keeping the product practical, cost-effective, and suitable for its intended use.
How to Design for Better Neoprene Case Waterproof Testing?
Good waterproof performance starts at the design stage, not at the testing stage. If the structure is wrong, no amount of testing will fix it.
The first step is to define the real use condition:
- daily splash protection
- outdoor rain exposure
- water-contact environment
- short immersion risk
Once this is clear, the structure can be designed accordingly.
Key design strategies include:
reduce unnecessary seams
every seam is a potential leak point
avoid placing seams at the bottom
bottom areas experience the highest water pressure
use overlapping or folded structures
this helps block direct water paths
design recessed openings
instead of exposed openings, use inward or covered entry points
allocate space for sealing materials
waterproof designs often need additional layers
A common mistake is designing a product based only on appearance. For example, a clean, symmetrical layout may look attractive but may place seams exactly where water pressure is highest.
Below is a comparison:
| Design Choice | Result |
|---|---|
| Fewer seams | Lower leakage risk |
| Bottom seam placement | High leakage risk |
| Covered zipper design | Better protection |
| Open edge design | Easy water entry |
In real projects, small structural changes can improve waterproof performance significantly without increasing cost dramatically.
Which Methods Improve Neoprene Case Waterproof Testing?
Once the design is defined, manufacturing methods determine whether the product can actually meet waterproof expectations.
The most effective improvement methods include:
glue bonding + stitching combination
reduces water entry through needle holes
blind stitching instead of standard stitching
avoids full penetration through material
seam sealing tape application
blocks water paths along seams
laminated neoprene with waterproof film
improves surface resistance
water-resistant or waterproof zippers
reduces leakage through opening
protective zipper flaps or covers
adds an extra barrier layer
Each method has a different cost and performance impact.
Here is a practical comparison:
| Method | Waterproof Improvement | Cost Impact | Best Use |
|---|---|---|---|
| Standard stitching | Low | Low | Basic products |
| Glue + stitch | Medium | Low to medium | Daily-use cases |
| Blind stitch | Medium to high | Medium | Higher-quality cases |
| Seam tape | High | Medium to high | Outdoor products |
| Waterproof zipper | High | High | Premium waterproof cases |
| Zipper flap cover | Medium to high | Low | Cost-efficient upgrade |
From a client perspective, the best approach is to combine 2–3 methods instead of relying on a single solution.
For example:
- glue + blind stitch + zipper flap → strong improvement without extreme cost
- seam tape + waterproof zipper → high-performance solution
The key is selecting the right combination based on product positioning and target price.
What Mistakes Fail Neoprene Case Waterproof Testing?
Many waterproof failures come from common, avoidable mistakes during design and production.
The most frequent problems include:
overestimating neoprene material performance
assuming the foam alone will block water
using standard zippers in waterproof claims
leading to immediate leakage
ignoring seam construction details
especially needle hole penetration
placing seams in high-pressure zones
such as the bottom or corners
skipping real-use testing
relying only on visual inspection
designing for appearance instead of function
leading to structural weaknesses
These mistakes often result in:
| Mistake | Real Outcome |
|---|---|
| Weak seam design | Leakage within minutes |
| Poor zipper choice | Immediate water entry |
| No sealing method | Failed immersion test |
| Overly complex structure | Multiple leak points |
| No testing standard | Inconsistent product quality |
Another common issue is mismatch between product claim and actual performance.
For example:
- labeling a splash-resistant case as waterproof
- testing only once instead of repeated cycles
- not testing after production changes
These issues do not always appear during sampling but become serious after mass production.
Work With Oneier to Develop Reliable Waterproof Neoprene Cases
If you are developing neoprene cases for your brand, product line, or wholesale business, waterproof performance should never be based on guesswork. It should be based on controlled design, tested structure, and reliable manufacturing.
At Oneier, we have over 18 years of experience in neoprene material development and product manufacturing. We understand that waterproof performance is not only about material—it is about how every part of the product works together.
What we provide:
- custom neoprene case design based on real use scenarios
- material selection and lamination optimization
- seam structure development and reinforcement solutions
- waterproof zipper and closure system recommendations
- prototype testing and performance evaluation
- low MOQ, fast sampling, and stable production quality
We work with both small businesses and high-end brands to create products that perform consistently in real conditions—not just in theory.
If you are planning a new neoprene case or want to improve an existing product, now is the right time to refine your waterproof construction.
Send us your product idea, target market, and performance requirements. Our team will help you develop a neoprene case that meets your expectations and stands up to real-world use.