A drink koozie looks simple—almost deceptively so. It’s just a sleeve around a can or bottle, right? Yet behind every well-performing koozie is a careful balance of material choice, insulation physics, fit accuracy, and construction method. That’s why some koozies keep your drink cold for hours while others feel flimsy, stretch out, or lose shape after a few uses.
In recent years, searches like “how to make a koozie from scratch” have surged as more people explore DIY projects, personalized gifts, small-batch promotions, or even startup product ideas. Whether you’re a hobbyist with a sewing machine, a brand testing a new promotional item, or a business owner comparing DIY versus factory production, understanding how koozies are actually made—from the ground up—matters more than ever.
A drink koozie is typically made from insulating materials like neoprene or foam that wrap snugly around cans or bottles to reduce heat transfer. To make a koozie from scratch, you measure the drink, create a simple pattern, cut insulating material, and assemble it by sewing or gluing the seam and base. Material thickness, fit precision, and construction method all directly affect insulation performance and durability.
At first glance, making a koozie seems like a quick craft. But as you go deeper, you’ll discover why professional manufacturers invest years in material R&D, pattern optimization, and quality control. In this guide, we’ll walk you through the DIY process step by step—then help you decide when it makes sense to scale up and work with a professional neoprene koozie factory like Oneier.
What Is a Drink Koozie
A drink koozie is an insulating sleeve designed to wrap around beverage containers such as cans, bottles, or cups. Its primary function is to slow heat transfer between the drink and the surrounding environment, helping cold drinks stay cold longer while reducing condensation on the exterior. Most drink koozies are made from insulating materials like neoprene or foam and are commonly used for personal, outdoor, promotional, and branded purposes.
What is a drink koozie and how does it actually work?
At a functional level, a drink koozie works by reducing heat exchange. When a cold beverage is exposed to warm air, heat naturally moves toward the colder object. A koozie introduces an insulating barrier—usually made from closed-cell materials like neoprene—that traps air and slows down this heat flow.
This insulation does three things simultaneously:
- Maintains beverage temperature longer
- Reduces exterior condensation
- Improves grip and comfort
Unlike rigid insulated containers, a koozie is lightweight, flexible, and portable, making it ideal for everyday and outdoor use.
Is a drink koozie only for cold drinks?
While drink koozies are most commonly associated with cold beverages such as beer or soda, they are not limited to cold drinks only. In practice:
- Cold drinks → Koozies slow warming and prevent sweating
- Chilled bottles → Koozies reduce hand warmth transfer
- Warm drinks (short term) → Koozies help retain heat briefly and protect hands
However, koozies are not designed to replace vacuum-insulated mugs for long-term heat retention. Their strength lies in short-to-medium duration temperature control combined with convenience.
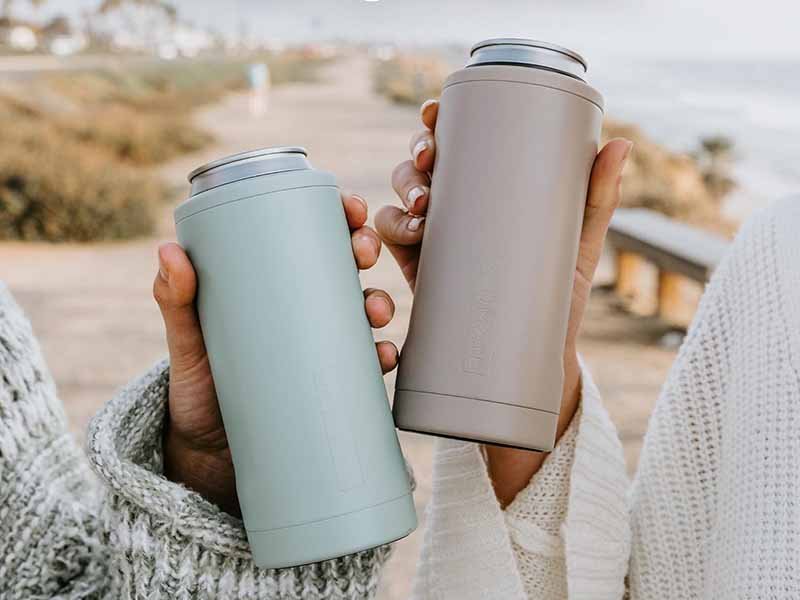
What types of drink containers can a koozie fit?
Modern drink koozies are produced in many formats to match different containers:
| Container Type | Common Koozie Style |
|---|---|
| Standard 12 oz cans | Straight sleeve koozie |
| Slim cans | Narrow-profile koozie |
| Glass bottles | Taller, tapered koozie |
| Sports bottles | Zippered or wrap koozie |
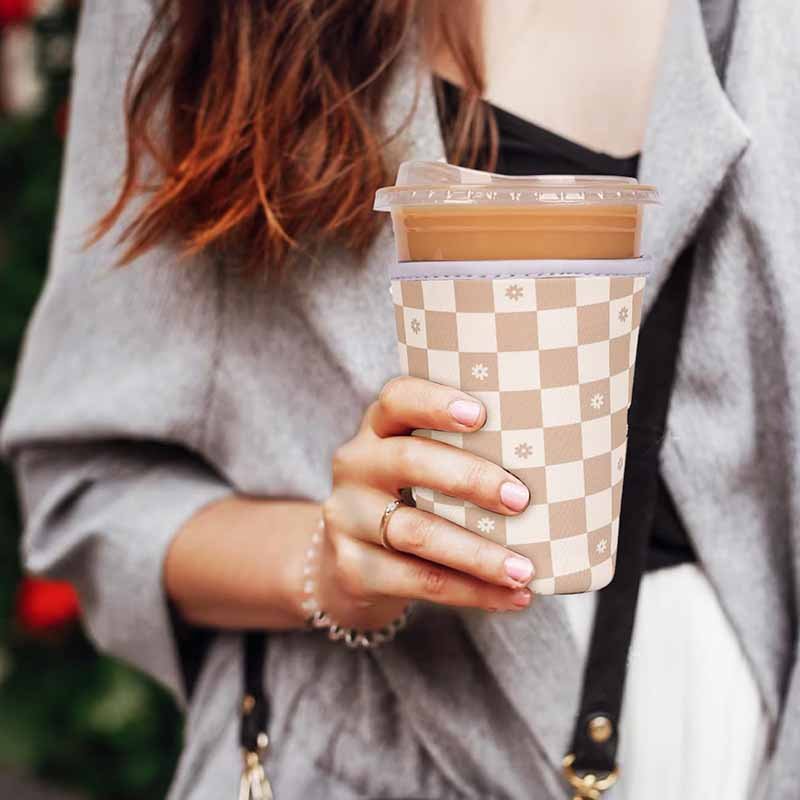
| Tumblers / cups | Adjustable wrap koozie |
This variety is why professional manufacturers maintain multiple pattern systems, rather than a one-size-fits-all design.
Why are neoprene drink koozies so popular?
Neoprene has become the most widely used material for drink koozies because it offers a rare balance of properties:
- Excellent thermal insulation
- Natural stretch and recovery
- High tear and abrasion resistance
- Water and moisture resistance
- Compatibility with printing, embossing, and lamination
Originally developed for wetsuits, neoprene performs exceptionally well in wet, outdoor, and repeated-use environments—making it ideal for drink koozies intended for real-world use rather than one-time events.
Are drink koozies mainly functional or promotional?
In reality, they are both.
From a user perspective, a drink koozie is a practical daily accessory. From a brand perspective, it is a high-exposure promotional product.
Drink koozies are widely used for:
- Brand promotions and giveaways
- Events, weddings, and festivals
- Outdoor activities (camping, fishing, boating)
- Sports and fitness scenarios
- Retail merchandise and private-label products
Because they are reusable and frequently visible, koozies often deliver higher brand recall than many other promotional items.
Which Materials Are Best for a Koozie
The best materials for a drink koozie are neoprene and closed-cell foam. Neoprene is the most popular choice because it offers superior insulation, flexibility, durability, and water resistance, making it ideal for repeated use and custom branding. Foam koozies are lighter and more affordable but provide less insulation and durability. Material thickness and structure directly affect performance and lifespan.
What materials are commonly used to make drink koozies?
Most drink koozies on the market are made from insulating, closed-cell materials designed to slow heat transfer. The most common options include:
| Material | Common Use | Key Characteristics |
|---|---|---|
| Neoprene | Premium, reusable koozies | Flexible, durable, excellent insulation |
| EVA / PE Foam | Promotional or disposable koozies | Lightweight, low cost, moderate insulation |
| Fabric-wrapped foam | Decorative or gift koozies | Better appearance, limited durability |
| Hybrid laminated materials | Custom / branded koozies | Balanced aesthetics & performance |
Among these, neoprene dominates professional and custom manufacturing, while foam remains popular for short-term promotional use.
Why is neoprene considered the best material for koozies?
Neoprene was originally developed for wetsuits, which explains why it performs so well in drink koozies. Its advantages include:
- Closed-cell structure that traps air and slows heat transfer
- Elasticity, allowing a snug fit across slight size variations
- Shape recovery, so it doesn’t deform permanently
- Water resistance, ideal for condensation and outdoor use
- Long service life, even after hundreds of uses
This combination makes neoprene especially suitable for:
- Reusable consumer products
- Outdoor and sports environments
- Private-label and branded merchandise
Is foam still a good option for making a koozie?
Foam koozies are not “bad”—they simply serve a different purpose.
Foam is best when:
- Cost must be kept extremely low
- The koozie is intended for single-event promotions
- Long-term durability is not critical
However, foam has limitations:
- Compresses permanently over time
- Loses insulation faster than neoprene
- Tears more easily at seams
- Limited branding durability
For DIY beginners, foam is easier to cut and glue, but for brands and repeat use, it often leads to customer dissatisfaction.
What thickness works best for a drink koozie?
Thickness is just as important as material type.
| Thickness | Best Application |
|---|---|
| 2–3 mm | Lightweight, collapsible koozies |
| 4–5 mm | Standard, all-purpose koozies |
| 6 mm+ | Premium insulation, outdoor or sports use |
Too thin → poor insulation Too thick → bulky, awkward grip
Professional manufacturers tightly control thickness tolerance (often within ±0.2 mm), ensuring consistent performance—something DIY production struggles to achieve.
Are laminated or fabric-backed materials better for customization?
Yes. Laminated neoprene or fabric-backed materials significantly improve:
- Logo clarity
- Color accuracy
- Surface durability
- Overall product appearance
These materials are ideal for:
- Screen printing
- Heat transfer
- UV printing
- Embossing or debossing
DIY makers often print directly on raw material, which can cause ink bleeding or fading. Professional factories pre-engineer surfaces specifically for branding.
How does material choice affect branding and user perception?
Material directly influences how users perceive quality.
- Neoprene koozie → “Reusable, premium, worth keeping”
- Foam koozie → “Freebie, short-term, disposable”
For brands, this difference matters. A koozie that stays in use for months or years delivers far more brand impressions than one discarded after a single event.
Which material should you choose: DIY vs professional production?
- DIY / learning / gifting → Foam or thin neoprene
- Small batch testing → Standard neoprene
- Retail, branding, or resale → Laminated neoprene with controlled thickness
Choosing the best koozie material is not just about insulation—it’s about durability, fit, branding, and user experience. Neoprene remains the gold standard for anyone serious about quality, while foam serves short-term needs. Understanding this difference helps you decide whether to make a koozie yourself—or work with an experienced manufacturer to do it right.
How to Make a Drink Koozie (Step-by-Step)
To make a drink koozie from scratch, you first measure the drink’s height and circumference, then create a simple pattern. Next, cut insulating material such as neoprene or foam, form the body into a cylinder, and secure the side seam by sewing or gluing. Finally, attach the base panel, reinforce stress points, and allow the koozie to cure or set before use. Accuracy and material choice determine performance.
How do you measure a drink correctly for a koozie?
Proper measurement is the single most important step. Even high-quality materials perform poorly if the fit is wrong.
You need three measurements:
- Height of the can or bottle (excluding the rim)
- Circumference at the widest point
- Base diameter
For neoprene, always account for stretch:
- Reduce circumference by 5–8 mm to ensure a snug fit For foam:
- Use the exact circumference (foam does not stretch)
A koozie that is too loose loses insulation efficiency; too tight causes deformation over time. Professional factories calculate stretch ratios and recovery rates, while DIY makers should test with scrap material first.
How do you create a koozie pattern from scratch?
A basic koozie pattern consists of:
- One body panel (rectangular or slightly tapered)
- One circular base panel
Pattern width = adjusted circumference Pattern height = drink height + seam allowance (usually 8–12 mm)
Most beginners use a rectangle, which works well for cans. Bottles benefit from a tapered pattern that narrows toward the base for better grip and stability.
In industrial production, patterns are engineered digitally to maintain consistency across thousands of units—DIY patterns rely heavily on careful manual marking.
How do you cut neoprene or foam cleanly and accurately?
Clean cutting affects both strength and appearance.
Best practices:
- Use a rotary cutter or sharp utility knife
- Cut on a flat, firm cutting mat
- Avoid stretching neoprene while cutting
- Make one continuous cut rather than multiple short cuts
Jagged edges weaken seams and create uneven insulation. Factories solve this with die-cutting or CNC cutting, which ensures millimeter-level accuracy—one of the biggest differences between DIY and OEM quality.
How do you assemble the koozie body step by step?
Correct assembly order matters:
- Join the vertical seam of the body panel
- Form the material into a cylinder
- Align edges carefully before bonding
Many beginners attach the base first, which makes alignment difficult. Professionals always create the cylinder first to ensure symmetry and even pressure distribution.
Use clips or temporary tape to hold alignment before sewing or gluing.
How do you sew or glue a drink koozie properly?
There are two primary methods:
| Method | Advantages | Limitations |
|---|---|---|
| Sewing | Strong seams, long lifespan | Requires machine & skill |
| Gluing | Simple, beginner-friendly | Lower durability |
For sewing:
- Use zigzag or blind stitching
- Polyester thread is recommended
- Avoid over-compressing neoprene
For gluing:
- Use neoprene-specific adhesive
- Apply thin, even layers
- Allow partial curing before joining
Professional koozies often combine adhesive bonding + reinforced stitching, which is difficult to replicate consistently at home.
How do you attach the base panel securely?
The base panel supports the drink’s weight, making it a critical stress point.
Steps:
- Align the circular base with the cylinder opening
- Attach gradually, not all at once
- Maintain even tension to avoid wrinkles
- Reinforce seam edges
A poorly attached base causes wobbling, uneven insulation, and early failure. Factories test base seams under load to ensure long-term durability.
Do you need special tools or machines to make a koozie?
For DIY, basic tools are enough:
- Scissors or rotary cutter
- Measuring tape
- Sewing machine or adhesive
However, limitations appear quickly:
- Stitch consistency varies
- Thickness tolerance is uncontrolled
- Scaling beyond 20–30 units is inefficient
This is why many creators use DIY only for learning and prototyping, then move to OEM manufacturing for real production.
How long does it take to make one koozie from scratch?
For beginners:
- 30–60 minutes per koozie
With experience:
- 15–25 minutes per koozie
By comparison, a professional factory produces hundreds per hour with consistent quality—an important factor when considering cost, labor, and scalability.
What Customization Options Are There
Drink koozies can be customized in shape, size, material thickness, color, surface finish, logo method, closures, and functional features. Common customization options include screen printing, heat transfer, embroidery, UV printing, embossing, debossing, zippers, Velcro, handles, and private-label packaging. The best customization approach depends on the intended use, budget, durability requirements, and branding goals.
What parts of a drink koozie can be customized?
A drink koozie may look simple, but almost every component can be customized. In professional manufacturing, customization typically includes:
- Overall shape (can, bottle, slim can, wrap-style)
- Dimensions & fit tolerance
- Material type & thickness
- Surface texture & finish
- Branding & logo placement
- Functional add-ons
- Packaging & labeling
Which logo and branding methods work best on koozies?
Branding is often the main reason koozies are customized. Different logo methods suit different needs:
| Logo Method | Best For | Durability |
|---|---|---|
| Screen printing | Simple logos, large areas | Medium |
| Heat transfer | Small batches, DIY | Medium |
| UV printing | Detailed, full-color logos | High |
| Embroidery | Premium, textured branding | Very high |
| Emboss / Deboss | Minimalist, luxury branding | Very high |
| Rubber / PVC patch | Outdoor & sports brands | Very high |
DIY projects are limited mainly to heat transfer or simple screen printing, while professional factories can combine multiple branding methods on a single koozie.
How do colors and surface finishes affect customization?
Color is not just aesthetic—it affects brand perception and print quality.
Customization options include:
- Solid Pantone-matched colors
- Two-tone or color-block designs
- Fabric-laminated neoprene
- Matte vs smooth finishes
- Anti-slip or textured surfaces
Factories control color consistency across batches, something DIY production cannot guarantee. For brands, this consistency is critical to maintaining a professional image.
Can you customize the structure and functionality of a koozie?
Yes, and this is where professional customization truly stands out.
Structural options include:
- Zippers (for bottles or collapsible koozies)
- Velcro closures (adjustable wrap koozies)
- Handles or straps
- Reinforced bases
- Extra insulation layers
Each feature affects cost, usability, and durability. Factories test these elements under real-use conditions, while DIY versions often prioritize appearance over longevity.
How does customization differ between DIY and professional production?
| Aspect | DIY Customization | Professional Customization |
|---|---|---|
| Logo methods | Limited | Full range |
| Color accuracy | Inconsistent | Pantone-controlled |
| Structural options | Very limited | Highly flexible |
| Durability | Variable | Tested & consistent |
| Scalability | Low | High |
This is often the point where creators move from DIY to OEM manufacturing.
What customization options matter most for different buyers?
- Promotional buyers → Low cost, bold logos
- Retail brands → Durability, finish, packaging
- Outdoor/sports brands → Reinforcement, grip, insulation
- E-commerce sellers → Differentiation & repeatability
Understanding your target user helps prioritize the right customization features rather than over-designing the product.
How does customization affect MOQ, cost, and lead time?
Customization directly impacts:
- MOQ (more complex designs usually require higher MOQ)
- Unit cost (materials, labor, tooling)
- Lead time (sampling + production)
Oneier supports low-MOQ customization, free design optimization, and fast sampling—helping buyers balance creativity with commercial feasibility.
How to Make Koozies for Different Uses

Drink koozies should be designed differently depending on their intended use. Standard can koozies prioritize simplicity and cost efficiency, bottle koozies require taller and tighter fits, outdoor and sports koozies need thicker insulation and reinforced seams, while promotional koozies focus on branding visibility and low cost. Matching material, thickness, structure, and features to the use case ensures better performance and user satisfaction.
How do you make koozies for standard cans (everyday use)?
Standard 12 oz can koozies are the most common and easiest to make, which is why they dominate both DIY projects and mass production.
Key design priorities include:
- Straight cylindrical shape
- Moderate thickness (4–5 mm neoprene)
- Simple stitched or glued side seam
- Flat circular base
These koozies are intended for casual use—home, parties, or social gatherings. DIY makers often start here because the pattern is forgiving. For brands, this format is ideal for large-volume production, promotional campaigns, and private-label resale due to its cost efficiency and broad appeal.
How do you make koozies for bottles instead of cans?
Bottle koozies require more precision than can koozies.
Design considerations include:
- Greater height to cover the bottle body
- Tighter circumference to prevent slipping
- Tapered pattern to follow bottle shape
- Optional neck grip or zipper
Because bottles vary widely in diameter, professional manufacturers maintain multiple size standards. DIY makers often struggle with loose fits, which reduces insulation efficiency and usability.
Bottle koozies are popular for beer brands, outdoor activities, and premium gifting, where appearance and fit matter more.
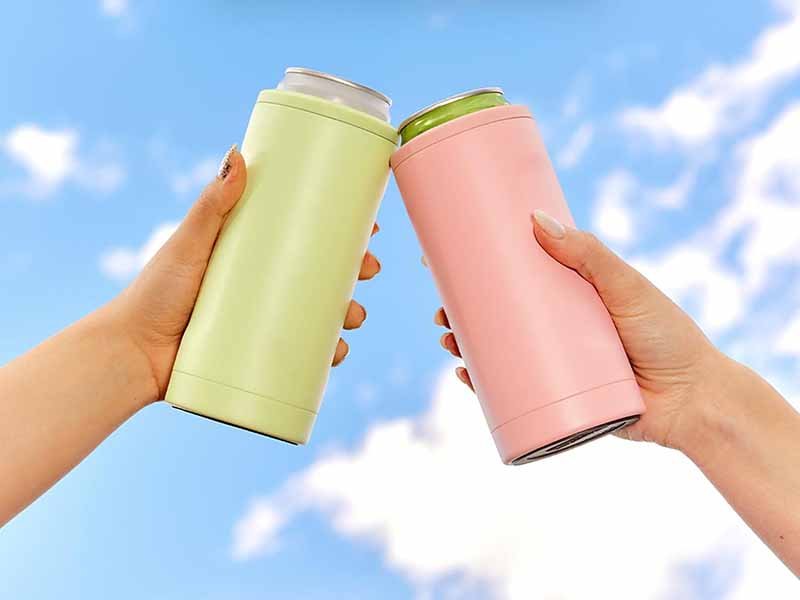
How do you make slim can koozies?
Slim cans (energy drinks, hard seltzers) look similar to standard cans but require entirely different proportions.
Key challenges:
- Smaller diameter
- Taller height
- Reduced tolerance for error
Even a 2–3 mm mistake can result in a loose or unstable koozie. This is why slim can koozies are a common transition point from DIY to OEM manufacturing, where precision cutting and pattern control are essential.
How do you make koozies for outdoor and sports use?
Outdoor and sports koozies prioritize performance and durability over cost.
Recommended features include:
- Thicker neoprene (5–6 mm)
- Reinforced seams
- Anti-slip or textured surfaces
- Optional handles or attachment loops
These koozies are designed for camping, fishing, boating, hiking, and sports events. They are often exposed to water, sun, and repeated handling, making material quality and seam strength critical.
Factories like Oneier test these designs for abrasion resistance, seam fatigue, and long-term insulation performance—areas DIY projects cannot easily evaluate.
How do you make koozies for promotional or event use?
Promotional koozies are designed with brand visibility and cost control in mind.
Typical characteristics:
- Foam or thinner neoprene
- Simple construction
- Large logo print areas
- Bright or high-contrast colors
Durability is less critical, as these koozies are often used for short-term events. However, brands should understand that lower-quality materials may result in the koozie being discarded quickly—reducing long-term brand exposure.
How do you make koozies for retail or resale?
Retail koozies must balance aesthetics, durability, and user experience.
Design priorities include:
- Laminated neoprene surfaces
- Clean stitching and finishing
- Consistent fit and color
- Brand-aligned packaging
Unlike giveaways, retail koozies are expected to withstand repeated use. This is where professional manufacturing clearly outperforms DIY, as consistency across hundreds or thousands of units is critical for customer satisfaction and brand trust.
How does use-case affect material choice and thickness?
| Use Case | Recommended Material | Thickness |
|---|---|---|
| Casual / home use | Neoprene | 4–5 mm |
| Bottle / premium | Neoprene | 5 mm |
| Slim cans | Neoprene | 4 mm |
| Outdoor / sports | Reinforced neoprene | 5–6 mm |
| Promotional events | Foam or thin neoprene | 2–3 mm |
| Retail / resale | Laminated neoprene | 4–5 mm |
This table highlights why note all koozies should be made the same way—even if they look similar at first glance.
Why is use-based design important when making koozies?
Designing a koozie without considering its use often leads to:
- Poor fit
- Reduced insulation
- Short product lifespan
- Disappointed users
Use-based design ensures that material, structure, and features align with real user behavior, which is exactly how professional manufacturers approach product development.
Do’s and Don’ts for DIY Koozie Makers

When making a drink koozie yourself, focus on accurate measurement, proper material thickness, clean cutting, and strong seam bonding. Avoid using materials that are too thin, household glue, or poorly aligned seams, as these reduce insulation and durability. DIY koozies are ideal for learning and small batches, but consistency, branding accuracy, and long-term performance often require professional manufacturing.
Do: Measure precisely and allow for material behavior
Accurate measurement is the foundation of a functional koozie. Always measure height, circumference, and base diameter, then adjust for material behavior.
Best practices:
- Reduce circumference slightly for neoprene to account for stretch
- Use exact measurements for foam, which does not stretch
- Test-fit with scrap material before final assembly
Many DIY failures come from skipping this step. Even a few millimeters of error can lead to loose fits, reduced insulation, or long-term deformation.
Do: Choose the right material thickness for your use case
Thickness directly affects insulation, comfort, and appearance.
Recommended guidelines:
- 4–5 mm neoprene for everyday use
- 5–6 mm neoprene for outdoor or sports use
- 2–3 mm foam only for short-term promotional use
Too thin = poor insulation Too thick = bulky grip and awkward handling
Professional manufacturers tightly control thickness tolerance—DIY makers should at least stay within a consistent range.
Do: Cut cleanly and consistently
Clean edges improve both durability and appearance.
Tips for better cutting:
- Use a sharp rotary cutter or utility blade
- Cut on a flat, firm surface
- Avoid stretching neoprene during cutting
- Make long, continuous cuts instead of short strokes
Jagged edges weaken seams and lead to early failure. This is one of the most common DIY mistakes.
Do: Reinforce stress points intentionally
The highest-stress areas of a koozie are:
- Vertical side seam
- Base attachment seam
- Any added features (zippers, handles, Velcro)
Reinforcement tips:
- Apply extra adhesive at seam ends
- Use zigzag or reinforced stitching if sewing
- Allow proper curing time before use
Factories routinely test these points under repeated stress; DIY makers should at least visually and manually check seam strength.
Don’t: Use household glue or improper adhesive
This is one of the biggest DIY mistakes.
Avoid:
- Hot glue
- Craft glue
- Super glue
These adhesives:
- Become brittle over time
- Fail under moisture and temperature changes
- Create stiff seams that crack
Instead, use neoprene-specific contact adhesive designed for flexible materials. Proper adhesive choice dramatically improves lifespan.
Don’t: Ignore seam alignment and symmetry
A koozie may still “work” with uneven seams, but:
- Insulation becomes inconsistent
- The base may wobble
- Visual quality drops sharply
Best practice:
- Always form the cylinder first
- Align seams carefully before bonding
- Secure temporarily with clips or tape
Factories rely on jigs and fixtures for alignment—DIY makers must compensate with patience and precision.
Don’t: Rush curing, drying, or setting time
Many DIY koozies fail not during assembly, but after first use.
Common issues caused by rushing:
- Seams separating
- Base detaching
- Adhesive softening
Allow:
- Partial curing before joining
- Full curing before use (often 12–24 hours)
Professional production schedules always include controlled curing time; DIY makers should do the same.
Don’t: Over-customize before validating the base design
Adding logos, zippers, or complex shapes before validating fit and insulation often leads to wasted effort.
Better approach:
- Perfect the basic koozie
- Test fit and performance
- Then add customization features
This mirrors professional product development workflows used by experienced manufacturers.
Don’t: Assume DIY quality scales easily
DIY koozies are excellent for:
- Learning
- Gifting
- Prototyping
They are not ideal for:
- Large quantities
- Commercial resale
- Brand-critical applications
As volume increases, inconsistencies multiply. This is usually when makers transition to OEM manufacturing for reliability and cost efficiency.
Why Choose Professional Custom Koozies from Oneier
Choosing professional custom koozies from Oneier ensures consistent quality, accurate fit, durable insulation, and reliable branding at scale. With over 18 years of experience in neoprene material R&D and manufacturing, Oneier provides low-MOQ customization, free design support, fast sampling, and OEM/ODM solutions for global buyers. Professional production eliminates common DIY limitations and delivers market-ready koozies that perform and last.
Why does DIY koozie making reach its limits quickly?
DIY koozies are excellent for learning, experimentation, and small personal projects. However, once you move beyond a handful of units, several limitations become clear:
- Inconsistent size and fit between pieces
- Unstable insulation performance
- Visible quality variation in seams and edges
- Limited logo and branding durability
- High labor time per unit
These issues don’t just affect appearance—they directly impact user experience and brand perception. This is why brands, event buyers, and e-commerce sellers eventually shift from DIY to professional manufacturing.
What makes Oneier different from general koozie suppliers?
Oneier is not a trading company or generic promotional supplier. We are a neoprene-focused manufacturing factory with over 18 years of hands-on experience in:
- Neoprene material formulation and lamination
- Thickness and density control
- Pattern engineering for stretch materials
- Product categories beyond koozies (bags, wetsuits, sports & medical supports)
This deep material expertise allows Oneier to design koozies that fit better, insulate more effectively, and last longer—not just look good on day one.
How does professional manufacturing improve fit and performance?
In professional production, every koozie is built on engineered patterns, not guesswork.
At Oneier:
- Patterns are optimized for stretch and recovery
- Thickness tolerance is tightly controlled
- Seams are reinforced and tested
- Base panels are aligned for stability
The result is a koozie that:
- Grips securely without deforming
- Maintains insulation over repeated use
- Feels consistent across every unit in the order
These are outcomes DIY methods cannot reliably deliver at scale.
Which customization options does Oneier support that DIY cannot?
Oneier enables full-spectrum customization, including:
- Laminated neoprene surfaces for high-quality printing
- UV printing, embossing, debossing, embroidery, rubber patches
- Custom shapes, sizes, and thickness combinations
- Zippers, Velcro closures, handles, and reinforced bases
- Private-label packaging and branding systems
Most importantly, these options are engineered for durability, not just visual impact.
Is Oneier suitable for small buyers and startups?
Yes. Oneier is specifically structured to serve:
- Small and mid-sized international buyers
- Startup brands testing new products
- Amazon and e-commerce sellers
- Promotional and event buyers
- High-end brands requiring strict quality control
We offer:
- Low MOQ customization
- Free design and engineering support
- Fast sampling
- Free samples
- Short, predictable lead times
This makes professional manufacturing accessible—even at early stages.
How does Oneier ensure quality and reliability?
Quality at Oneier is not a claim—it’s a process.
Our production includes:
- Material inspection and thickness verification
- Seam strength and adhesion checks
- Visual and functional inspection at multiple stages
- Final QC before shipment
This is why we confidently offer 100% quality assurance to our global clients.
When is the right time to switch from DIY to Oneier?
You should consider professional manufacturing when:
- You need more than 20–30 units
- Branding accuracy starts to matter
- Customers expect durability and repeat use
- You plan to sell or distribute koozies commercially
- Time and labor cost become a concern
At that point, professional production is not more expensive—it is more efficient and more reliable.
Who Typically Works with Oneier?
Oneier currently serves:
- Overseas small and mid-sized buyers
- Promotional product companies
- Sports, outdoor, and lifestyle brands
- Medical and functional product brands
- High-end private-label clients
All with custom, private label, or OEM/ODM koozie solutions.
Conclusion
Making a drink koozie from scratch is a great way to understand how insulation, fit, and construction work together. But when your goal shifts from learning to selling, from one piece to hundreds or thousands, the challenges change completely. This is the point where many creators, brand owners, and promotional buyers realize that professional manufacturing is not a shortcut—it’s a strategic upgrade. At Oneier, we help you move smoothly from an initial idea or DIY prototype to a production-ready custom drink koozie that meets real-world standards for durability, appearance, and consistency. If you’re ready to stop experimenting and start producing with confidence, Request your custom drink koozie quote from Oneier today. We’ll help you turn your idea into a product your customers actually want to keep—and use.