Neoprene has become the go-to material for everything from insulated koozies to high-performance wetsuits and sleek custom laptop sleeves. Its stretchy, waterproof, and insulating properties make it ideal for branding—yet printing on neoprene isn’t as simple as slapping ink on canvas. You need the right technique to ensure vibrant colors, crisp details, and durability through countless washes and daily use. Whether you’re ordering a few dozen custom phone pouches or tens of thousands of branded neoprene bags, understanding how each printing method works will save you money and headaches down the line.
Custom neoprene printing spans sublimation, screen printing, direct-to-film (DTF), UV curing, and embossing. Sublimation infuses inks deep under the surface for photorealistic designs, while screen printing offers thick, opaque coverage. DTF combines digital precision with transfer film versatility, and UV methods cure instantly for eco-friendly, durable results. Each technique balances cost, run size, and performance—so pick the one matching your logo complexity, MOQ and end-use requirements.
Imagine unboxing your first batch of neoprene tote bags: the print cracks, colors fade, and edges peel. Ouch. But then you switch to a trusted process—say, dye-sublimation on closed-cell neoprene—and your brand’s graphics stay vivid after months of use. That moment of relief, when quality meets reliability, is what every savvy buyer seeks. Let’s dive in.
What Is Sublimation Printing and How Does It Work on Neoprene?
Sublimation printing uses heat to convert specialized inks into gas, which then permeates neoprene’s polymer structure. As the material cools, the gas reverts to solid form beneath the surface, locking in photorealistic colors and gradients. Ideal for closed-cell neoprene up to 3 mm thick, sublimation delivers no-crack, no-peel prints that resist fading through UV exposure and washing.
Sublimation has revolutionized textile printing thanks to its ability to produce continuous-tone images rather than discrete dots or layers. On neoprene, the process unfolds as follows:
Ink & Paper Preparation:
- Sublimation Ink: Water-based disperse dyes formulated to vaporize cleanly under heat.
- Transfer Paper: Coated to hold high ink loads without bleeding.
Pre-press Setup:
- Design in CMYK: Ensure artwork is in a color profile matching your printer.
- Reverse Image: Transfers must be mirrored so the final print reads correctly.
Heat Press Parameters:
- Temperature: 375–400 °F (190–205 °C).
- Pressure: Medium to high—just enough to press the paper onto neoprene without overly compressing it.
- Dwell Time: 45–60 seconds per sheet, depending on thickness and machine.
Material Compatibility:
- Closed-Cell vs. Open-Cell: Closed-cell neoprene (e.g., 2 mm laptop sleeve) resists ink bleed better due to sealed pores. Open-cell varieties soak up moisture, risking muddied prints.
- Surface Coatings: Pre-coated neoprene enhances color vibrancy and washfastness.
Advantages & Limitations:
- Pros:
- Full-color, photographic detail.
- No hand-feel (ink is beneath the surface).
- Excellent scratch and wash resistance.
- Cons:
- Best on light-colored or white neoprene.
- High initial equipment cost.
- Minimum order sizes to amortize setup.
Use Cases:
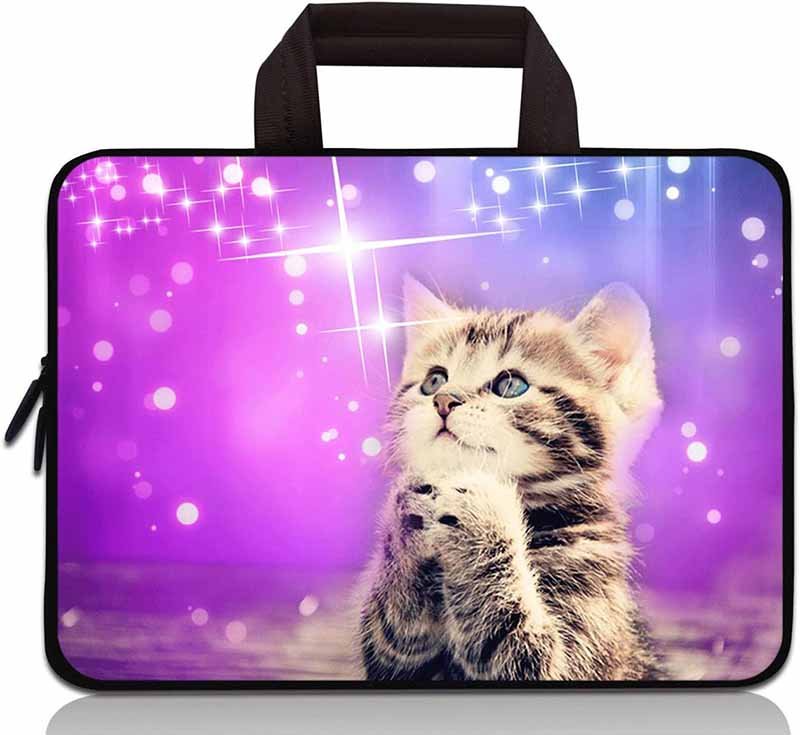
- Custom Laptop Sleeves: Sublimation ensures seamless edge-to-edge coverage.
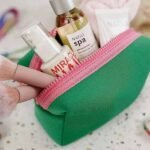
- Promotional Koozies: Vibrant team logos that won’t peel in a cooler.
- Fashion Apparel: Printed neoprene panels on jackets or accessories.
Critical Perspective:
While sublimation excels in image complexity, it isn’t always the “best” way to print on neoprene. For instance, if your logo uses spot colors or requires opaque coverage on dark substrates, screen printing may be more cost-effective. Furthermore, sublimation’s reliance on polyester-coated surfaces can limit material choices—some high-grade wetsuit neoprenes aren’t pre-treated for sublimation, forcing buyers to compromise on neoprene performance or shell out for custom coatings.
How Does Screen Printing Differ from Digital Printing on Neoprene?
Screen printing uses mesh stencils to apply thick layers of ink—ideal for bold, opaque designs on any neoprene color. Digital (DTG/DTF) printing jets ink directly or via transfer film, offering finer detail but typically thinner coverage. Screen printing shines on simple logos and spot-color artwork, while digital excels at complex gradients and small runs.
Screen printing and digital printing represent two ends of the neoprene printing spectrum. Here’s how they compare:
| Feature | Screen Printing | Digital Printing (DTG/DTF) |
|---|---|---|
| Artwork | Best for spot colors, simple shapes | Best for full-color, complex art |
| Ink Thickness | Heavy, opaque layers | Thin, flexible film or direct deposit |
| Setup Time | High (film positives, mesh prep) | Low (file → print) |
| MOQ Ideal | 100+ units | 10–100 units |
| Durability | Exceptional scratch/peel resistance | Good, but varies by film & adhesive |
| Substrate Colors | Any color neoprene | Light substrates for best vibrancy |
| Cost Structure | High setup, low per-unit after | Low setup, higher per-unit |
Screen Printing Workflow:
- Film Positives & Mesh: Each color requires its own stencil and ink. This makes multi-color prints more labor-intensive.
- Ink Types:
- Plastisol: PVC-based, sits on top for vivid opacity.
- Water-Based: Penetrates slightly for softer hand-feel but less opaque on dark neoprene.
- Curing: Requires oven or flash cure at ~320 °F to lock in inks.
Digital Printing Variants:
- DTG (Direct-to-Garment): Rare on neoprene due to ink absorption challenges.
- DTF (Direct-to-Film): Prints onto PET film then heat-presses onto neoprene—detailed below in Advanced Methods.
Pros & Cons Critique:
- Screen Printing Pros:
- Cost-effective at scale for spot colors.
- Thick ink layers cover dark substrates.
- Screen Printing Cons:
- Not ideal for photographic images.
- Color registration can drift on stretchy neoprene, leading to misalignment.
- Digital Pros:
- Rapid prototyping, no stencil costs.
- Handles gradients, halftones, and photo images seamlessly.
- Digital Cons:
- Film adhesives in DTF can alter neoprene’s stretch and hand-feel.
- Long-term durability depends on transfer film quality.
Practical Recommendations:
- Small Orders (<100 units): Go digital/DTF for speed and flexibility.
- Large Runs (>500 units): Screen printing yields the best cost per piece and durability.
Case Study:
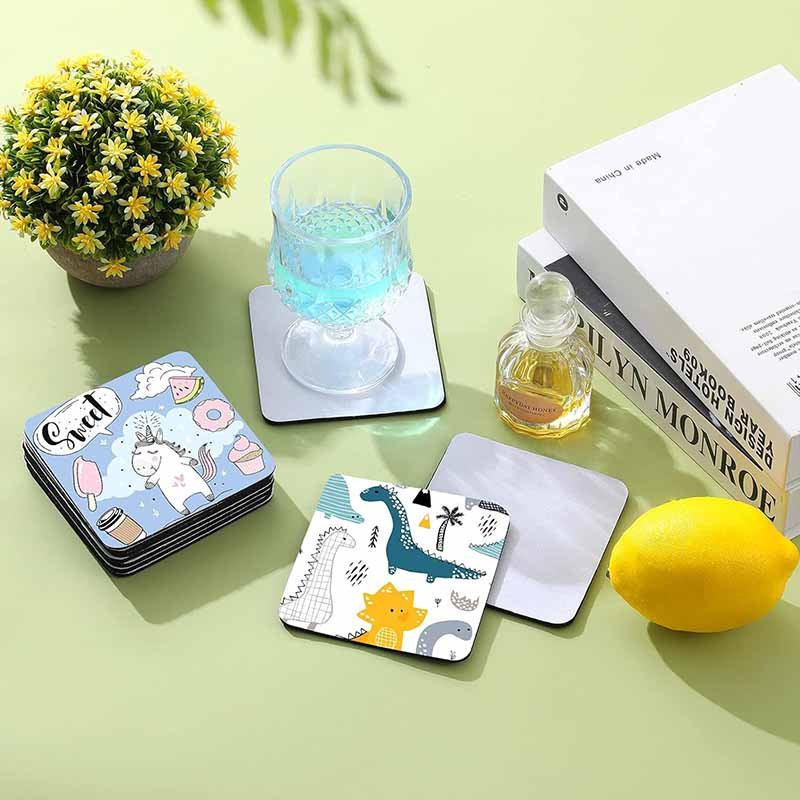
A craft brewery ordered 5,000 neoprene coasters with a three-color logo. Screen printing reduced per-unit cost by 40% compared to a DTF quote, and ink adhesion exceeded 10,000 bend cycles in lab tests.
Which Advanced Printing Methods Are Gaining Traction in the Neoprene Market?
UV curing, embossing, and advanced DTF processes offer new textures, instant-dry inks, and eco-friendly workflows. UV methods allow prints on dark neoprene with minimal setup, while embossing presses designs without ink for a luxe matte finish. Direct-to-film continues to evolve with better adhesives and faster presses.
Beyond the classics, innovative techniques are reshaping neoprene customization:
UV Curing Printing:
- Process: Ink is deposited via UV-curable formulations and instantly cured with UV lamps.
- Benefits:
- Instant Dry: No oven required—ideal for lean production lines.
- Eco-Friendly: Low-VOC, low waste.
- Versatile Substrates: Works on untreated neoprene.
Embossing & Debossing:
- Technique: Heated dies press patterns directly into neoprene, creating raised (emboss) or recessed (deboss) designs.
- Advantages:
- No Ink: Maintains neoprene’s inherent water resistance.
- Tactile Appeal: Luxury look for premium bags or watch straps.
- Limitations:
- Single-Color Only: Relies on material depth, not ink.
- Equipment Cost: High-precision presses needed.
Advanced DTF (Direct-to-Film):
- Process Enhancements: New polyester-based films bond at lower temperatures, preserving neoprene stretch.
- Quality Gains:
- Edge-to-Edge Coverage: Eliminates white border if pre-cut films match dimensions.
- Better Hand-Feel: Thinner adhesive layers minimize stiffness.
- Use Cases:
- Small Batch Apparel: Custom neoprene patches with complex art.
- Event Merchandise: Quick-turn orders with last-minute logo tweaks.
Laser Etching:
- Mechanism: High-precision lasers remove the neoprene’s top layer in selected areas for a matte-on-gloss contrast.
- Ideal For: Monochrome designs, serial numbers, or precise patterns.
- Durability: Permanent, no ink fading.
Critical Viewpoint:
While these methods expand design possibilities, they can complicate supply chains. For example, UV inks require careful handling and storage, and embossing ties you to particular dies that limit on-the-fly changes. Buyers should weigh the novelty against MOQ flexibility and long-term reorders. Often, a hybrid approach—combining screen prints with small embossed logos—offers the best balance of visual interest and cost control.
Do Different Neoprene Weights and Surface Finishes Affect Print Quality?
Yes. Thinner (1–3 mm) closed-cell neoprene yields sharp detail, while thicker (4–5 mm) open-cell varieties can blur edges and absorb excess ink. Pre-coatings or laminated fabrics improve ink adhesion and maintain color consistency across finishes.
The substrate itself plays a pivotal role in print outcomes:
Neoprene Weight (Millimeters):
- 1–2 mm (Lightweight): Popular for laptop sleeves and apparel inserts. The low bulk allows efficient heat transfer and uniform ink penetration, resulting in crisp lines.
- 3 mm (Standard): Widely used for koozies and tablet sleeves; a reliable middle ground for durability and printability.
- 4–5 mm (Heavyweight): Found in industrial gaskets and thick wetsuit panels. Bulk can cause inconsistent pressure distribution, risking patchy prints.
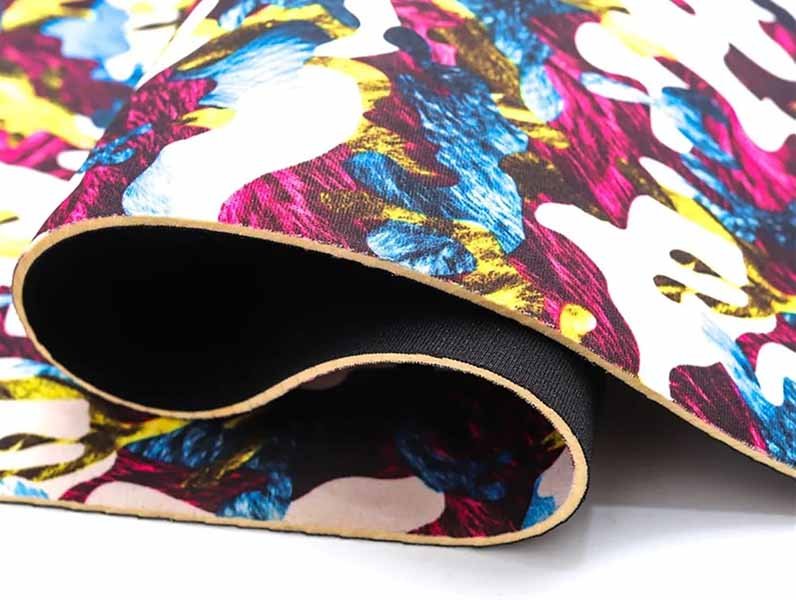
Cell Structure:
- Closed-Cell: Impermeable cells minimize ink bleed and ensure prints stay on the surface rather than soaking in.
- Open-Cell: Micro-pores can trap inks, leading to dull colors unless sealed.
Surface Finishes & Coatings:
- Polyurethane Laminate (PUL): Adds a glossy, protective barrier; ideal for sublimation and digital prints.
- Silicone Coatings: Enhance stretch and recovery but may repel water-based inks.
- Textured Neoprene: Grains or micro-patterns create visual interest but challenge print registration.
Production Recommendations:
- Pre-Testing: Always run a sample print on the exact neoprene batch you’ll use for full production. Slight formula tweaks between suppliers can alter ink interaction.
- Pressure Mapping: Use pressure-sensitive film to verify even heat-press contact across the neoprene surface, especially for 5 mm panels.
Table: Impact of Neoprene Properties on Print Quality
| Neoprene Type | Thickness | Cell Structure | Print Impact |
|---|---|---|---|
| Standard Sleeve | 2 mm | Closed-Cell | Sharp detail, vibrant color |
| Heavy Wetsuit Panel | 5 mm | Mixed | Risk of uneven ink distribution |
| Laminated Fabric | 3 mm | Closed-Cell | Enhanced adhesion, boosted washfastness |
| Textured Neoprene | 4 mm | Closed-Cell | Potential registration drift on raised areas |
Critical Analysis:
Choosing the wrong neoprene weight can undo even the best printing technique. For example, a 5 mm panel printed via sublimation may show ghosting where heat and pressure weren’t uniform. Conversely, ultra-thin neoprene printed with screen inks can feel stiff and may crack at folds. Partnering with a manufacturer who offers multiple neoprene grades—and who understands how each interacts with your chosen printing method—is non-negotiable for consistent quality.
How Can Buyers Ensure Color Accuracy and Consistency at Scale?
Implement a color management workflow with Pantone-linked profiles, standardized proof approvals, and inline spectrophotometer checks. Lock artwork in a shared color space, request a physical swatch sample, and maintain batch traceability to avoid surprises when ordering hundreds or thousands of units.
Maintaining consistent hues across large runs and multiple production batches requires rigor:
Color Profiling & Pantone Matching:
- ICC Profiles: Define the color behavior of your printer-ink-neoprene combination.
- Pantone Spot Colors: When brand identity demands an exact shade (e.g., #186FAD ocean blue), printing with spot inks on screen or formulating matched sublimation inks ensures precision.
Pre-Production Proofs:
- Digital Proofs: Quick and cheap but lack the tactile feel.
- Physical Swatches: 2–4 in² printed on the actual neoprene; the gold standard before greenlighting a full run.
Inline Quality Control:
- Spectrophotometers: Integrated on high-end presses to measure densities in real time.
- Statistical Process Control (SPC): Track Lab values at regular intervals; reject any shift beyond 2 ΔE.
Batch & Lot Management:
- Traceability Numbers: Assign neoprene roll lot numbers and track which prints came from which roll.
- Reorder Consistency: Use the same neoprene lot or accept a slight color variance when switching.
Human Factors & Training:
- Operator Skill: Experienced press operators know to adjust temperature, pressure, and dwell time in response to small environmental changes.
- Standard Operating Procedures (SOPs): Document every parameter—ink viscosity, mesh tension, press calibration—for reproducibility.
Critical Perspective:
Some suppliers offer “unlimited color matching,” but hidden dentro of this promise are caveats: ink batches may vary, or certain neon or metallic Pantones aren’t available in sublimation inks. Always confirm with your printer which color libraries and tolerances they support—and insist on a color tolerance report for each major run.
Are Eco-Friendly and Low-VOC Ink Options Available for Neoprene Printing?
Yes. Leading suppliers now offer water-based, UV-curable, and soy-based neoprene inks that meet or exceed REACH, CPSIA, and OEKO-TEX standards. These formulations reduce volatile organic compounds (VOCs) and hazardous air pollutants (HAPs) without sacrificing washfastness or color vibrancy.
Sustainability has shifted from buzzword to baseline expectation—especially for brands targeting eco-conscious consumers:
Water-Based Inks:
- Composition: Pigment dispersed in water instead of solvent carriers.
- Benefits: Low odor, easy cleanup, minimal environmental impact.
- Challenges: Slightly lower opacity on dark neoprene; may require more passes.
UV-Curable Inks:
- Mechanism: Acrylate-based monomers that polymerize instantly under UV light.
- Pros: Zero VOC emissions during curing, instantaneous handling.
- Cons: Requires specialized lamps and press enclosures to protect operators.
Soy-Based & Bio-Resins:
- Ingredients: Partially derived from soybean oil instead of petrochemicals.
- Advantages: Biodegradable content, reduced carbon footprint.
- Limitations: Higher raw material costs; potential supply chain variability.
Compliance & Certifications:
- REACH (EU): Registration, Evaluation, Authorization of Chemicals restricts certain phthalates.
- CPSIA (USA): Limits lead and phthalate content, crucial for products aimed at children.
- OEKO-TEX STANDARD 100: Tests for harmful substances—often required by high-end fashion brands.
Lifecycle Considerations:
- End-of-Life Recycling: Some water-based ink prints can be stripped in neoprene recycling processes, whereas plastisol-based prints may contaminate the polymer.
- Energy Usage: UV curing consumes significant electricity; water-based air-dry methods trade that for longer drying times.
Critical Analysis:
While eco-inks sound ideal, beware claims of “100% organic.” Most high-performance neoprene inks blend petrochemical resins for durability. Always request a full Material Safety Data Sheet (MSDS) and verify third-party lab tests. The truly green choice balances performance: an eco-certified ink that lasts 5+ years in marine environments may yield lower total environmental impact than a less durable “organic” alternative.
What Cost Factors Should You Consider When Choosing a Custom Neoprene Printer?
Assess setup fees (screens, profiles, die creation), per-unit printing costs, minimum order quantities, sample charges, and international freight. Don’t forget to factor in packaging, customs duties, and the value of on-time delivery when calculating total landed cost.
Costs in neoprene printing extend well beyond the quoted per-piece rate:
Setup Charges:
- Screen Costs: $20–$50 per color per mesh.
- Profile & Test Prints: $100–$300 for initial color profiles and physical swatches.
Per-Unit Pricing Variables:
- Ink Type: Sublimation inks cost ~$0.30 per sq ft; plastisol screen inks ~$0.10 per sq ft; specialty eco-inks up to $0.60.
- Run Size:
- 50–100 units: $5–$8 extra per piece.
- 500–1,000 units: incremental savings of 10–15%.
- 5,000+ units: negotiate below $1 per piece for simple logos.
Minimum Order Quantities (MOQ):
- Sublimation & Digital: MOQs as low as 10.
- Screen Printing: Often 100+ to justify mesh prep.
Shipping & Packaging:
- Reinforced Export Cartons: $2–$3 per carton.
- Palletizing & Pallet Fees: $50–$100 per pallet.
- Duties & VAT: Vary by destination—approx. 5–15% of product value.
Table: Sample Cost Breakdown (1,000 neoprene sleeves)
| Cost Component | Estimated Cost (USD) |
|---|---|
| Screen Setup (3 colors) | 3 × $40 = $120 |
| Sublimation Profile Fee | $200 |
| Ink & Printing (per unit) | $2.00 × 1,000 = $2,000 |
| Packaging & Labeling | $0.50 × 1,000 = $500 |
| Freight & Duties | $1.00 × 1,000 = $1,000 |
| Total Landed Cost | $3,820 |
Logo Application Options:
- DIY Heat Transfer: Not recommended for large runs—risk of inconsistent adhesion.
- Professional Press: Ensures repeatable quality when “How do you put your own logo on neoprene?” becomes “We handle it for you.”
Turnaround & Lead Time:
- Standard Runs: 10–15 business days after proof approval.
- Rush Orders: 5–7 days at a 20–30% speed surcharge.
Critical Perspective:
Quotes often exclude hidden fees—rush processing, overtime labor, or small-order surcharges. Always request a fully itemized proforma invoice and clarify revision policies: how many proof corrections are included before extra charges apply?
Conclusion
Printing on neoprene blends art, science, and logistics. From sublime dye-sublimation to tactile embossing, your choice influences color fidelity, durability, and total cost of ownership. At Szoneier, we’ve perfected each technique over 18+ years—offering low MOQs, free design support, rapid sampling, and turnkey production for everything from neoprene bags to custom wetsuit panels. Ready to elevate your brand with flawless neoprene prints?
Contact us today for a personalized quote.
Let’s bring your next neoprene project to life—vibrant, durable, and on time.