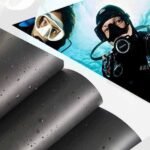
Custom neoprene stubby holders are more than drink insulators—they’re mobile billboards. In a world where every promotional item competes for attention, stubby holders stand out for their tactile appeal and everyday utility. Imagine your brand’s logo keeping someone’s beverage cold on a hot day, with vibrant colors that endure hundreds of washes. That’s the marketing power of well-printed neoprene gear.
To print on neoprene stubby holders, choose a compatible method like sublimation or screen printing, prepare high-resolution CMYK or Pantone artwork with proper bleed, ensure surface pretreatment for ink adhesion, and run through strict QC for colorfastness. Partner with an OEM/ODM factory offering low MOQs, fast sampling, and 100% quality assurance to streamline your branding process.
But how does this work step by step—and which choices give you the best ROI? Let’s walk through definitions, workflows, quality checks, cost analyses, and even eco-friendly alternatives to help you make informed decisions. You’ll hear a quick tale of a craft brewer who turned 1,000 stubby holders into 10,000 new customers by leveraging a simple yet stunning full-wrap design. Ready? Let’s dive in.
What Are Stubby Holders and Why Should You Brand Them?
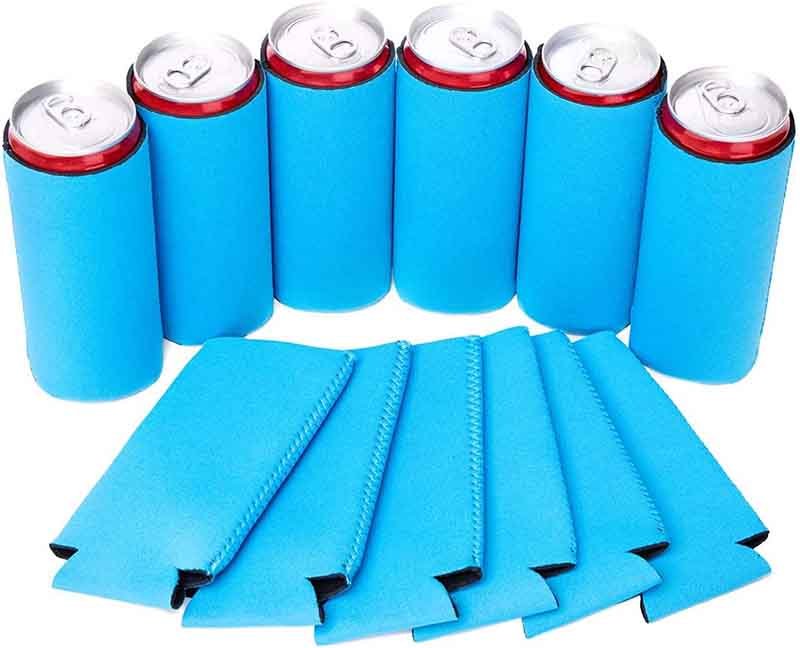
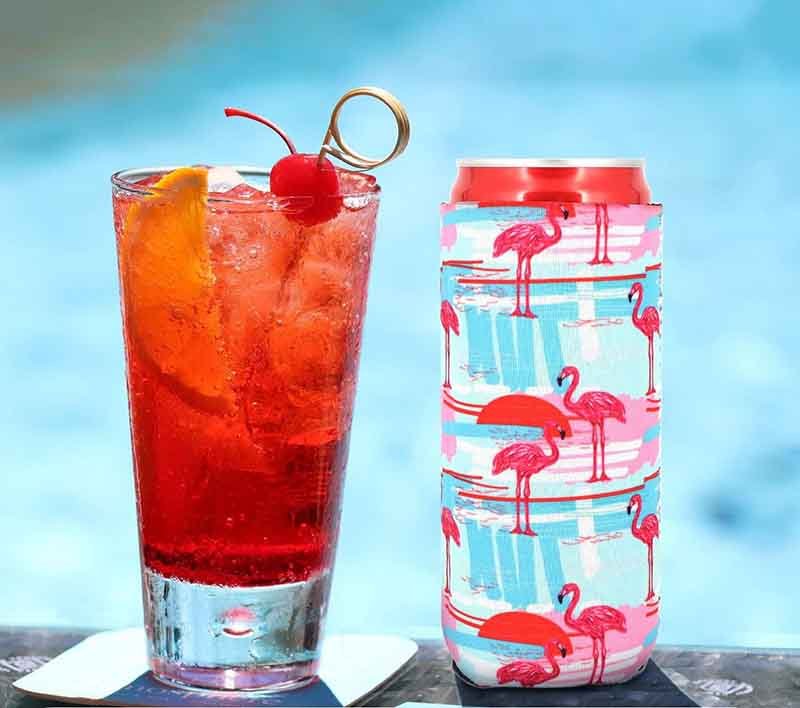
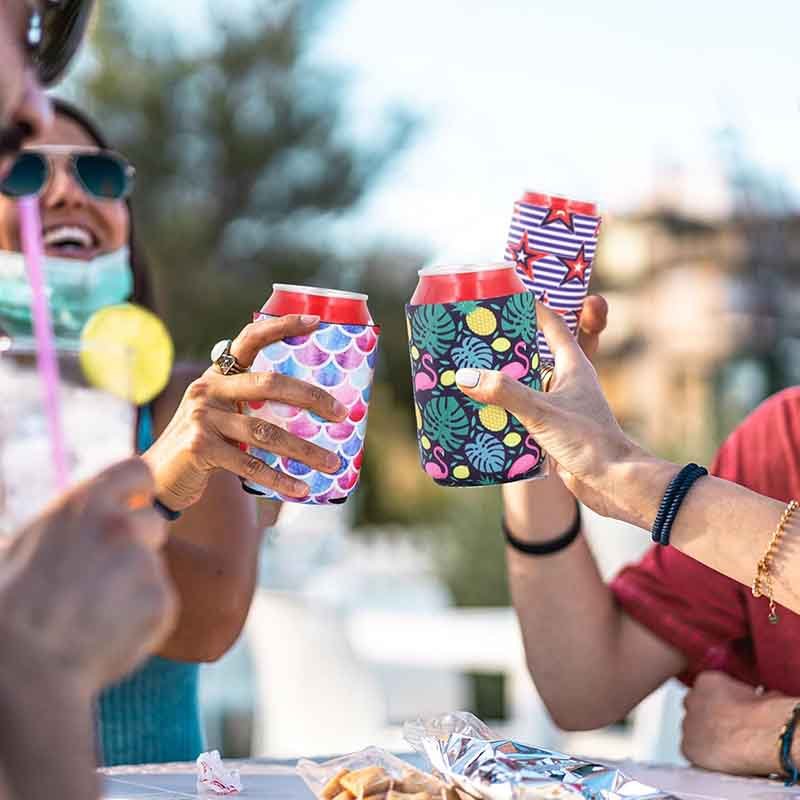
Stubby holders—also called coozies—are neoprene or foam sleeves that insulate cans and bottles. Branding them boosts visibility at events, extends customer reach, and offers a cost-effective giveaway. Their frequent use in outdoor and hospitality settings makes them ideal for reinforcing brand recall with minimal investment.
Stubby holders originated in Australia as “stubby coolers” to keep short beer bottles—or “stubbies”—cold. Today, they’ve evolved into a global promotional staple, crafted from neoprene for superior insulation and elasticity. From trade shows to tailgates, stubby holders keep drinks at optimal temperature while showcasing your logo front and center.
Marketing Impact: Business buyers love them because each holder can be reused dozens of times, multiplying impressions. A study by Promo Insider found that branded drinkware yields an average of 2,000 impressions per item over its lifetime. Compared to single-use flyers, that’s a huge boost in cost efficiency.
Use Cases:
- Hospitality & Events: Hotels, bars, and event planners use custom holders to reinforce brand identity.
- Corporate Gifts: Holiday or conference giveaways that live on desks and in refrigerators.
- Retail & E-commerce Bundles: Upsell accessories alongside bottles or gift sets.
Critical Perspective: While stubby holders offer low per-unit costs—often under $1.50 at scale—poor print quality can backfire. Blurry logos or faded inks signal cheapness, undermining your brand. Therefore, investing in the right printing process and quality control is essential.
ROI Calculation: If your cost per holder is $1.20 and you distribute 5,000, that’s $6,000. With 2,000 impressions each, you gain 10 million brand exposures—just $0.0006 per impression. Contrast that with digital ads, which can cost $0.01–$0.05 per impression. Stubby holders deliver exceptional value when executed properly.
Which Printing Methods Work Best on Neoprene Stubby Holders?
The most common printing methods for neoprene stubby holders are sublimation (heat transfer), screen printing, and UV digital printing. Sublimation yields full-color, edge-to-edge designs; screen printing offers durability for simple spot colors; and UV printing bridges the gap with photographic detail and fast turnaround.
Choosing the right printing method is pivotal for aesthetics, durability, and cost. Here’s a closer look:
Sublimation (Heat Transfer):
- How it works: Dye inks are heat-pressed into the neoprene fibers, creating a permanent, full-color image.
- Pros: Unlimited colors, gradient fades, edge-to-edge coverage, no hand-feel.
- Cons: Requires polyester coating; upfront artwork setup and equipment costs.
Screen Printing:
- How it works: Ink is forced through stencils (screens) onto the holder’s surface.
- Pros: Low cost for simple, bold designs; excellent opacity on dark neoprene; proven durability.
- Cons: Limited color count per run (usually ≤6); not ideal for photographic detail.
UV Digital Printing:
- How it works: UV-curable inks are jetted directly onto neoprene then instant-cured under UV lamps.
- Pros: Photographic quality, no pretreatment needed, fast proofs.
- Cons: Ink thickness can be felt; colors may fade faster outdoors.
Comparison Table:
| Method | Color Range | Durability | Setup Cost | Best for |
|---|---|---|---|---|
| Sublimation | Unlimited | Very High | High | Full-wrap, photo designs |
| Screen Print | Spot Colors (≤6) | Extremely High | Moderate | Logos, simple artwork |
| UV Printing | Medium | High (indoor) | Moderate | Fast small runs |
How Do You Prepare Your Artwork for High-Quality Prints?
Prepare artwork in vector formats (AI, EPS, or high-res PDF) at 300 DPI, using CMYK color mode or Pantone spot colors. Include 3–5 mm bleed and set safe margins. Convert fonts to outlines and embed all linked images to ensure crisp, accurate printing.
Proper artwork prep prevents delays, extra costs, and poor print outcomes. Let’s break down the essentials:
File Formats and Resolution:
- Vector Files (AI/EPS/PDF): Ideal for logos and text—scalable without pixelation.
- Raster Images (PSD/TIFF/PNG): Must be at least 300 DPI at actual print size. Lower resolution leads to grainy prints.
Color Mode:
- CMYK vs. RGB: Printers operate in CMYK; convert RGB files to avoid color shifts.
- Pantone Spot Colors: Use for exact brand color matching, especially in screen printing. Request a Pantone guide sample print.
Bleed and Safe Margins:
- Bleed Area (3–5 mm): Extends artwork beyond the cut line so background colors/images reach the edge.
- Safe Zone (5 mm inside cut line): Keep critical text/logos inside to prevent accidental trimming.
Font and Link Handling:
- Convert to Outlines/Curves: Ensures text renders correctly on any system.
- Embed or Package Linked Images: Avoid missing files that halt production.
Proofing and Color Matching:
- Soft Proofs: View on screen with color-corrected monitors, but always request a hard-copy proof (paper or sample stubby).
- Delta E Value: For critical brand colors, request a Delta E ≤2 to guarantee visible match accuracy.
Allocating time—often 10–15% of project lead time—for proof revisions pays dividends in on-time, error-free deliveries.
Do Stubby Holders Require Special Pre-Treatment or Coating?
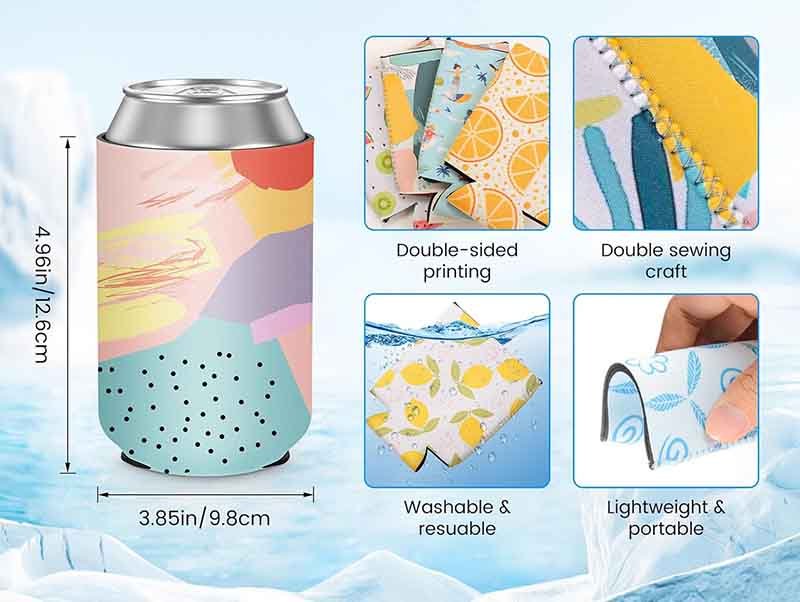
Neoprene surfaces often receive a light primer or silicone coating to improve ink adhesion. Pretreatment steps include cleaning with isopropyl alcohol, applying a thin adhesion promoter spray, and curing before printing. This ensures prints won’t peel during stretch or washing.
Neoprene’s closed-cell structure repels liquids—which is great for insulation but challenging for ink adhesion. Pre-treatment bridges that gap:
Surface Cleaning:
- Isopropyl Alcohol Wipe: Removes oils, residues, and dust.
- Drying Time: 5–10 minutes; moisture can cause adhesion failures.
Adhesion Promoter:
- Silane or Silicone Primer: Applied via fine-mist spray. Creates microscopic anchoring points for inks.
- Curing: Air-dry for 30 minutes or bake at 60 °C for 10 minutes, depending on primer specs.
Testing Protocols:
- Crosshatch Tape Test: Cut a 1 cm grid into a printed area, apply 3M tape, and peel. Less than 5% ink loss passes.
- Stretch Test: Stretch printed area 20–30% to simulate hand use; look for cracking.
Alternative Coatings:
- Polyester Lamination: Required for sublimation; neoprene is bonded with a polyester film before printing.
- Eco-Friendly Options: Water-based primers exist but may require longer cure times.
Well-pretreated batches have defect rates below 1%, while skips in this step can lead to 10–15% re-runs, increasing cost and delaying shipments.
How Is the Printing Process Executed in an OEM/ODM Factory?

After artwork approval, factories produce a digital or physical proof, set up printing equipment, run an initial sample batch, inspect for quality, then proceed to full production. QC checkpoints include color accuracy, adhesion, and dimensional checks. MOQs typically start at 100–500 units with 7–14 day lead times.
Working with an experienced OEM/ODM partner like Szoneier streamlines your path from concept to delivery:
Sample Approval:
- Digital Mockup: A 3D-rendered proof helps visualize placement and scale.
- Physical Prototype: A printed stubby lets you assess ink texture, color fidelity, and fit.
Equipment Setup:
- Screen Printing: Screens are tensioned and aligned; inks mixed per Pantone specs.
- Sublimation: Heat-press plates are programmed to exact time and temperature profiles.
- UV Printing: Print heads calibrated for dot size and ink flow.
Pilot Run:
- Batch Size: 20–50 units to catch issues before full run.
- QC Checks: Color measurement with spectrophotometer; adhesion and stretch tests.
Mass Production:
- Workflow: Printed holders advance through drying/curing ovens, then hand-trimmed and stitched if needed.
- Inspection: Each piece is spot-checked; random sampling (ANSI/ASQ Z1.4 Level II) ensures consistency.
Packaging & Logistics:
- Packaging Options: Individual polybags or bulk cartons with custom insert sheets.
- Labeling: Cartons labeled per customer specs (UPC, SKU, batch codes).
Integrated R&D, printing, and quality labs cut lead times by 20–30%. At Szoneier, in-house prototyping and one-stop workflows ensure sample approval to shipment in as little as 14 days.
What Quality Assurance Measures Ensure Durable, Fade-Resistant Prints?
Durability tests include Martindale abrasion (≥10,000 rubs), wash-fastness (ISO 105-C06), and UV exposure (ASTM G154). Colorfastness ratings of ≥4 on Gray Scale ensure minimal fading. Adhesion and stretch tests confirm no cracking or peeling under daily use.
Printing may look good fresh out of the oven, but real proof lies in rigorous testing:
Abrasion Resistance:
- Martindale Test: Simulates rubbing; a pass is ≥10,000 cycles for neoprene coozies.
- Outcome: Ensures prints survive in backpacks, pockets, and cooler bags.
Wash-Fastness:
- ISO 105-C06 Test: Repeated washing in standardized detergent; target rating ≥4/5.
- Why It Matters: Stubby holders often go through kitchen sinks or laundromats.
UV Exposure:
- ASTM G154: Accelerated weathering chambers expose prints to UV-B lamps.
- Goal: Less than 10% color change after 300 hours, simulating months of outdoor use.
Adhesion & Stretch:
- Crosshatch Tape Test and 25% Stretch Test: Confirms ink bonds under tension.
- Importance: Neoprene stretches around bottles; cracked prints look unprofessional.
Documentation & Reporting:
- QC Reports: Include pass/fail data, spectrophotometer color readings (Delta E), and photographs.
- Compliance: Provide certificates for ISO 9001 (quality management) or Oeko-Tex (no harmful substances).
At Szoneier, a mandatory triple-stage QC keeps our defect rate below 0.5%.
How Do You Calculate Cost, MOQ, and Lead Time for Custom Stubby Holders?
Cost depends on volume, print method, and neoprene grade. MOQs start around 100–500 units. Typical lead times are 7 days for samples and 14–21 days for bulk. Additional costs include setup fees ($30–$100 per screen) and packaging options. Higher volumes lower per-unit price.
Understanding your total landed cost is key for budgeting and pricing strategies:
Cost Components:
- Material: Neoprene ranges $2.00–$3.50 per piece (1.5 mm–3 mm thickness).
- Printing Setup:
- Screen print: $30–$100 per color per screen.
- Sublimation plate: $80–$150 per design.
- Ink & Labor: $0.20–$0.50 per unit.
MOQs and Price Breaks:
| Quantity | Unit Cost (Screen) | Unit Cost (Sublimation) |
|---|---|---|
| 100–499 pcs | $3.50 | $4.00 |
| 500–999 pcs | $2.80 | $3.20 |
| 1,000–4,999 pcs | $2.20 | $2.60 |
| ≥5,000 pcs | $1.50 | $2.00 |
- Lead Times:
- Samples: 5–7 days (digital mockup + physical).
- Bulk: 14–21 days, including printing, drying, trimming, and QC.
- Rush: Available at 20–30% surcharge.
- Packaging & Freight:
- Standard Carton: $0.10–$0.20 per unit.
- Air vs. Sea Freight: FOB Shenzhen—air adds $0.50–$1.00 per unit; sea is cheaper but slower.
Selling stubby holders at $6.99 retail yields margins ≥70% even at mid-tier volumes.
Are There Any Sustainable or Eco-Friendly Printing Options?
Eco-friendly stubby holders use water-based inks, OEKO-Tex certified neoprene alternatives, and recycle-ready packaging. Water-based screen printing generates fewer VOCs, while bio-based neoprene reduces petroleum reliance. Certified factories minimize waste with closed-loop water systems.
Sustainability isn’t just a buzzword—it’s a buying criterion for many customers:
Neoprene Alternatives:
- Dope-Dyed Neoprene: Pigments added during polymerization reduce water use.
- Limestone-Based Neoprene: Lowers reliance on petroleum feedstocks by up to 40%.
Ink Choices:
- Water-Based Inks: Emit minimal VOCs; perfect for eco-friendly branding. Drying requires longer press times (2–3 minutes at 60 °C).
- Soy-Based Inks: Renewable and biodegradable, but cost 10–15% more.
Certifications:
- Oeko-Tex Standard 100: Guarantees no harmful chemicals.
- ISO 14001: Environmental management—factories track and reduce carbon footprints.
Waste Reduction:
- Closed-Loop Water Systems: Recycle wash-water from cleaning screens and presses.
- Digital Proofing: Cuts physical proofs by 50%, saving paper and plastics.
While green options raise unit costs by 10–20%, they unlock eco-conscious markets willing to pay a premium.
Ready to Customize Your Stubby Holders?
Elevate your brand with high-quality, custom-printed neoprene stubby holders from Szoneier. Whether you need 100 pieces for a boutique event or 50,000 for a global launch, our in-house R&D, printing expertise, and strict QC guarantee 100% satisfaction.
Request a Quote Today
Visit our website or contact us at manager@neoprene-bag.com to get sample proofs, view Pantone swatches, and start your OEM/ODM journey. Let’s turn your logo into a conversation starter—one cold drink at a time!